


30. 06. 2021
Development, NetEye

04. 03. 2016
Patrick Zambelli
NetEye, Unified Monitoring
Monitoring Agent deployment: NSClient++.MSI
Nsclient++ is a very popular open-source agent for monitoring Microsoft environments ( http://www.nsclient.org/ ). As one of the first agents introduced with the Nagios success story, it has gained many improvements over the last years, becoming a reliable monitoring agent with extreme stability. This is also the reason, why this agent is still a principal strategy for the monitoring projects realized with NetEye. The open source agent provides access to system health information and performance values. In the same way, it is possible to extend its functionalities with additional instructions to support the remote execution of customized commands, such as the launch of Alyvix testcases. ( www.alyvix.com ).
In this post I would like to highlight the possibility of installing the agent via its native setup package. The advantage lays in the usage of Microsoft tools for preparing, deploying and upgrading the agent.
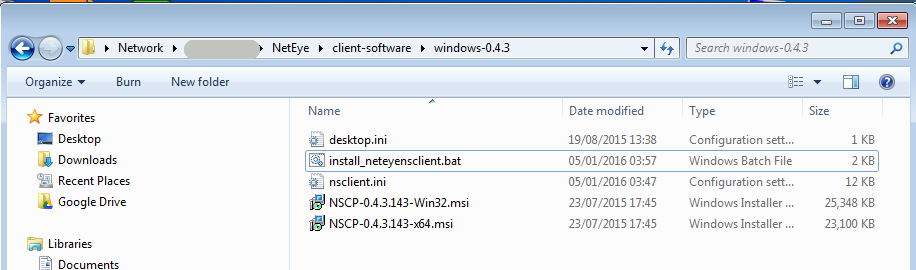
The msi package is available within the latest version of the Agents collection in the share on your NetEye appliance. Alternatively you can download it from the community page ( http://nsclient.org/download/). For its distribution it is copied to the NetEye-Share, from where it is possible to deploy it quickly to a remote Windows environment.
So what’s the news ? Installing the agent via msi we benefit of the Microsoft software deployment logic, by registering the agent within the operating system software registry. In this way it is even easier to check the currently installed version, update the distribution from a new package and finally: provide an approach for an automated package dirstribution.
The structure of the script could consist of the following instructions:
- Identify the Operating system architecture
IF “%PROCESSOR_ARCHITECTURE%”==”x86” set AGENT_File=NSCP-0.4.3.143-x32.msi
IF “%PROCESSOR_ARCHITECTURE%”==”AMD64” set AGENT_File=NSCP-0.4.3.143-x64.msi
- Copy and Install the suitable Agent version
xcopy /E \\%NETEYE_SERVER%\%AGENT_File% c:\NSClientTempInstall\
msiexec /qn /passive /norestart /l* install.log /i %AGENT_File% INSTALLLOCATION=”c:\Program Files\NetEyeNSClient++” ADDDEFAULT=ALL REMOVE=PythonScript - Place a custom configuration file and additional scripts:
xcopy /E \\%NETEYE_SERVER%\nsclient.ini “%ProgramFiles%\NetEyeNSClient++\” /q /y
xcopy /E \\%NETEYE_SERVER_PATH%\MSI_Packages\scripts\* “%ProgramFiles%\NetEyeNSClient++\scripts\” /q /y - Start the agent ( Making sure to stop a running instance first )
net stop nscp
net start nscp - Register a suitable firewall rule
netsh advfirewall firewall add rule name=NetEyeNSClient++ dir=in action=allow program=”%ProgramFiles%\NetEyeNSClient++\nscp.exe” enable=yes protocol=any
In order to make the script re-usable for various situations, some information can be defined as a variable within the install script:
- The path and version to the setup msi packages containing the MSI, the customized .ini file and possible additional scripts.
set NETEYE_SERVER_PATH=\\172.16.3.138\neteye\client-software\windows\MSI_Packages
set AGENT_VERSION=0.4.3.143
Ready to go! Now lets bring all those information together. To simplify this task a sampe install-script and configuration file is provided here:
Copy them to the neteye share and identify a situation like this when connecting from a remote windows machine.
When running the install_neteyensclient.bat with elevated permissions ( „Run as Administrator“ ) the installation dialog should appear and install the agent.
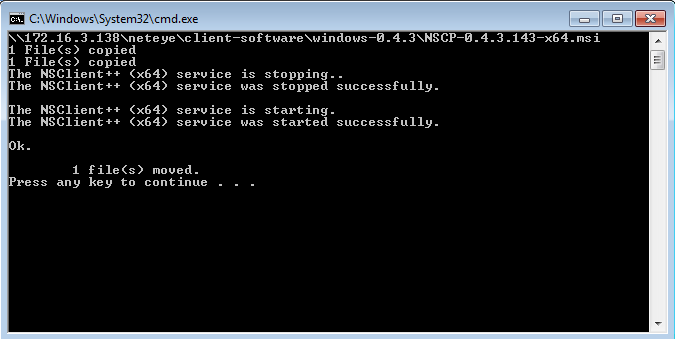
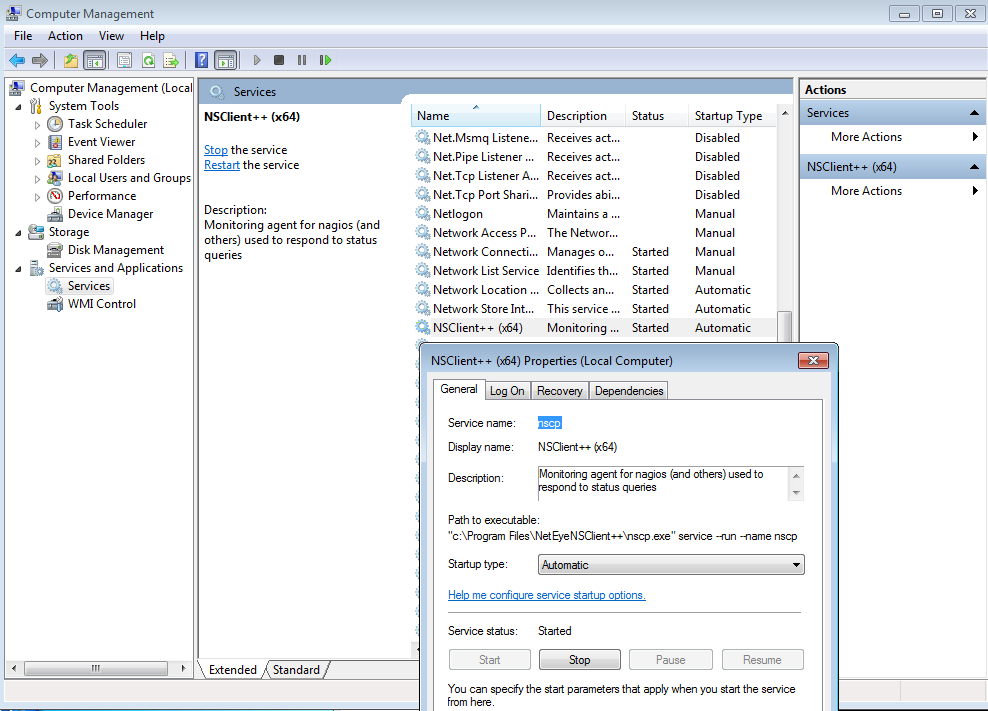
Now the NSClient should be registered as service: „nscp“
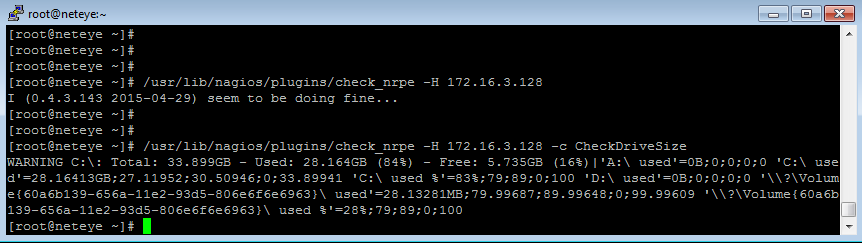
Test the availability of the agent:
Downloads Script Example:
This .zip file contains a sample deployment .bat file and an nsclient.ini file you can use for customizing the default .ini configuration: MSI_Packages_install

Patrick Zambelli
Project Manager at Würth Phoenix
After my graduation in Applied Computer Science at the Free University of Bolzano I decided to start my professional career outside the province. With a bit of good timing and good luck I went into the booming IT-Dept. of Geox in the shoe district of Montebelluna, where I realized how a big IT infrastructure has to grow and adapt to quickly changing requirements. During this experience I had also the nice possibility to travel the world, while setting up the various production and retail areas of this company. Arrived at Würth Phoenix I started developing on our monitoring solution NetEye. Today, in my position as Consulting an Project Manager I am continuously heading to implement our solutions to meet the expectation of your enterprise customers.
Author
Latest posts by Patrick Zambelli
16. 01. 2024
NetEye, Unified Monitoring
Icinga 2 DSL for Defining the Monitoring Status of Objects with Director
23. 12. 2020
NetEye
Tornado – Getting in Action with Sample Rules
05. 05. 2020
NetEye, Unified Monitoring
Import Data Correlation and Automation with Icinga2 Director