
Back to Basics: Assembly and Machine Code on 2 KB of RAM
In a world where RAM and CPU demands are increasing exponentially (and prices too) and 4 GB of RAM seems like nothing nowadays, let’s have some fun again and learn some assembly and machine code with a RISC-V processor with 16 KB of Flash memory and 2 KB of SRAM (yes, kilobytes).
This series will be divided into multiple parts: the first one, building the development board and information on the processor; the second part will be more on the assembly language (RV32EC instruction set).
RISC-V is not a product itself but an open standard for building microcontrollers and embedded systems. It defines a modular set of Instruction Sets called Base and optional Extensions, so any company can produce its processor with just the base and extensions they need, and without having to pay a royalty since the ISA code and CPU designs are distributed under BSD licenses. If you want to know more about how the RISC-V organization works, listen to the interview with its CEO on Floss Weekly 874.
The Board
To learn, I’m using the RVPC board made by Olimex, a computer that costs about as much as a coffee. It needs to be soldered together, but it’s good practice if you also want to learn how to solder.
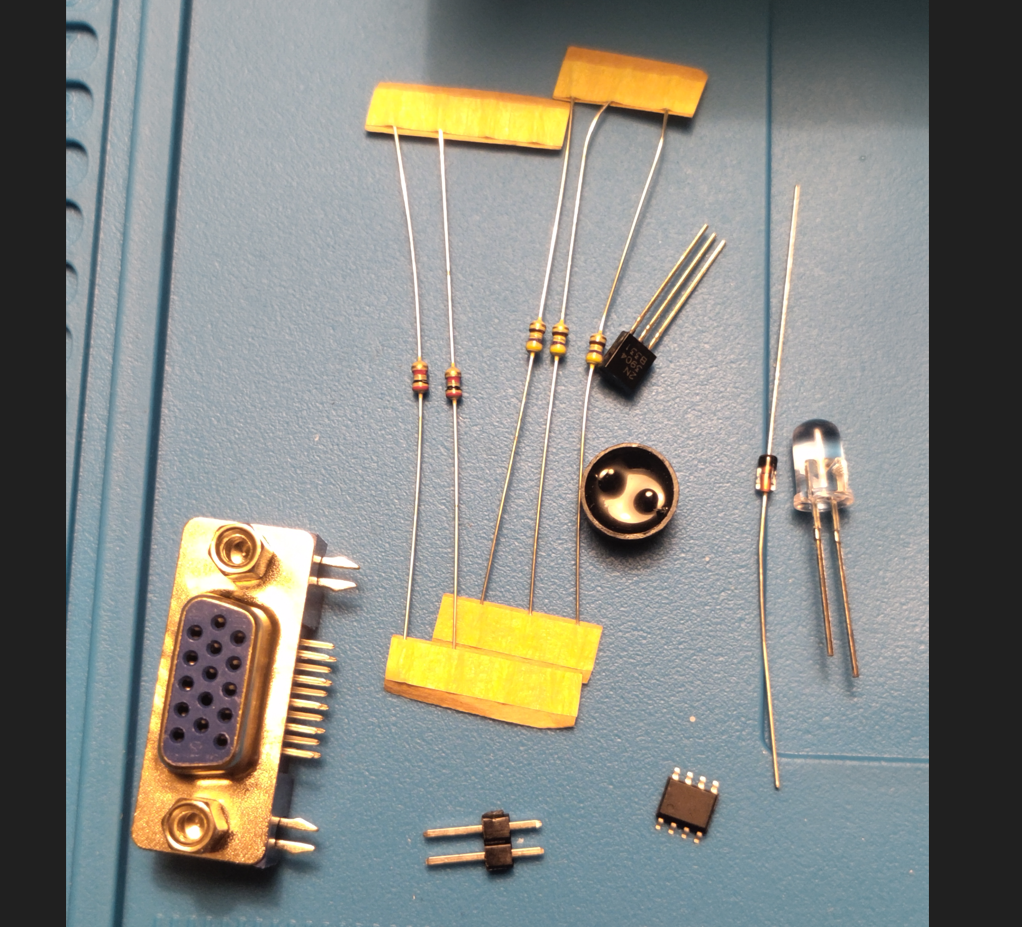
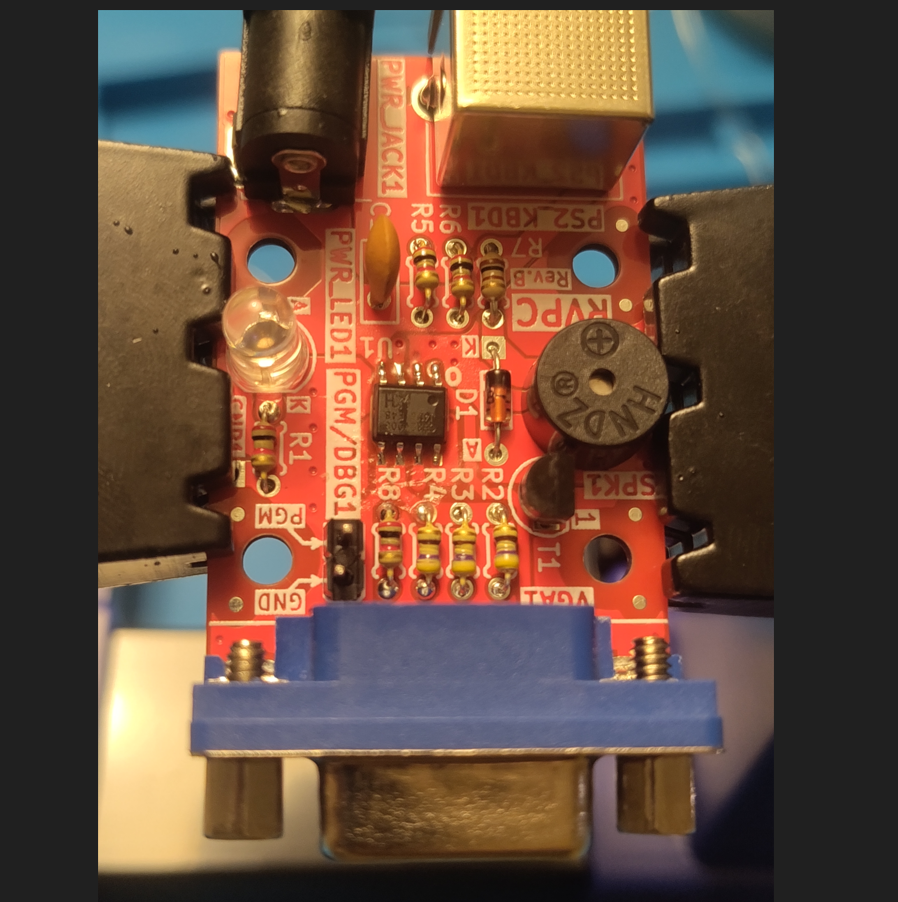
The microcontroller is a CH32V003 QingKe 32-bit RISC-V2A processor with 48 MHz system main frequency, 16 KB Flash and 2 KB SRAM. To start, there’s no need to flash anything because it comes pre-flashed with VMON, a RISC-V machine code monitor. In the customized version made by Olimex it’s called RVMON (Demo-RVMON). From now on I will call it RVMON, and it can be used to write, print and execute code in memory (yes, in hexadecimal).
The Monitor
Power it on and it will present this screen on its VGA output:
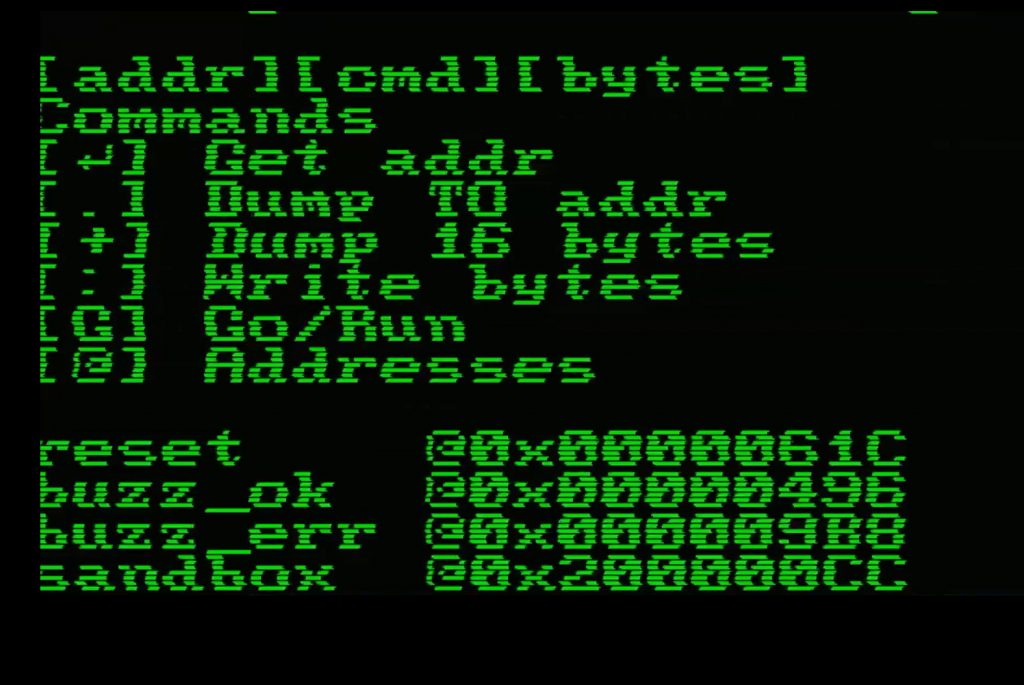
So let’s start by checking all the commands we have available. The monitor tells you the grammar on the first line: [addr][cmd][bytes] — first the address, then the command character, then the bytes if the command needs them.
| Key | Command | What it does |
|---|---|---|
| ↵ | Get addr | type an address and press Enter, and it prints the single byte stored there |
| . | Dump TO addr | dumps the range between two addresses, like 200000CC.200000CF |
| + | Dump 16 bytes | dumps 16 bytes from that address, in 4 rows of 4 bytes |
| : | Write bytes | writes the bytes you type into the address |
| G | Go/Run | runs the code starting at that address |
| @ | Addresses | prints again the list of addresses you see at the bottom of the screen |
And those addresses are:
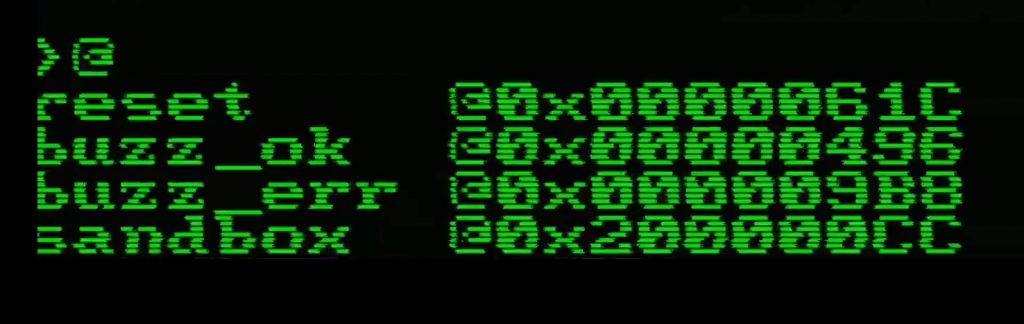
Notice that reset, buzz_ok and buzz_err start with 0x00000..., while sandbox starts with 0x20000.... That’s not random – flash and RAM are mapped in two different places:
0x00000000 - 0x00003FFF    16 KB flash
0x20000000 - 0x200007FF     2 KB RAM
So the first three are routines already sitting in the flash: you can call them (try 00000496G and you will hear the buzzer) but you cannot overwrite them. sandbox is in the RAM, and that’s where our code goes. The monitor keeps some memory for itself, leaving us exactly 512 bytes (200000CC to 200002CB).
How Memory Is Organized
Every address holds 1 byte, so 0x200000CC, 0x200000CD, 0x200000CE and 0x200000CF are four different bytes one after the other. But the CPU registers are 32 bit – 4 bytes – so every 32-bit value you write fills 4 consecutive addresses.
And here comes the fun part: RISC-V is little-endian, the least significant byte goes first. To put 0x000080A2 (32930 in decimal) in memory you type the bytes in reverse order, and not 00 00 80 A2. It looks backwards on screen, but that’s just how the bytes are ordered in memory.
Writing and Reading Bytes
So let’s save a number in memory and read it back. Keep in mind that here we’re just throwing bytes into memory – nothing is interpreting them yet. Only later, when we run assembly code, will those bytes be read as a byte, a half word (16 bit) or a full word (32 bit), depending on which instruction we use.
First we need to decide where to write. The sandbox is the first RAM address free for us, so let’s use that, and let’s write all four bytes:
200000CC:A2 80 00 00
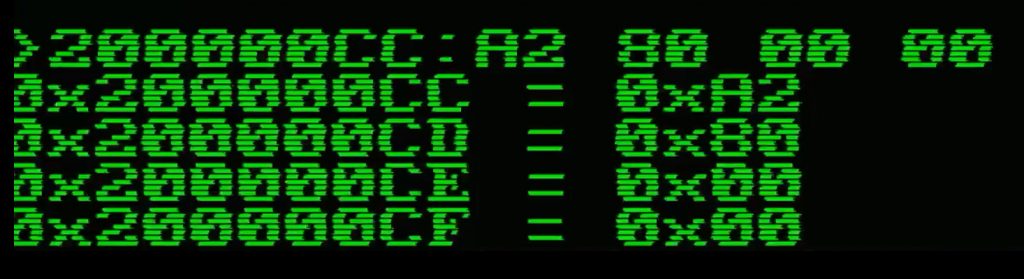
The monitor answers by confirming what it wrote, one address at a time. And then let’s read them back using the other commands: giving a range with 200000CC.200000CF, printing 16 bytes with 200000CC+, or getting one single byte with just 200000CC and Enter:
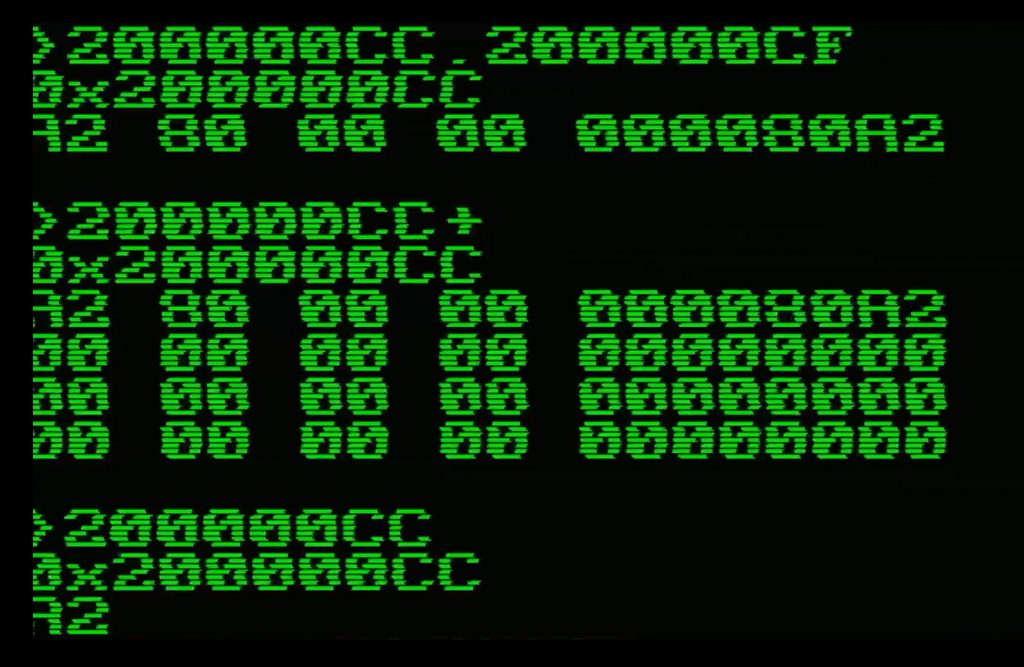
And look at what the monitor prints to the right of the dumps: on the left you have the raw bytes A2 80 00 00, and on the right 000080A2 – exactly the same four bytes, but read as one 32-bit word. That’s little-endian right in front of your eyes.
Let’s Run Some Code
The easiest program to run is one that’s already there. Type 00000496G and the buzzer plays the “ok” sound; 000009B8G gives you the error one. G calls the routine like a subroutine, so when it finishes you are back at the prompt.
Now something of our own: let’s add two numbers and store the result.
lui  a0, 0x20000      # a0 = 0x20000000
addi a0, a0, 0x100    # a0 = 0x20000100, where the result goes
li   a1, 20           # a1 = 20
li   a2, 22           # a2 = 22
add  a1, a1, a2       # a1 = 42
sw   a1, 0(a0)        # write a1 as a 32 bit word at the address in a0
ret                   # go back to the monitor
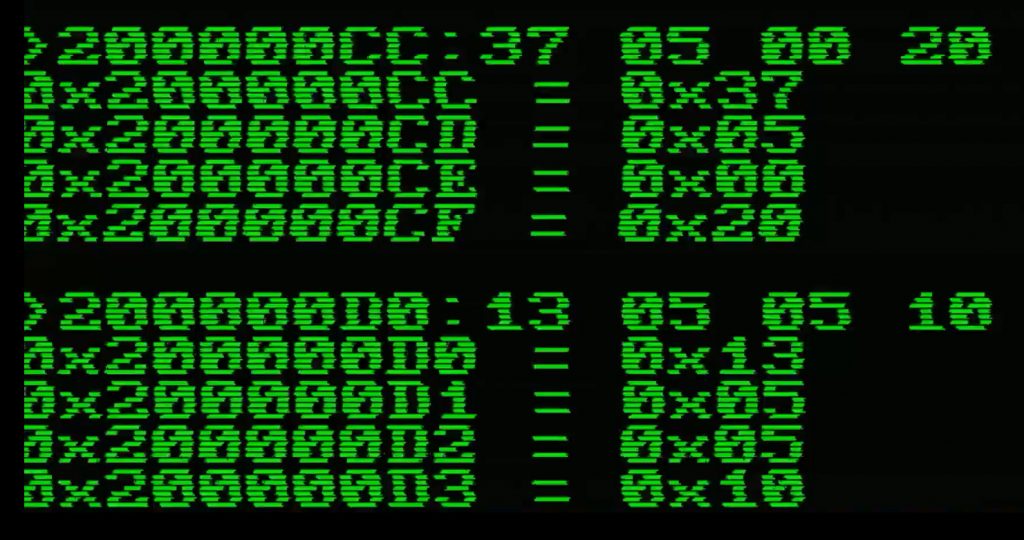
But the monitor doesn’t speak assembly, only bytes. And the screen is only 23 characters wide, so 4 bytes per line is about all that fits:
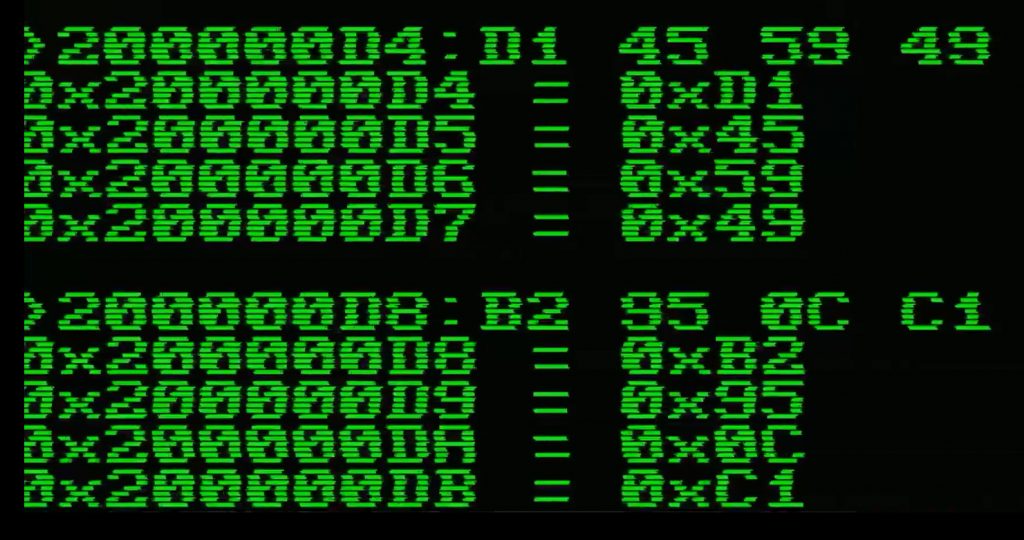
200000CC:37 05 00 20
200000D0:13 05 05 10
200000D4:D1 45 59 46
200000D8:B2 95 0C C1
200000DC:82 80
Seven instructions, 18 bytes – not 28. Some are only 2 bytes instead of 4, and that’s not a mistake: it’s the C (compressed) extension saving memory. More on this in the next part.
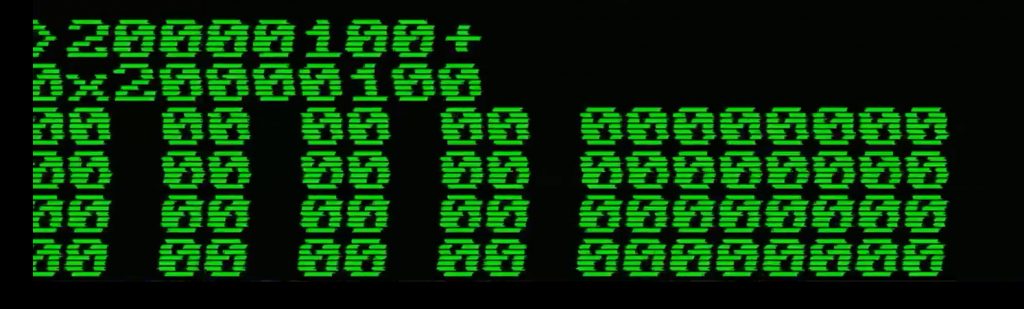
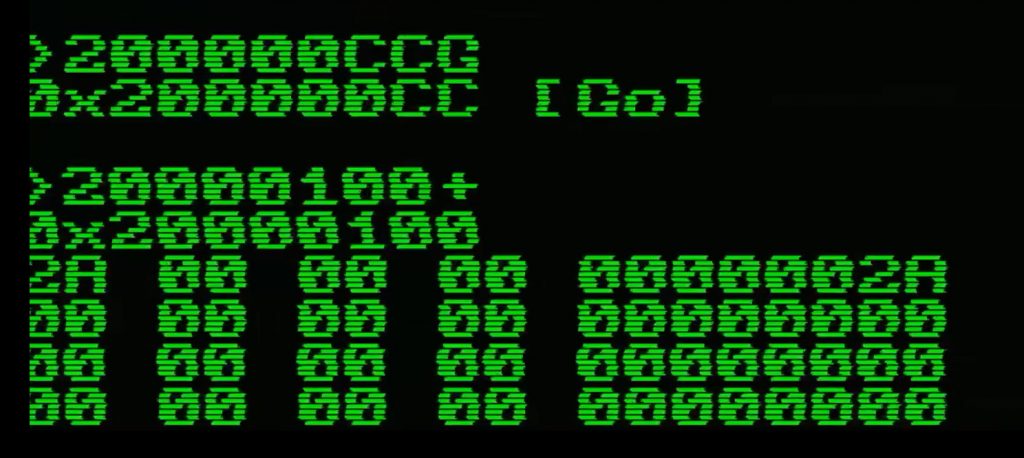
Run it with 200000CCG↵, then read what it wrote with 20000100+. You should see 2A 00 00 00 on the left and 0000002A on the right – and 0x2A is 42.
Here’s the real run:

And that’s it for the first part. We soldered a computer, we found out where its memory lives, we typed bytes by hand and we made a 48 MHz RISC-V core do a sum – inside the 512 bytes of RAM available for us, without a compiler, without an IDE, and without a single line of C.
In the next part we’ll go the other way around: Instead of typing bytes by hand, we’ll write the code, let a compiler turn it into bytes, and look at what comes out – which, spoiler, will not be exactly what we wrote here. And then we’ll take something already living in Flash, like the buzzer routine, and read it back instruction by instruction, to see if we can understand code we didn’t write.
References
- OLIMEX/RVPC – schematics, assembly instructions and the full source of the monitor
- VMON by krakenlake – the machine code monitor RVMON is based on
- rvcodec.js – paste an instruction or a hex word and it converts both ways, compressed instructions included (remember to reverse the byte order first)
- LinuxFoundationX: Building a RISC-V CPU Core on edX – if you want to know more about the CPU itself, and even build one
- Floss Weekly 874 – interview with the CEO of RISC-V International
These Solutions are Engineered by Humans
Did you find this article interesting? Does it match your skill set? Programming is at the heart of how we develop customized solutions. In fact, we’re currently hiring for roles just like this and others here at Würth IT Italy.

Emanuele Bernardi
Author
