22. 05. 2026
AI, NetEye, Unified Monitoring

01. 02. 2021
Rocco Pezzani
NetEye, Unified Monitoring
Monitoring Certificate Expiration with the x509 Module
Now, if you’ve followed my previous blogs about the x509 Module, you should have in place your x509 Certificates Asset with (or without) a minimum of cleanup routines. Now it’s time to look at what Icinga was made for: monitoring.
Making an asset out of all of your SSL Certificates is only half the job. The other half is monitoring them. Without this part, you’ll still have to check your asset almost once or twice per month manually, looking for nearly-expired SSL Certificates. Not a fun or efficient thing to do. Fortunately, the x509 Module comes included with some basic integration with NetEye 4.
Icinga CLI Integration
Note: It's not a requirement to work with the Command Line, but understanding this section will be useful for the following ones.
The developer of the x509 Module has been kind enough to integrate the module with the icingacli command line tool:

icingacli x509 moduleAs you can see by looking at its help text, icingacli x509 contains several commands, but the one you will use most is check, and at the present time its only action is host. Therefore, we will focus on icingacli x509 check host. This means it is not possible to monitor just a single SSL Certificate, but only to monitor whether a service (in the general meaning of the term) exposes an expiring SSL Certificate.
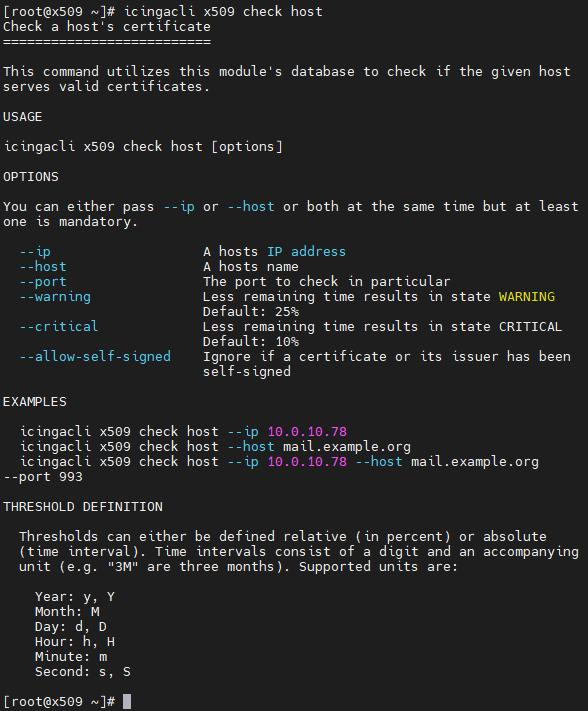
icingacli x509 check hostLooking at the help text for the command, we can see a number of arguments, at least 3 (three) of which should be provided:
- IP Address
- TCP Port
- Host name
Starting with the IP Address, you should provide the required address(es) to precisely identify the SSL Certificate related to your asset. You can also provide all of them, it is not a problem to do so and can even be considered a best practice.
You can also override the default warning and critical thresholds. Pay attention to the right notation, though:
- The threshold is always an integer number followed by an identifier
- If the identifier is
%(percentage sign), the threshold’s actual value is calculated as the corresponding fraction of the whole validity period for the current SSL certificate; e.g., if the validity of an SSL certificate is 1000 days and the threshold is 20%, the actual value is 20% of 1000 days, or 200 days - If the identifier is
y(orY),M,d(orD),h(orH),mors(orS), then the number is interpreted as a time duration, and the corresponding unit as stated at the end of the help is used - Any other values will result in an error
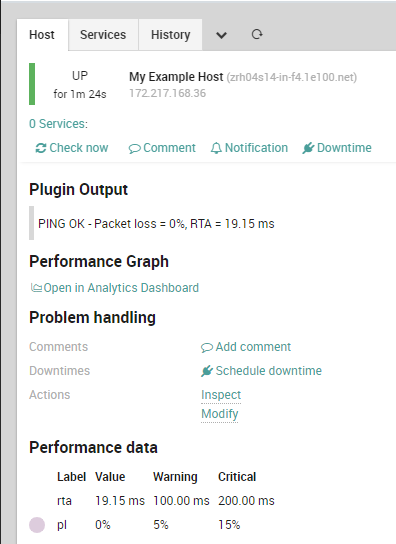
Now let’s look at an example. Suppose a certificate with the subject www.google.com is exposed by zrh04s14-in-f4.1e100.net with IP address 172.217.168.36 using TCP Port 443, and expires in 25 days. Let’s also say a warning should be issued one month from the certificate’s expiration, and a critical should be raised exactly 15 days before expiration.
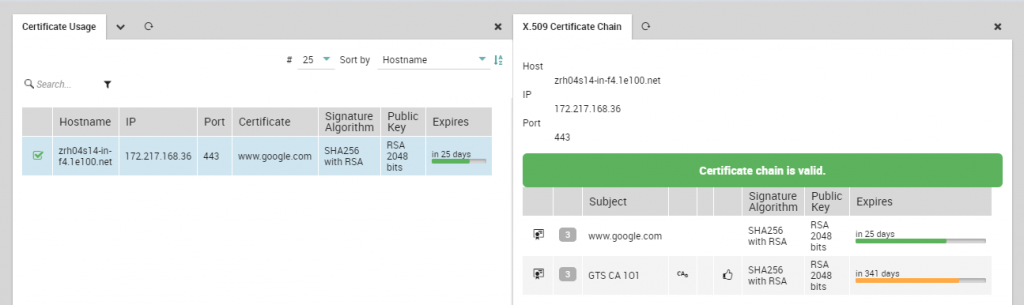
To set this situation up for monitoring, we should use the following command: icingacli x509 check host --ip 172.217.168.36 --port 443 --host zrh04s14-in-f4.1e100.net --warning 1M --critical 15D. As you can see, the output is already in an Icinga-compatible format.

Director and Icinga Integration
By now you’re thinking “Okay, that’s it! Let’s begin creating the Plugin Check Command on Director!” and… no, just stop. I know you may (or may not) be a Director enthusiast, and you may (or may not) want to create a Plugin Command, but you don’t have to. Just running the Kickstart Wizard is enough.
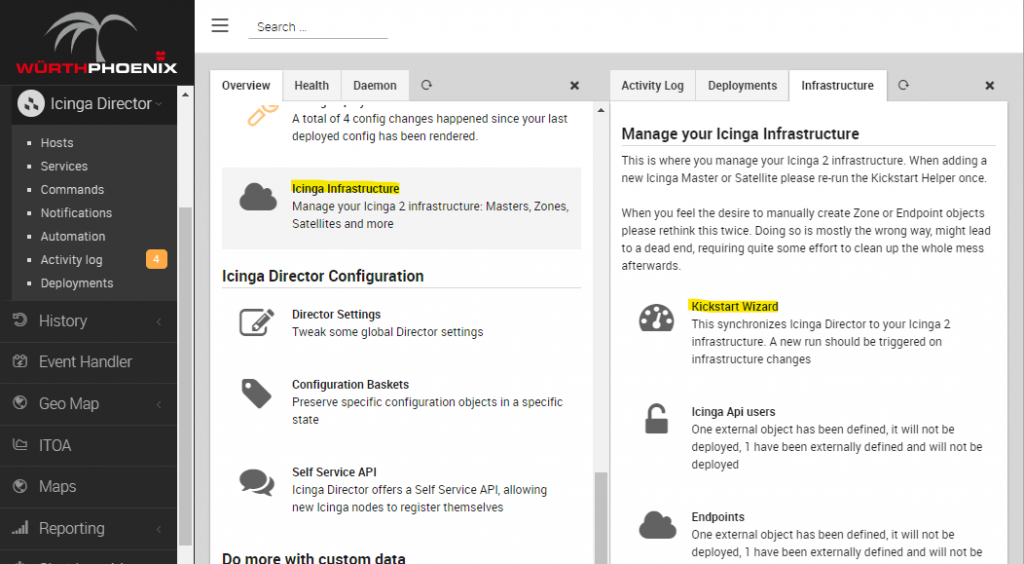
If you’re now asking yourself “Why?”, the answer is simple: the x509 Module updates your Icinga2 installation with a new External Command that does exactly what we did in the above paragraph. In fact, just adding the x509 Module enables your Icinga2 to begin monitoring the contents of your SSL Certificates Asset. You just have to align your Director Instance to avoid potential issues during future deployments.
To run the Kickstart Wizard, run icingacli director kickstart run from the command line, or run it from Director by selecting the corresponding section in the Icinga Infrastructure panel.
After this, you’ll find the new icingacli-x509 External Command, with all the required arguments.
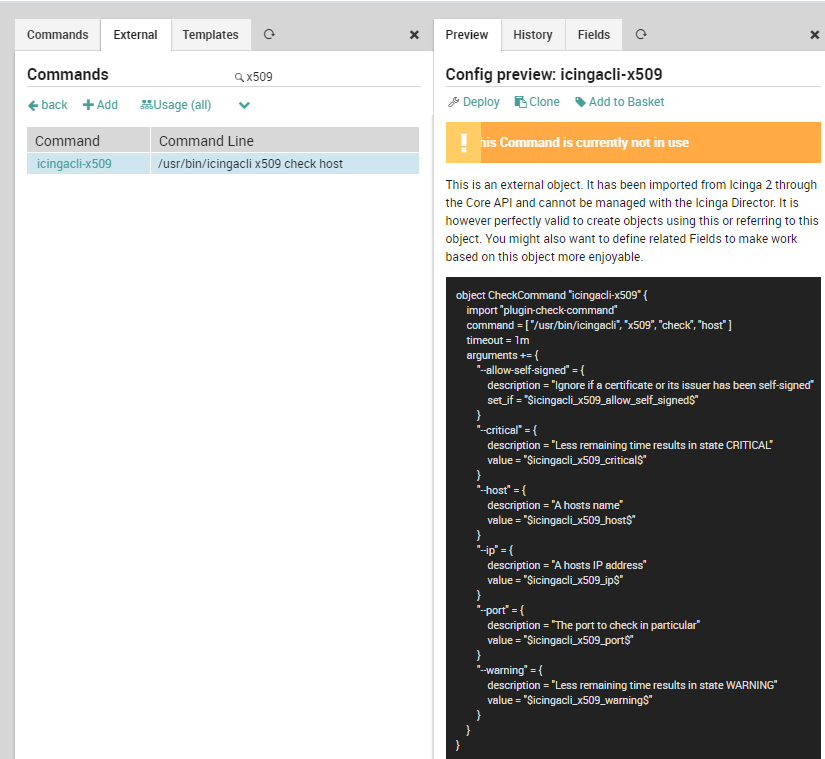
icingacli-x509 External Command definitionNow you can easily create a new Service Template from this Command and use it as you feel appropriate. Of course, don’t forget to Deploy your current configuration.
This concludes the theoretical part. On to the practical side!
Monitoring Example
Now, if you don’t feel confident enough to create your own Service Template, I’ll provide a brief implementation of the example above.
As a prerequisite, ensure that you have a Host Object with name zrh04s14-in-f4.1e100.net and IP Address 172.217.168.36. You can base it on any Host Template you want, but for the sake of simplicity (and also, remember that every NetEye 4 setup is a custom setup) let’s base it on the generic-host Host Template.
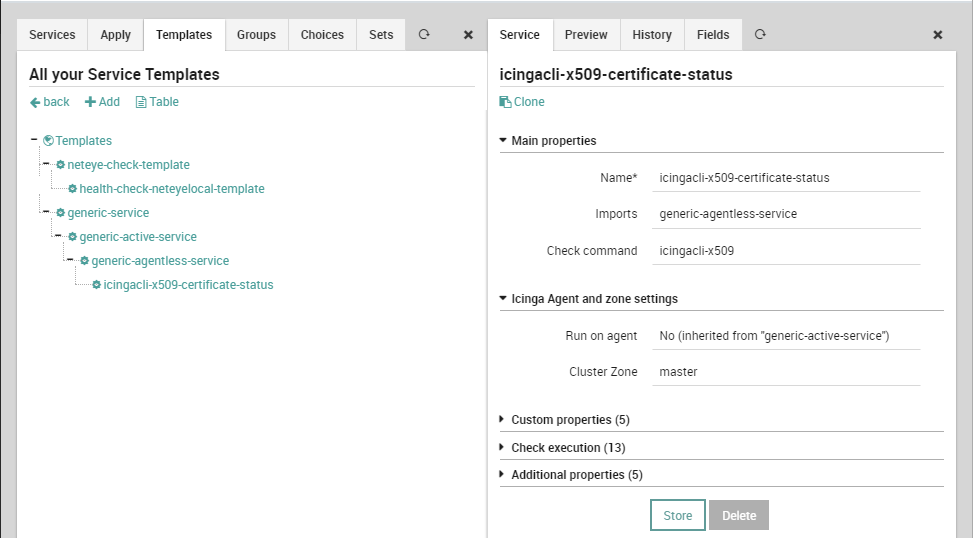
Now we can create the Service Template required for monitoring a generic SSL Certificate from our Asset. As stated before, you can base this template on any Service Template you want. Obviously, you should base it on the right one, given your hierarchy, so the choice can only be yours to make. Remember this is an Active check, it must not be executed by an Agent and it should run on the Master zone. So let’s base it on the generic-agentless-service Service Template. This can be considered as a basic definition.
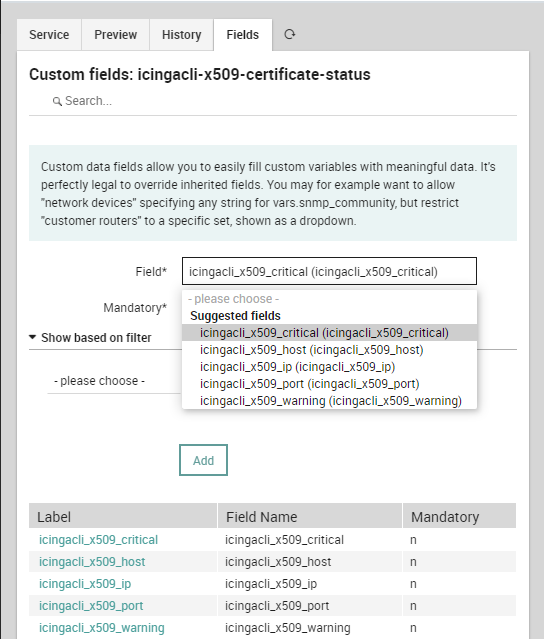
Service TemplateNow all of the suggested fields can be added to the Service Template. Just add them from the Fields tab, and their definition will be created automatically.
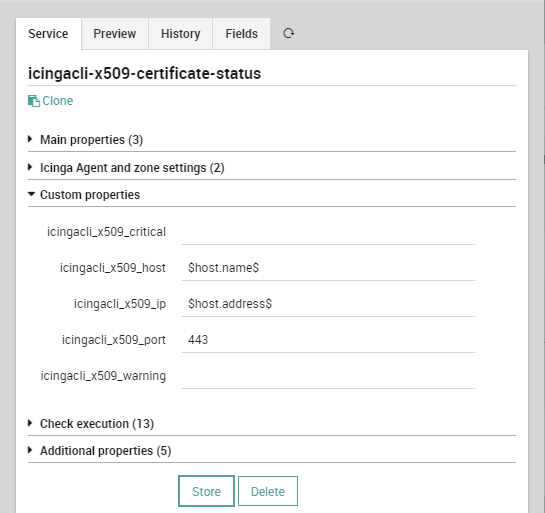
Service TemplateNow that all the Fields have been added, we should add some minimum default values. A good choice is to use the Name and Address as provided by a Host Object, and the default TCP Port can be 443. Remember that everything can be overridden, so don’t overthink the default values too much.
Service TemplateOnce the Service Template is ready, we can use it to create a Service inside our example Host Object (or any Host Template or Service Set, as you like). Just remember to provide the right values.
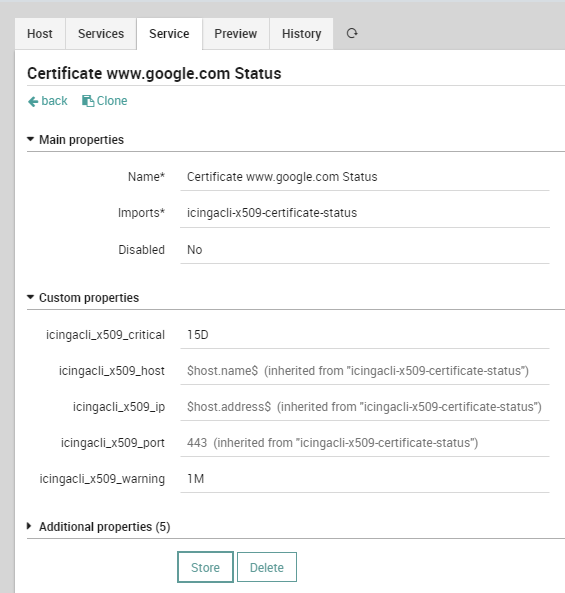
Host ObjectNow, after the Deploy, the SSL Certificate will be monitored as required.

Author
Latest posts by Rocco Pezzani
22. 05. 2026
NetEye, NetEye Extension Packs
NEP and Upgrading to NetEye 4.48
18. 03. 2025
Icinga Web 2, ITOA, NetEye, UI, Unified Monitoring
A First Step towards Multitenancy in Icinga 2
31. 12. 2024
Business Service Monitoring, ITOA, NetEye, SLM, Unified Monitoring
Display a Service’s Availability with ITOA
30. 11. 2024
Business Service Monitoring, NetEye, Unified Monitoring
The Story of a Strange Business Process