17. 06. 2026
Atlassian

15. 12. 2021
Fabrizio Dovesi
Development, Service Management
First Steps in Your Atlassian Ecosystem – Keep the Lights on Jira with Confluence Pages Macros
Project data and documentation management is always a challenge. Using macros within your Confluence pages can definitely help with this, especially those that create live charts and reports on the linked Jira project.
After following these simple steps, in just a few minutes you'll have:
📌 A better idea of how to organize Confluence Pages to manage you documentation and, eventually, to collaborate with your team
📌 Configured Macros on Jira project data within a Confluence page
Introduction
This blog post is intended for people who already own an existing Jira/Confluence cloud site but are at the beginning of their Atlassian journey. Instead if you don’t have a site available yet, you can quickly create one for free by reading the first post of this series, and then learning how to link your new project with spaces by reading the second one.
If you want to get the most out of the integration between Jira and Confluence, one “Must have” is the usage of dedicated Macros within the Confluence page your are going to create.
In the previous post we mostly focused on what is needed to be done on Jira side to link a project with a dedicated Confluence space. Moreover, we learned where to quickly create Confluence contents and pages directly from a Jira project section.
So, it’s time to taste the Jira-Confluence integration benefits on the Confluence side. In detail, below I’ll show you which macros are the available and what they do.
But first, let’s briefly introduce the concept of macros: Macros are tools that help you extend the capabilities of your Confluence pages, allowing you to add extra functionality or include dynamic content.
As a user, you might desire a wide set of macros to enhance your content; the good news is that these macros are already available starting with the free Confluence plan subscription. Bear in mind that you can even expand this set of macros with specific add-ons if you need to.
A Step-by-step Guide
We’re ready to get hands on with these tools now! so, let’s start!
STEP 1 – Open your Confluence Space
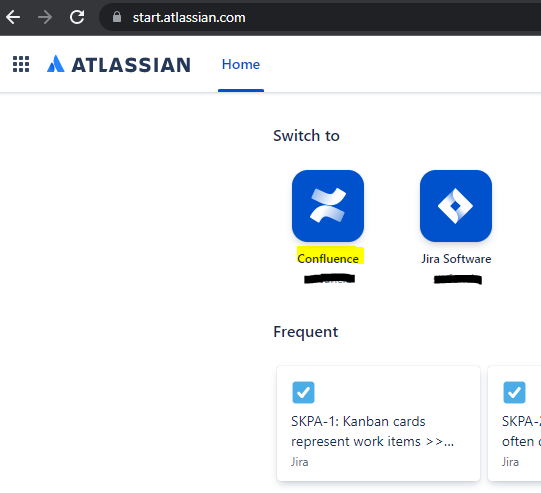
First of all, sign in to your Atlassian account from Atlassian’s Login page. Once you’re in, as we did during the previous post, click on Confluence.
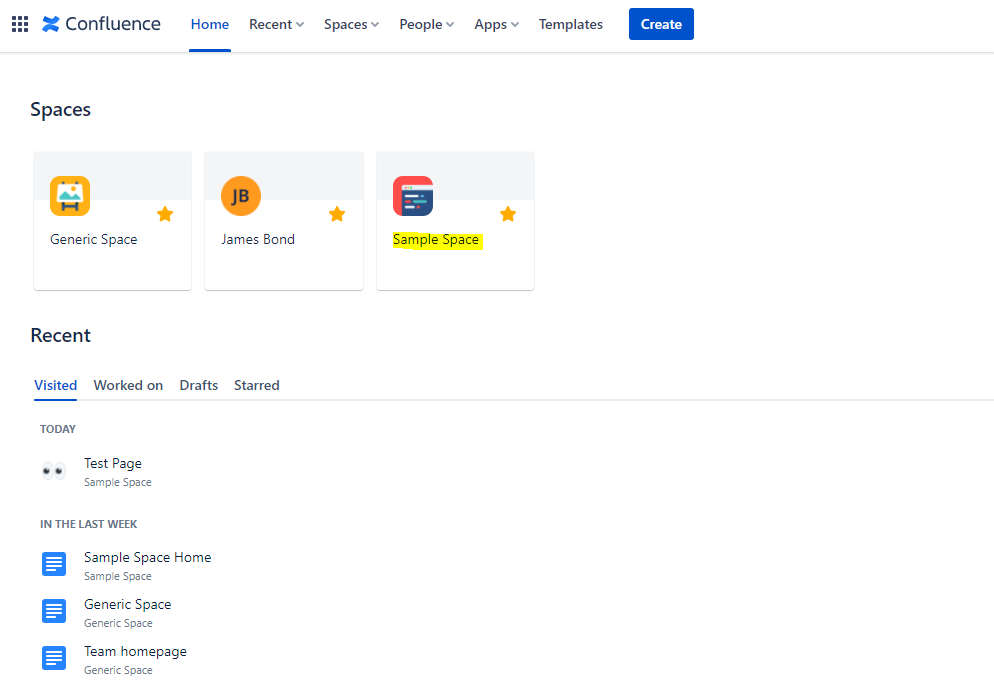
Now you should click on the Space you used last time (the one you created during the previous post). In the picture to the right it’s called Sample Space, but you should see yours there.
Now it’s time to create within your space a new page to get practice with Jira dedicated macros.
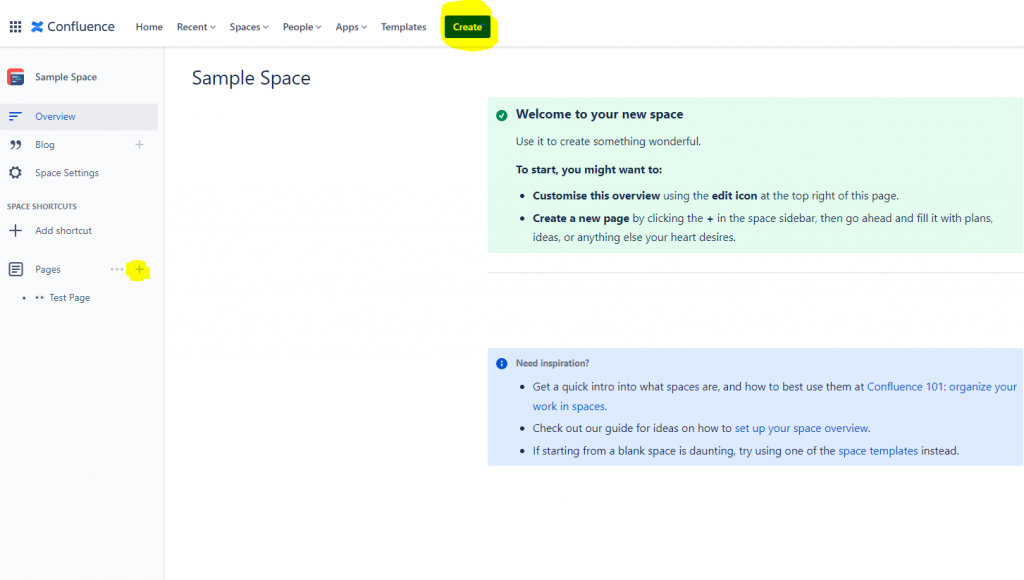
Bear in mind that you have multiple options when creating new Confluence pages, but for now we’ll just focus on the following two ways:
1) Use the “+” icon next to each existing page in the menu on the left (hover your mouse over them) to get fine control over the new page’s position/order
2) Use the “Create” button within the navigation bar at the top.
STEP 2 – Set Name, Emoji, brief introduction of the page
Once the new page is ready to be edited, the first choice to make is on the page template: a huge set of templates is available from the left menu. Templates help you and your team by driving users through content creation with pre-formatted document structures, fields/cells/etc.. to be compiled and so on.
Since we’re focusing on Jira integration dedicated macros today, we can keep the default blank page suggested by the system.
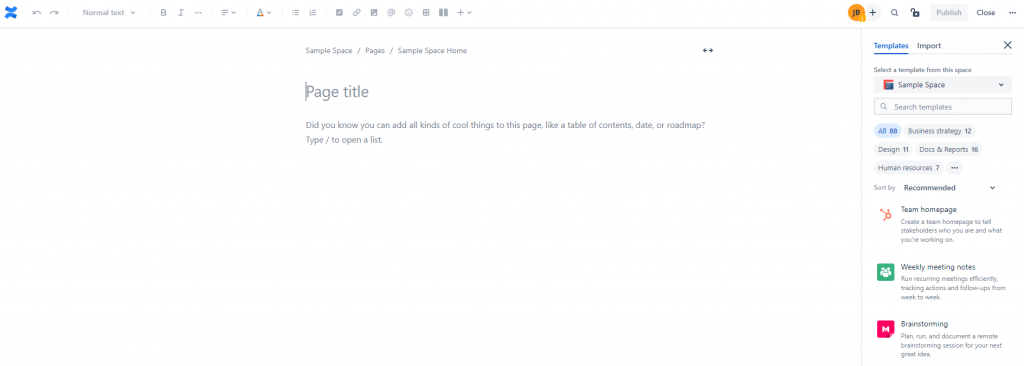
So, for now we can just set some basics page fields, like page title, a brief introduction text, a background image, and then stop.
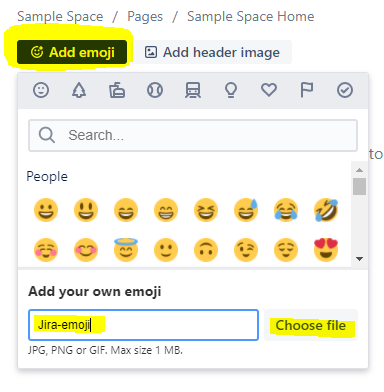
Apart from these, I recommend you use emojis to make pages more recognizable. You can quickly do it from the “add emoji” button just above the page title (you can even create a personalized one, as shown in the example to the right) in edit mode.
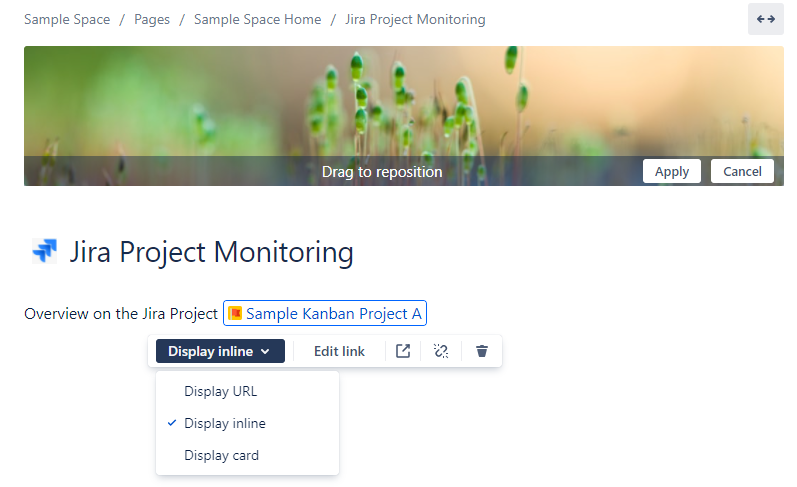
Now let’s introduce the first element representing Jira-Confluence integration: by simply copying/pasting the Jira project link within a Confluence page while in edit mode, this provides various options to display the Jira project link once the page is published. As you can see from the picture to the right, it lets you decide among the normal URL, the inline and the card display options
Once completed, you can click on “Publish” at the top right of the page.
You should now be able to view the content you’ve added as a result of these 2 steps (something similar to the picture to the right)

STEP 3 – Add a Jira Charts macro to the page
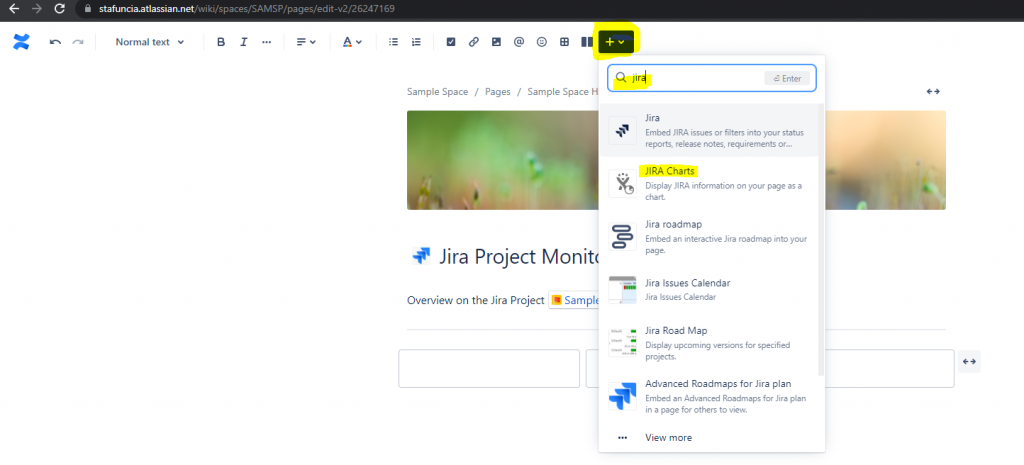
Go back to edit mode now (by clicking on the pencil at the top right of the page) and add a new block below the introduction text (you can even divide it into two or three columns if you desire to place more than one Jira chart there, like in the example below). If you click on “+” and search for “jira“, Confluence will return a list of the available macros. Click on “Jira charts“
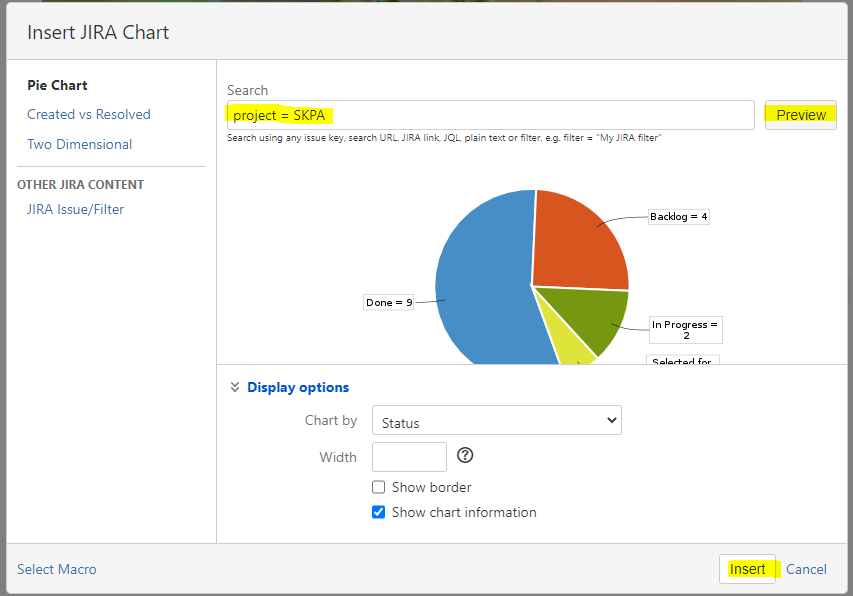
This macro has 3 different native Jira charts available:
- Pie chart
- Created vs. Resolved
- Two dimensional
Moreover, you can even switch to the Jira issue/filter macro which we’ll see later.
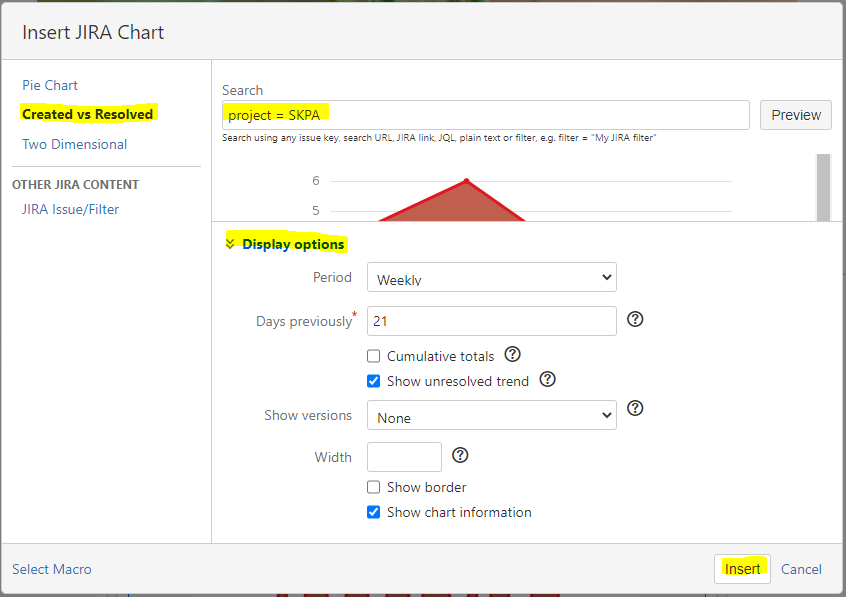
So it’s up to you decide which are the best to represent your Jira project data and which are more relevant than the others. Once you have this clear enough in your mind, you can set the filter (data perimeter) by searching URL, JIRA link, JQL, plain text or filter name.
Finally, you can click on “Preview” to check the filter, and then “insert” to confirm.
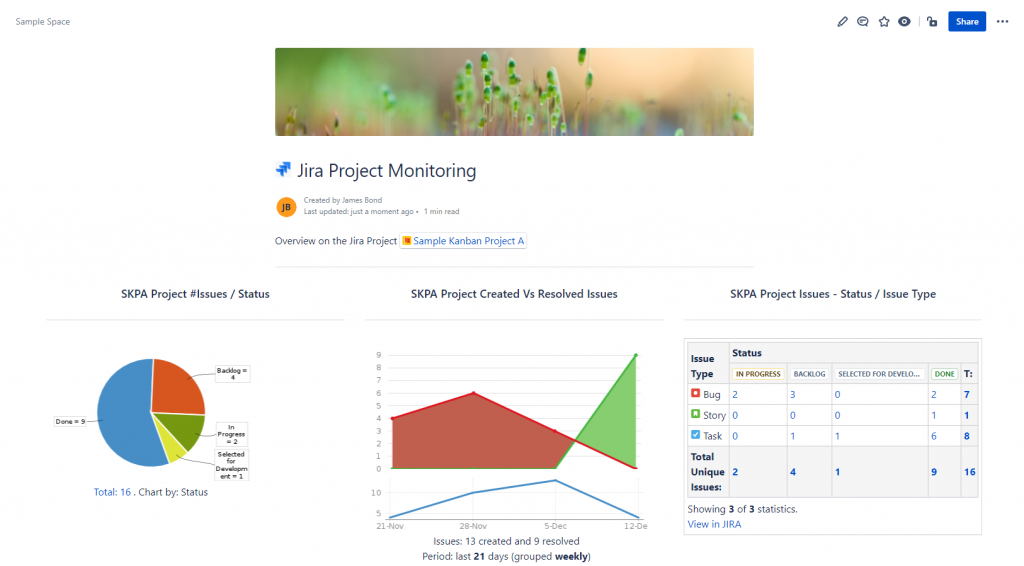
I recommend you get some experience with this by trying to add and “play around” with the settings of all 3 available charts, “Pie“, “Created vs Resolved” and “Two dimensional” to better understand how they work and to see if they can help you and your team, as well.
You can see one possible result for each of the chart types in the following picture:
STEP 4 – Add Jira Issue/Filter results
The easiest way to get a quick Jira issues recap within Confluence is to build one or more filters and then store them through the dedicated macro within a page named Jira issue/filter.

Let’s go back to edit mode and search for “Jira” macros from the “+” at the top and select the one for Jira Filter result.
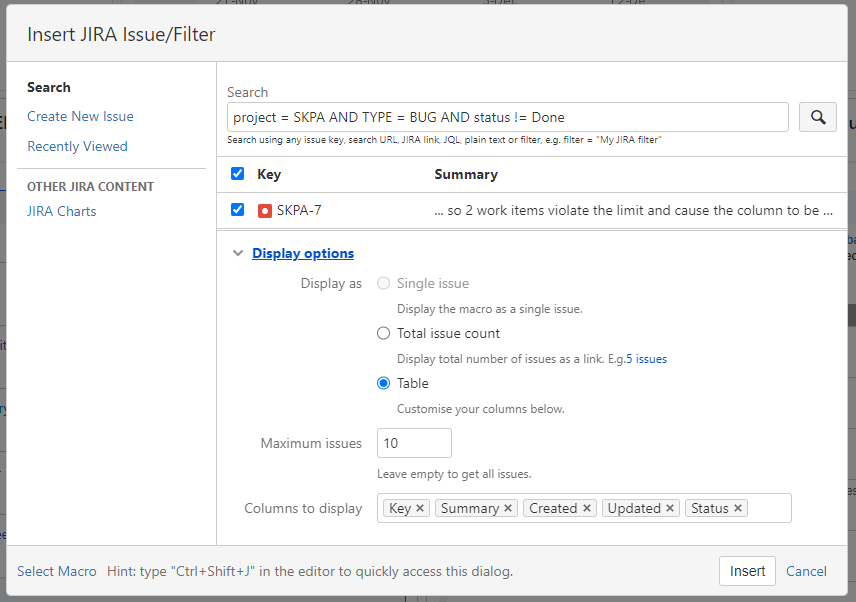
Now you can use a JQL, an existing filters, a URL, etc… exactly like the Jira charts macro.
In the example to the right, we’ll run an easy search on “all the open SKPA project Bugs”. Obviously, you have the option to create more complex filters than this one and/or multiple filters in order to create a page to better manage your project activities.
Finally, in the lowest part there are the display options where you can define columns, number of results, etc.
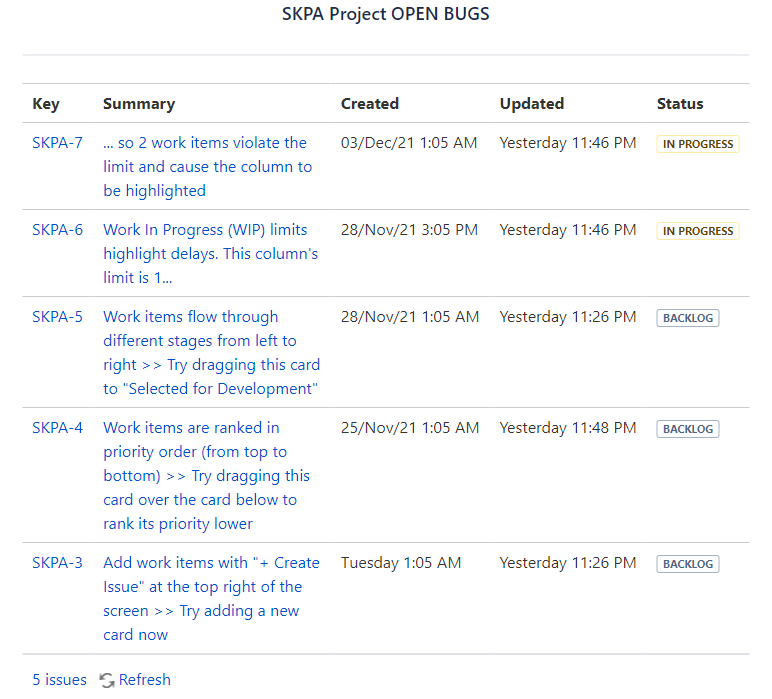
Once you’ve finished, you can click on “Insert” to store the macro in the page. The final result you should have is something similar to the picture to the right. Note that the title is not part of the macro itself, but it’s always good practice to add a name/description in order to clearly explain what each macro’s purpose is.
In the example to the right a “Heading 3” text style has been applied to the title, followed by a “Divider” macro

STEP 5 – Add a Jira Issues Calendars macro
To complete this “hands-on” part, if you and your team need to manage issues on a calendar view, I strongly recommend you give the Jira Issues Calendars macro a shot since it’s there exactly to play this role.
Bear in mind that you need to populate each issue’s “due date” field from Jira before they become visible on the Confluence calendar macro. In case you don’t have the due date field available in your project, you can always add it from the screen (you can refer to this link to check the guide on how to do that).
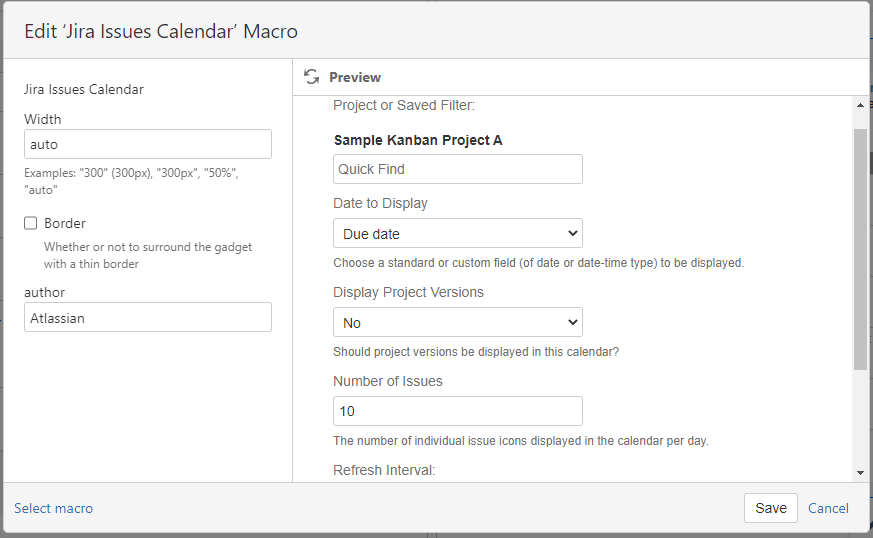
If you already have Jira issues’ due dates in place (i.e., it’s not empty for at least some issues), you can go back to your Confluence page in “edit” mode. Then, as we did on the previous steps, search for “Jira” macros from the “+” action. Select the one called Jira Issues Calendar and configure all the required parameters as we did in the example to the right (where you can even set a different field from the default one, Due date, as display date).
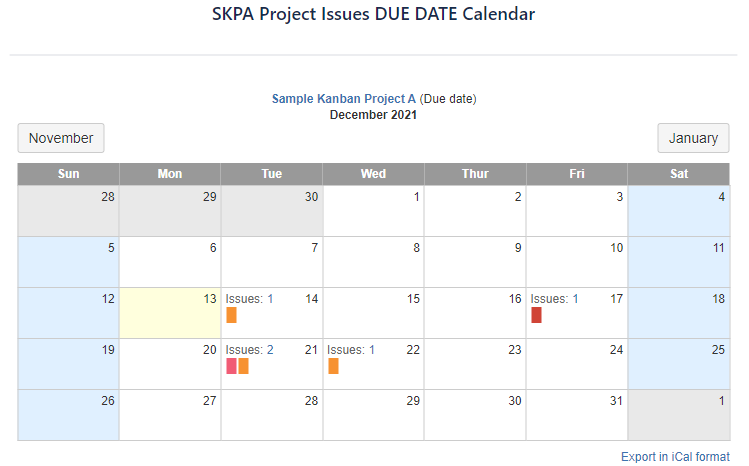
Once you’re done, you can save the macro and go back to edit the page. As we did before, I highly recommend placing a title before the macro to better explain users what the calendar represents.
You should have already noticed the presence of an “Export in Ical format” action at the bottom right of the calendar.
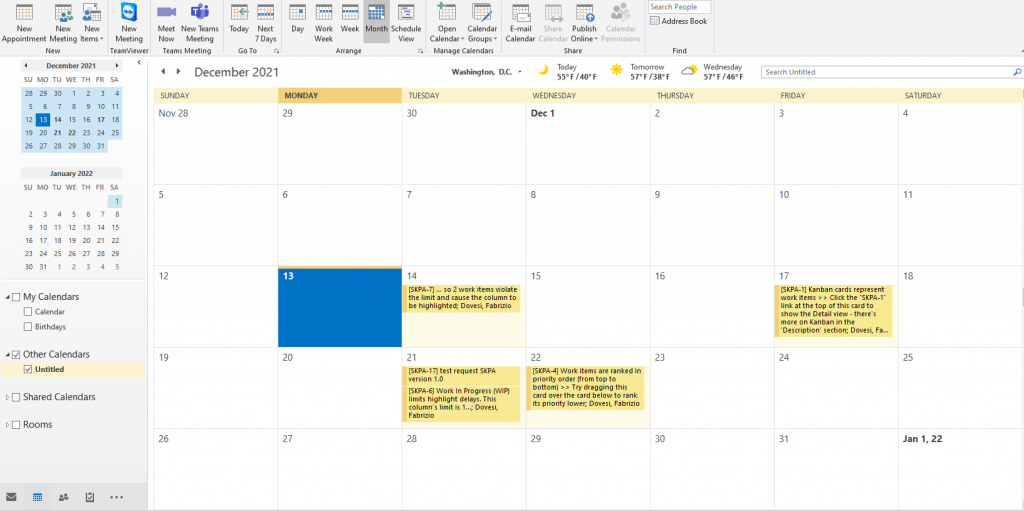
By clicking on it, you download an “.ics” file that can be opened from just about every application that is used to work with calendars, like Outlook Calendar (see the picture to the right which represents the .ics version downloaded from the Confluence macro.

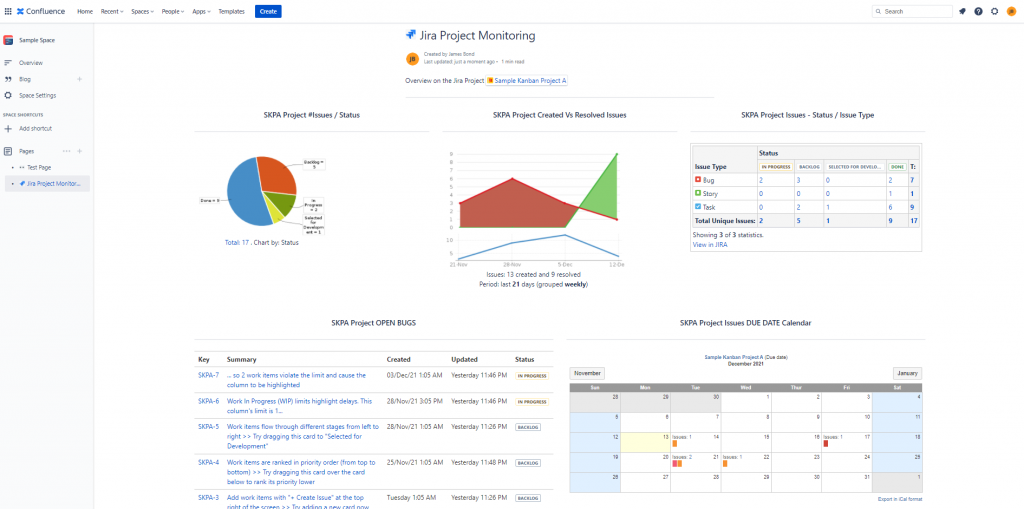
Finally, bear in mind that it’s always a good idea to play around with the macros positions within the same page. Usnig “Sections” will help you organize them in one, two, or three different columns with the final aim being to place the most relevant data and information in one single view. The following picture shows the result obtained by using some of the Jira macros available in Confluence.
Conclusion
I hope this post helped you in getting an idea of how the described features work and the value they could bring you in the future. Just bear in mind that you can always extend your system’s boundaries with these macros: apart from other native ones available out-of-the-box, you can always scout around for some add-ons to make this even better than it already is.
In case you’d like to do a deep dive into these macros, you can refer to the following links:
To conclude, we’ve put another little piece of Confluence/Jira knowledge into our bag today, so you’re now in a position to view your Jira project data directly from a Confluence page, so Congrats!!!!
Stay tuned and see you in the next episode! 😉
Author
Latest posts by Fabrizio Dovesi
31. 03. 2026
Atlassian, Service Management
When Agile at Scale Meets Atlassian: Choosing the Right Scaling Model for Global IT Organizations
30. 12. 2025
Atlassian, Service Management
Atlassian Rovo Today: Architecture, Technologies, and Enterprise Trust
01. 10. 2025
Atlassian, Service Management
Project Managers Are rAIsing the Bar: Redefining the Rules of the AI Game
30. 06. 2025
Atlassian, Service Management
Where ITIL® 4 Meets Atlassian: Elevating IT Service Management
21. 03. 2025
Atlassian, Service Management
Be a “Whiteboard Blackbelt” to Unleash Effective Collaboration