01. 07. 2026
AI, Atlassian, Service Management

27. 09. 2021
Fabrizio Dovesi
Service Management
Create Your Own Atlassian Ecosystem in a Few Clicks (…and for Free!)
Everything you need to do and know to taste the Jira and Confluence experience yourself (... and for free! ;-) )
After following these simple steps, in just a few minutes you'll have:
📌 Your Atlassian cloud instance containing Jira Software and Confluence
📌 Option to invite up to 10 users to collaborate as a team
📌 Option to add both more Atlassian products and Atlassian add-ons to your instance
Introduction
Although plenty of people may be interested in using Atlassian Cloud products, many of them may have been discouraged in the past when creating a new cloud-based instance for various reasons. This could be caused by the fear of possible hidden costs, the time it could take and/or the technical difficulties to put everything together. In fact, I can quickly reassure you on these points by answering the following questions:
How much does it cost? The products presented in this blog series are entirely free (no payment or credit card are required at instance creation or later)
When does the free license expire? Actually, there is no end-date on your instance, so free licenses won’t expire.
How long does it take? 5 minutes to create both the instance and your first Jira Project; from that moment on, you can effectively enjoy using it.
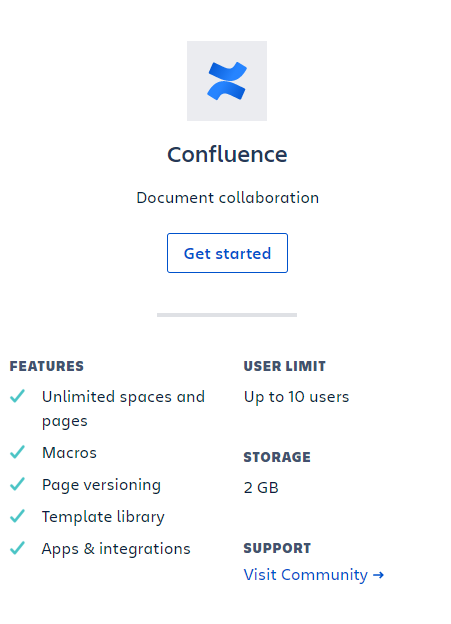
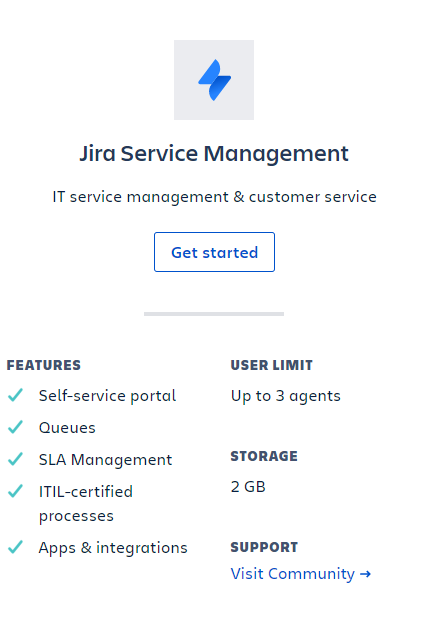
Which features are available on the free plan and which ones are added through payment plans? Many of the main features are already in place in the free plan! Bear in mind that the number of users on free plans is limited to 10 users for most products, but there are some exceptions like Jira Service Management, which offers only 3 JSM user seats on the free plan.

In any event, if you want to get more details on available plans and related features, you can check out the official Atlassian pages listed below:
Before starting, there’s something you should be aware of:
⚠ You are about to create an ecosystem of free cloud products that interact with each other!
This means that in the future you will be independent when defining exactly the perimeter of activities you want to manage by comparing it to a large set of Atlassian products in order to cover them.
But at this stage, we’re just going through the steps to create a new instance with Jira Software and Confluence.
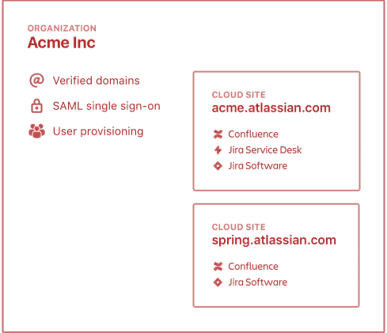
⚠ In the Atlassian world, terminology matters to help avoid confusion! So, when we talk about “new instance”, we mean a new organization (a kind of “site/s container” where you can manage user provisioning, verify domains, etc… at an overall level. This means settings affect all the sites within that organization) containing a new site (a kind of “Atlassian products container”, reachable through a dedicated URL). You can refer to the picture on the right to better understand how this works. To summarize, in this blog we’re going to create and consider this case:
1 Organization [1 Site (2 Products)]
⚠ The URL you are going to set for your new instance is unique! So don’t “consume” URLs that can be suitable for future official instance/s if you are planning to use the new instance just for testing, playing and/or demonstration purposes.
⚠ An Atlassian account is required to create a new instance. If you already own an Atlassian account, you can use it to create a new instance and this won’t affect any other existing site/s and product/s you are currently managing or just using. If you don’t have an Atlassian account, you can create one (for free) by following a few simple steps that we will see below.
Step-by-step Guide
We’re ready to put our hands on these tools now! so, let’s start!
STEP 1 – Log in to your Atlassian cloud account
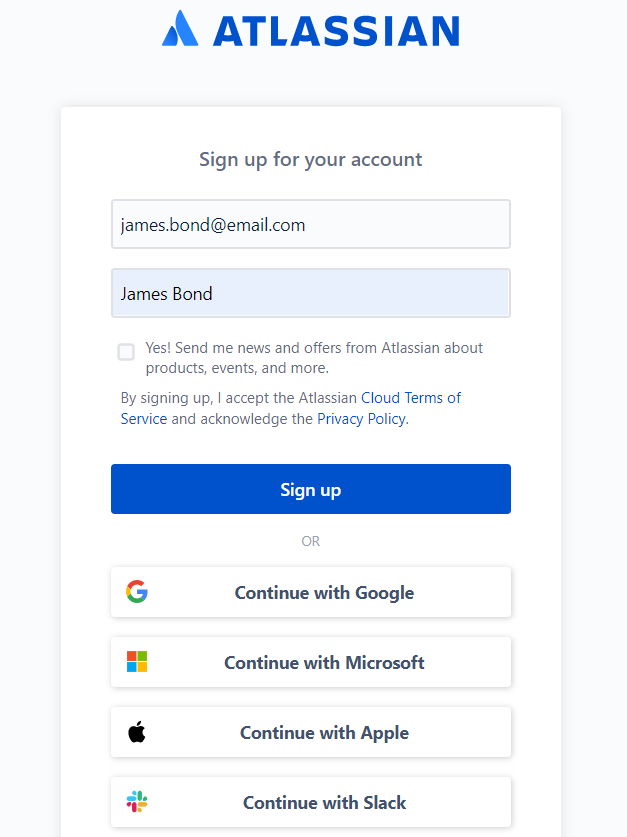
First of all, sign in to your Atlassian account from Atlassian’s Login page.
If you don’t have an Atlassian account yet, you can sign up to Atlassian (for free) or continue by using an existing Google, Microsoft, Apple or Slack account to join.
STEP 2 – Create your own Atlassian instance (Jira SW + Confluence)
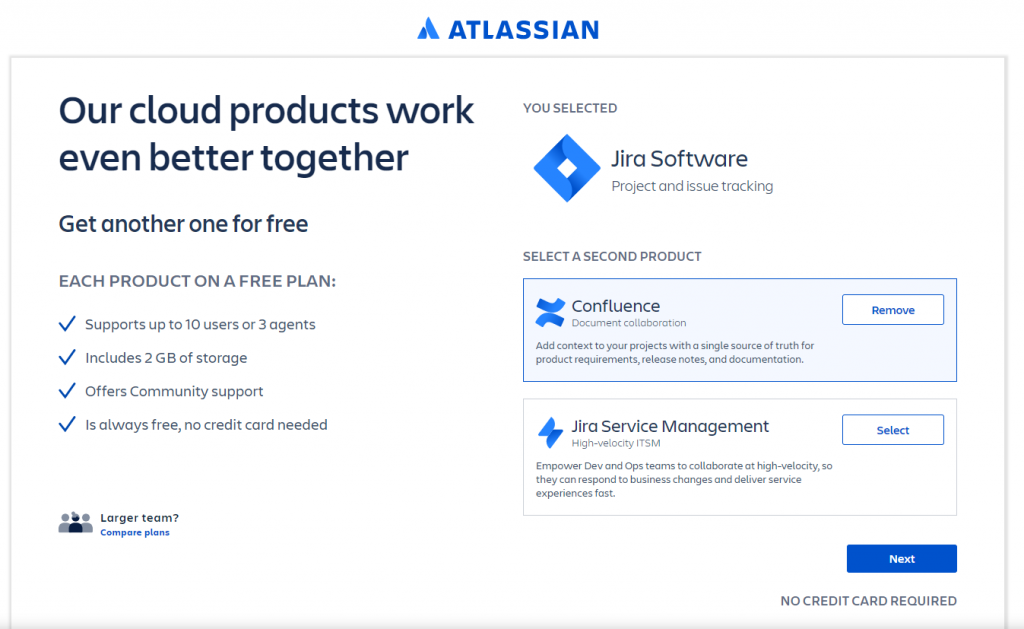
Go to the page where you can create your free Atlassian cloud instance with Jira Software and Confluence; to add the second one, remember to click on “select” in the Confluence section, just as in the following picture, then click “Next”.
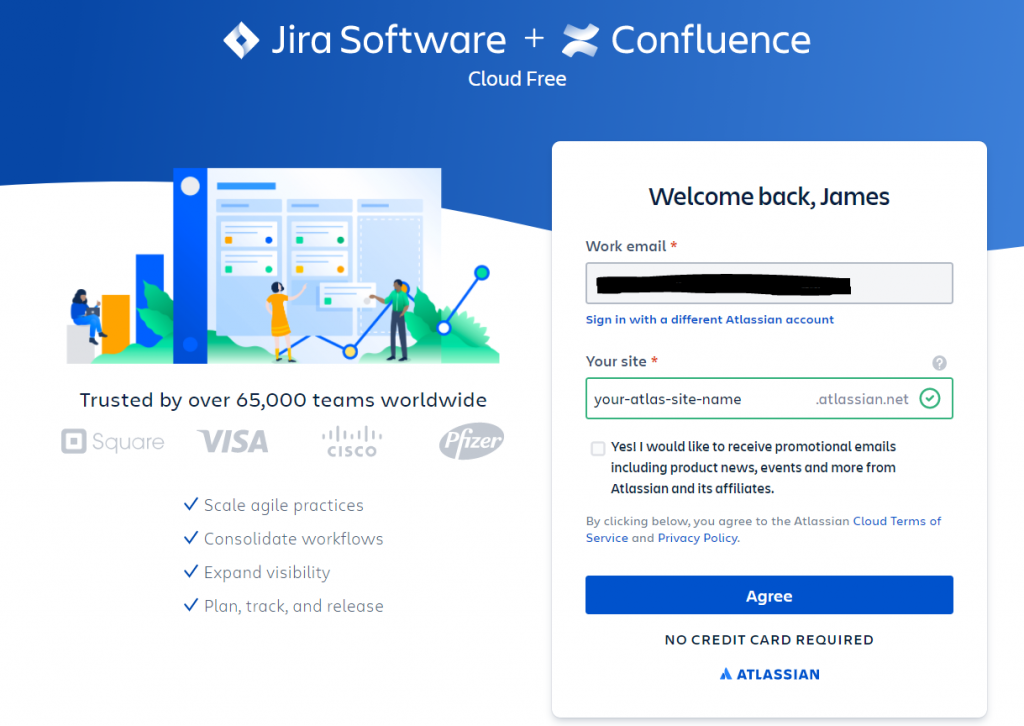
At this stage, you have to define your site URL (which will be: <your-site-name>.atlassian.net) and click “Agree”.
Remember to not set an eligible URL for a possible company production instance if you are just planning to test it for evaluation purposes. Moreover, another good reason to do so is that it will be always possible to restore a backup from a test instance to a new one when needed. This procedure will keep you from wasting time in activities like manually copying configurations from test to production; it will be enough to restore and check a very small set of customizations (like fixing the system “look and feel”).
Finally, during instance creation, it is strongly suggested to not invite other people by email or through the checkboxes (keep both of them unflagged like in the picture at the right).
We’ll discover in Step 4 how to invite other users to join your site.
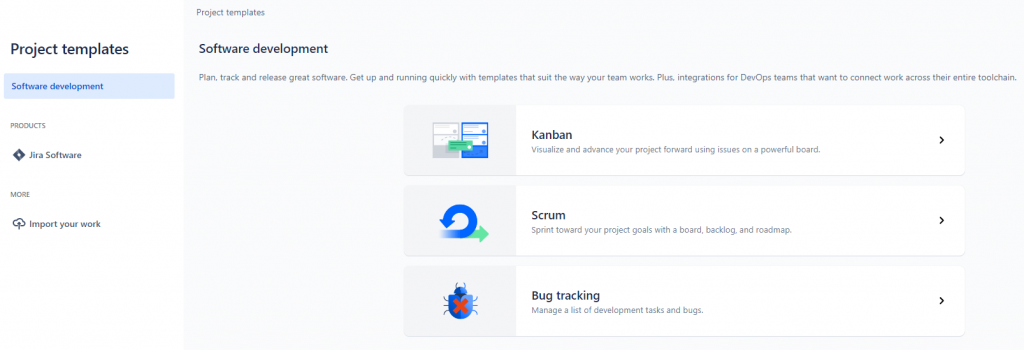
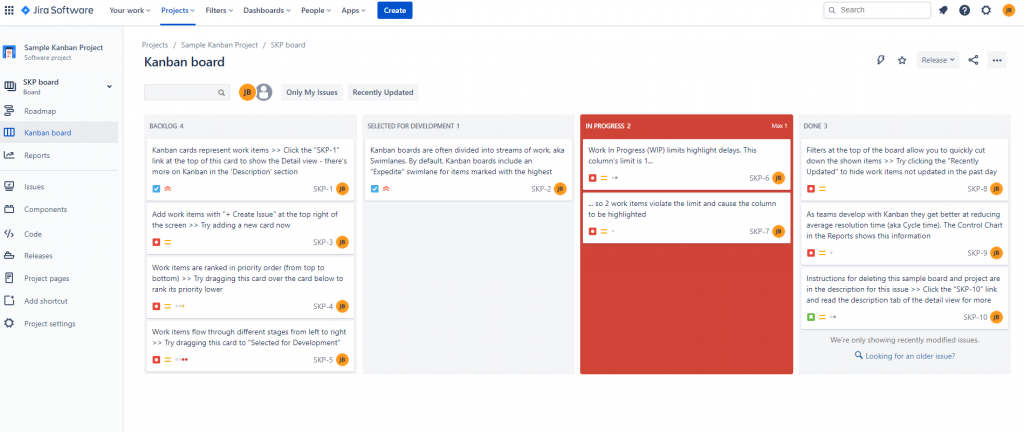
STEP 3 – Create your first Jira Software Project with sample data
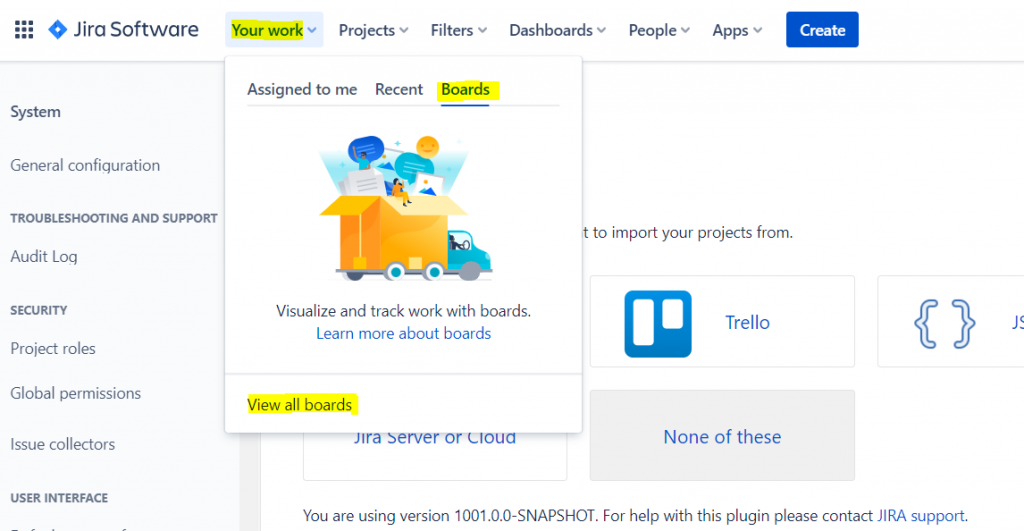
The first time you land in your new Jira cloud environment the system makes you create a project by using one of the project templates available in Jira software. Since we’re going to create a new project with simple data inside it, we need to click on “Import your work” at the left.
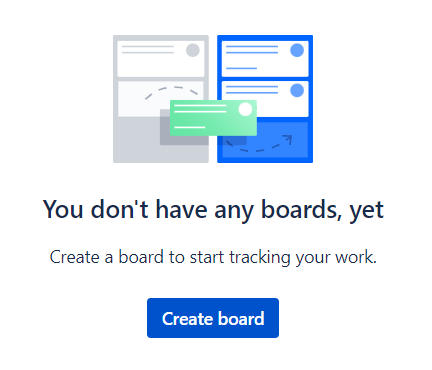
Jira then brings you to the administration page to import data from external resources. In any case, we’ll skip these options, so click directly on Your work from the main menu on the top, then on Boards > View all boards and finally on Create board.
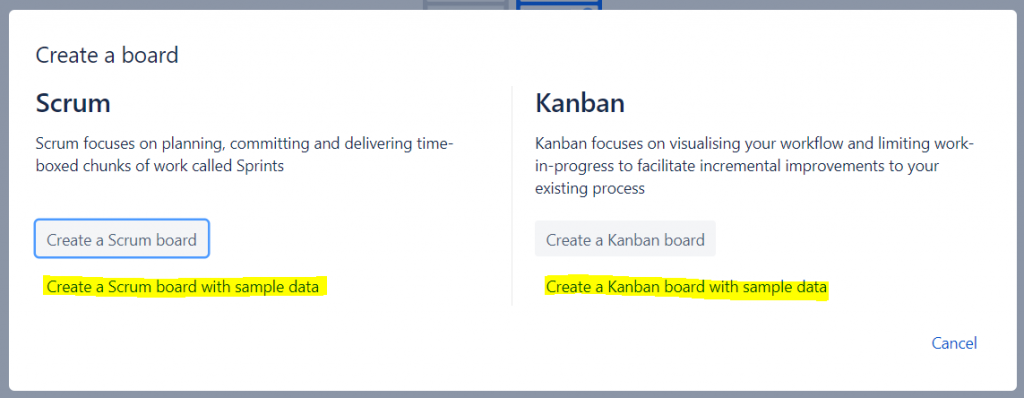
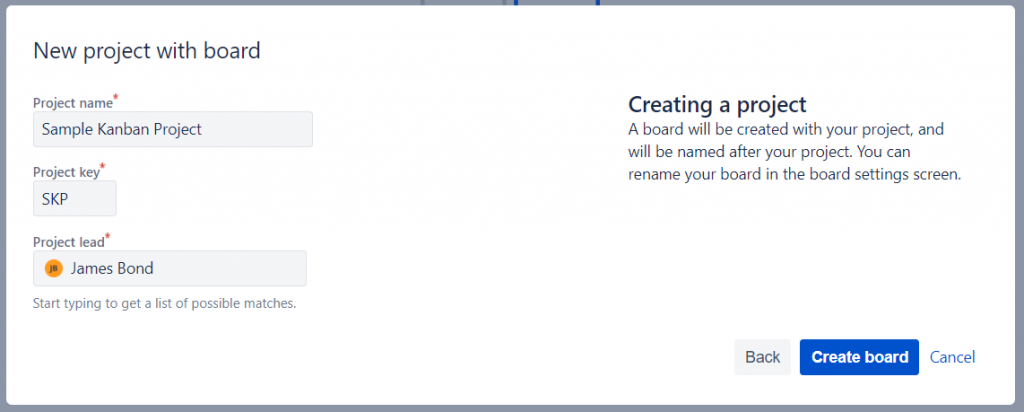
The last action required to create your Jira software project with sample data is clicking on one of the 2 Jira templates available with sample data (Scrum and Kanban). Hence, you just have to select the one you prefer by clicking on one of the 2 highlighted options in the picture below and entering your project name and a key.
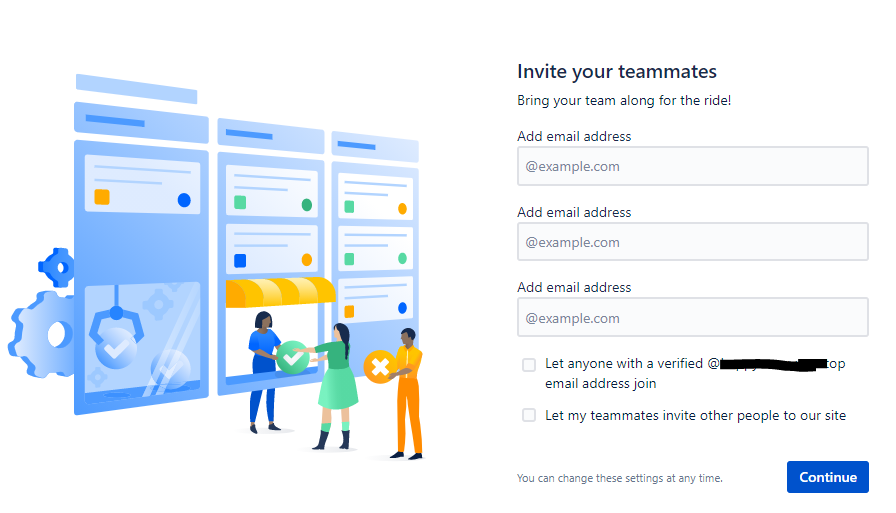
STEP 4 – Invite other users to join your site
As already explained at the beginning, you can manage up to 10 users within Jira SW and Confluence (9 users + you). To invite them to your instance you just need a valid email address for each user; then, you add them within the “User Management” section from the admin panel (the gear icon at the top right of the main menu).
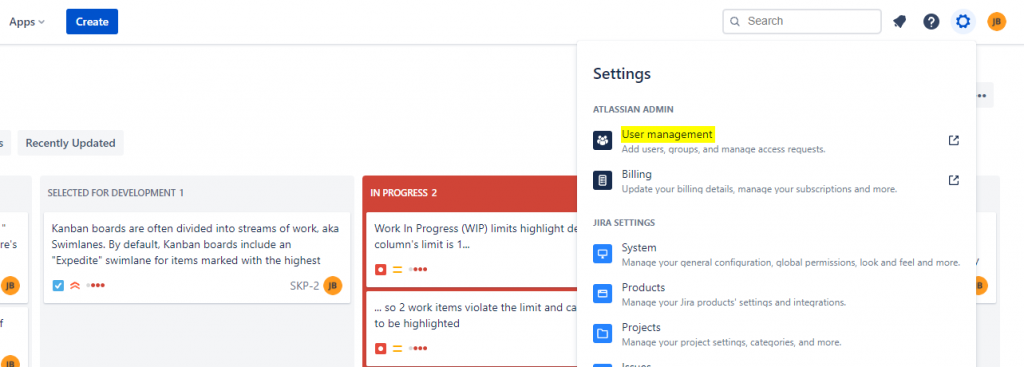
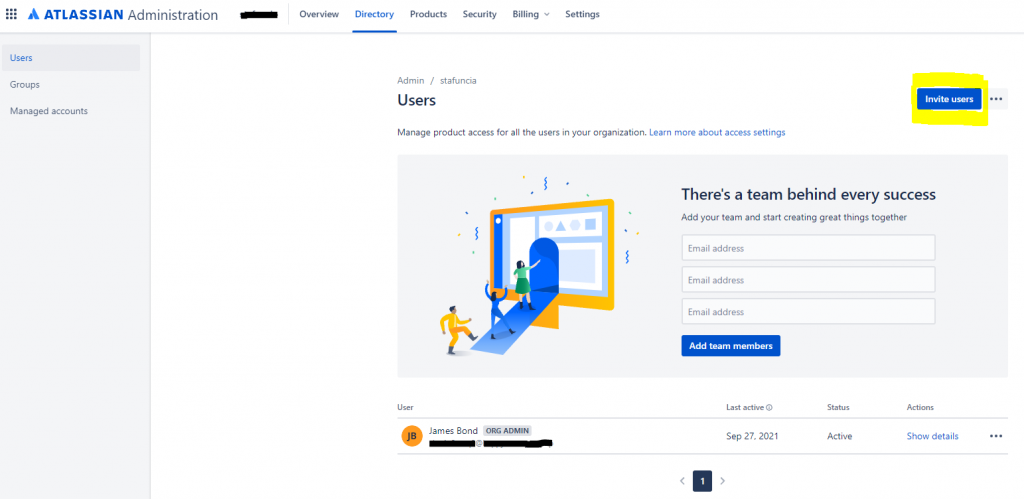
When you need to perform an activity like grant users access, manage groups membership, manage products billing and so on, you will be redirected to the Atlassian Administration site (https://admin.atlassian.com/). Hence, this is also the place to invite new users.
From here, by clicking on “Invite users” at the top right, you will be able to create users from a dedicated window to invite people.
Once you have added one or more email addresses in the dedicated section, the system lets you grant those users specific products access (like Jira, Confluence, etc…) and, eventually, permission to administer them.
Moreover, from the same page users can be directly added to existing groups and/or receive a personalized invitation.
In order to keep the approach to the current topic from being too heavy, you can just confirm the default options you find in this window (like the picture on the right), so: Jira Software=User, Confluence=User, Jira Administation=None, Group Membership=Empty
Remember that you will always be able to change user permissions in the future if you need to.
Finally, by clicking on the “Invite users” button, people involved will receive an invitation email containing a specific link that will let them join you on your site; they will be asked to sign in (or sign up) with an Atlassian Account, exactly as you did at the beginning of Step 1.

Conclusion
Congrats!!!! You can now get your first taste of what it means to work with Atlassian cloud products!
I hope you’ll have a great experience, and don’t miss upcoming episodes on “how to evolve this system….”
So, stay tuned and see you soon! 😉
Author
Latest posts by Fabrizio Dovesi
01. 07. 2026
AI, Atlassian, Service Management
A Hybrid IT Operating Model: PMBOK® Guide (Eighth Edition), ITIL® , and Agile Working Together
31. 03. 2026
AI, Atlassian, Service Management
When Agile at Scale Meets Atlassian: Choosing the Right Scaling Model for Global IT Organizations
30. 12. 2025
AI, Atlassian, Service Management
Atlassian Rovo Today: Architecture, Technologies, and Enterprise Trust
01. 10. 2025
Atlassian, Service Management
Project Managers Are rAIsing the Bar: Redefining the Rules of the AI Game
30. 06. 2025
Atlassian, Service Management
Where ITIL® 4 Meets Atlassian: Elevating IT Service Management