
29. 09. 2025
Antonio Cerullo
Microsoft
Migration from Windows 10 to Windows 11 for Enterprise Clients
Introduction
With the End of Support (EOS) date for Windows 10 approaching (it’s set in fact for October 14, 2025), companies must urgently plan their transition to Windows 11, as Windows 10 will no longer receive security updates after that date. This means non-updated devices will be exposed to vulnerabilities and thus be non-compliant with corporate security standards.
Here’s what EOS means:
- No security updates or patches
- Compliance risks in regulated environments
- Increased exposure to cyber threats
- Limited technical support
Upgrade Methods
Transitioning from Windows 10 to Windows 11 is possible in several ways, provided that the PC meets the minimum set of requirements (e.g., TPM 2.0, Secure Boot, compatible CPU).
1. Windows Update
Pros:
- Simplest and safest method
- No external tools required
Cons:
- Available only if the PC is fully compatible
- May take time before the update is offered
- Potential issues with blocked updates or system errors
2. Windows 11 Installation Assistant
Pros:
- Forces the upgrade even if Windows Update doesn’t offer it
- Guided and intuitive interface
Cons:
- Requires manual download of the tool
- Installation halts if the PC is incompatible
- Possible errors due to outdated drivers or software
3. Using the Windows 11 ISO
Useful in isolated cases such as:
- Lab machine testing
- Non-domain or unmanaged devices
- Emergency situations
Pros:
- Flexibility: upgrade, reinstall, or clean install
- Can bypass some compatibility limits (with advanced tweaks)
Cons:
- More complex and technical
- Possible issues with drivers and activation in clean installs
4. Installation via SCCM (Microsoft Endpoint Configuration Manager)
In our case, we’ll use SCCM, a powerful tool to manage this migration in a scalable, secure, and controlled way. SCCM allows automated deployment to hundreds or thousands of devices without manual intervention.
SCCM enables you to:
- Define maintenance windows
- Set user notifications
- Apply security policies
- Monitor centralized logs and reports
SCCM dashboards and reports help:
- Track installation status
- Identify errors or incompatible devices
- Analyze migration success
SCCM Migration Prerequisites
If you decide to go the SCCM route, then before starting ensure you have:
- SCCM updated (version 2107 or higher)
- Windows 11 ISO
- Devices compatible with Windows 11:
TPM 2.0 enabled
Secure Boot enabled
Supported CPU
RAM ≥ 4 GB
Storage ≥ 64 GB
A Step-by-Step SCCM Guide
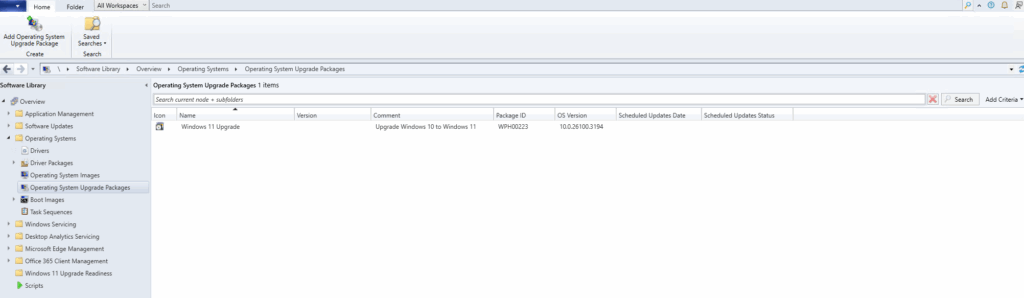
Import the Upgrade Package
- Copy the Windows 11 ISO to SCCM’s shared folder
- In SCCM:
Software Library > Operating Systems > Operating System Upgrade Packages - Add the package and assign a descriptive name (e.g., Windows 11 Upgrade)
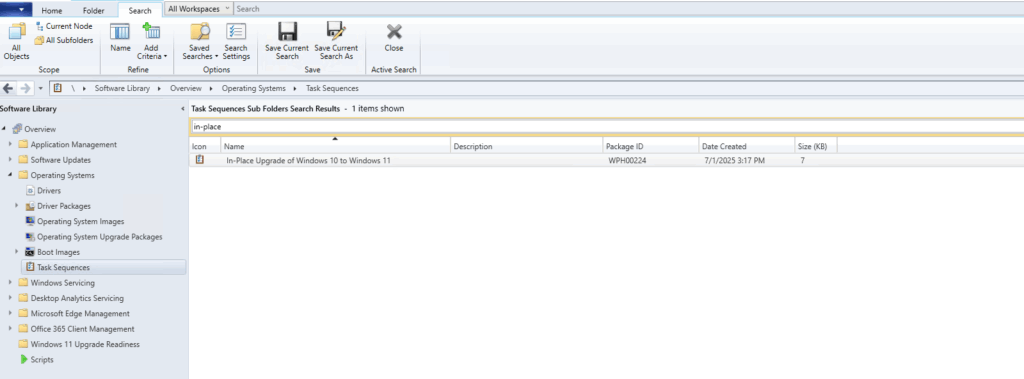
Create the Task Sequence
- Navigate to:
Software Library > Operating Systems > Task Sequences - Click ‘Create Task Sequence’
- Select ‘Upgrade an operating system from an upgrade package’
- Configure:
Name (e.g., In-Place Upgrade of Windows 10 to Windows 11)
Package: the one created earlier
Edition and Language: ensure they match
Deploy the Task Sequence
- Select the Task sequence > deploy
- Collection: list of Windows 10 devices
- Set:
Mode: Available or Required
Maintenance window: if applicable
Monitor and Troubleshoot
- Monitor status in:
Monitoring > System Status > Deployments - Check client logs:
C:\Windows\CCM\Logs\SMSTS.log - Use SCCM reports to analyze upgrade success
Best Practices for Effective Migration
- Test on a pilot group before proceeding to large-scale deployment
- Schedule outside working hours to reduce impact and use maintenance windows to avoid interruptions (if set as REQUIRED)
- Clearly communicate expectations to users, e.g.:
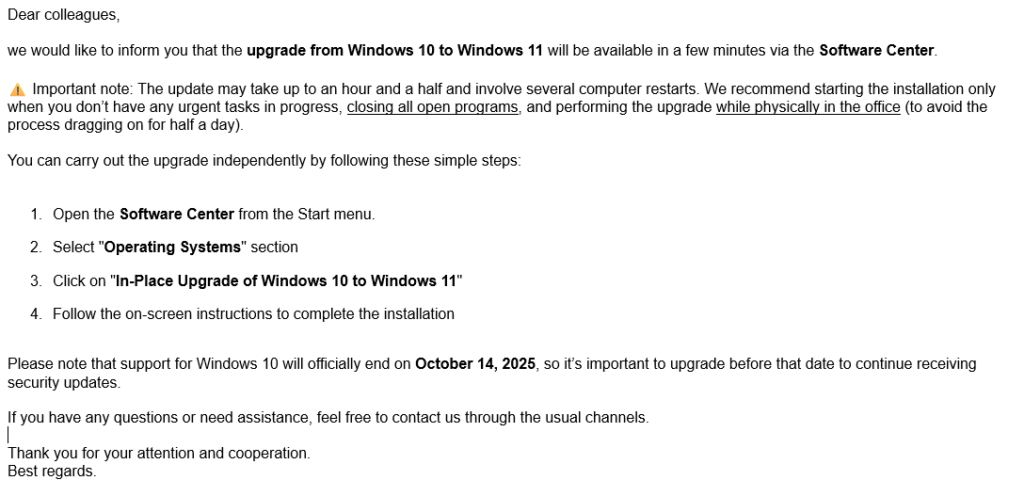
Upgrading Virtual Machines on VMware vCenter
If it’s also necessary to upgrade the virtual machines via SCCM, first configure a Key Provider:
- Log in to vSphere Client
- Navigate to:
vCenter > Configure > Security > Key Providers - Click Add, select Add Native Key Provider, and give it a name

Then configure the VMs:
- Enable UEFI: firmware must be set to UEFI (not BIOS)
- Enable Secure Boot
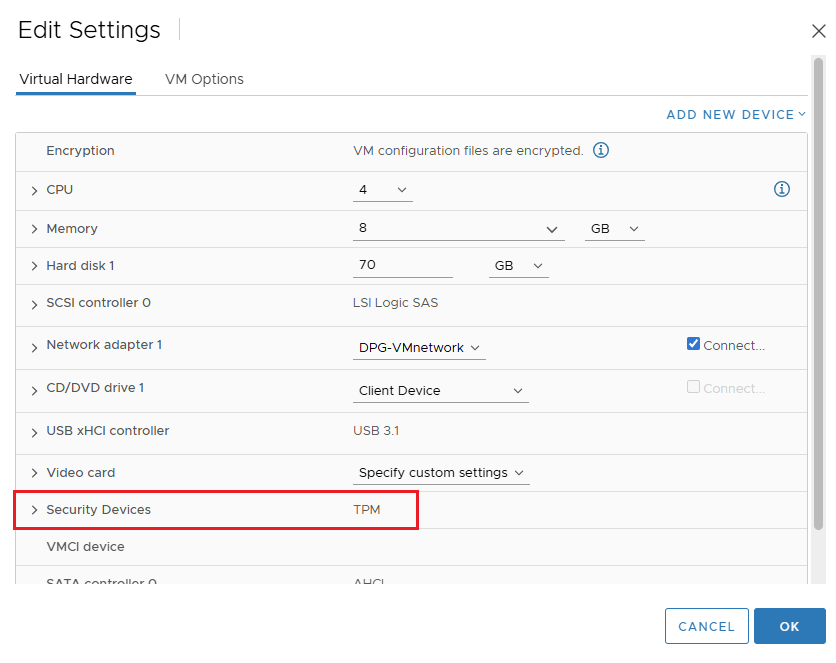
- Add a vTPM to the VM:
Right-click the Windows 10 VM > Edit Settings
Click Add New Device > Trusted Platform Module
Before upgrading, always take a snapshot in case a rollback is needed, and ensure VMware Tools are up to date.
Conclusion
Migrating to Windows 11 is not just a technical update: it’s a strategic move toward a more secure, modern, and high-performing IT environment. With SCCM, you can manage the entire transition professionally and smoothly.
These Solutions are Engineered by Humans
Did you find this article interesting? Are you an “under the hood” kind of person? We’re really big on automation and we’re always looking for people in a similar vein to fill roles like this one as well as other roles here at Würth Phoenix.

Antonio Cerullo
Site Reliability Engineer at Wuerth IT Italy
Author
Latest posts by Antonio Cerullo
07. 07. 2026
Automation, Microsoft
Automating BIOS Password Management on Dell Laptops via SCCM (with 90-Day Rotation)
31. 03. 2026
Asset Management
Immich – Choosing the Company’s DAM
24. 01. 2025
Knowledge Management, Service Management
Dynamics 365 Finance & Operations (On-Premises) Certificate Rotation