30. 06. 2026
Documentation

29. 12. 2021
Charles Callaway
Development
Making Your Own Tutorials, Part 6: Beyond the Green Screen
Welcome to the next installment in my series on creating video tutorials on technical topics that you can upload to YouTube, and in particular in this article, on continuously improving the quality as you create more and more tutorials over time.
There’s a method in the art/design community called iteration, where creative groups improve on a work or product in repetitive cycles. The two keys in this method are (1) repetitive cycles of (2) critical analysis leading to a new design. The method is applicable to any creative or design field, including software engineering (which was a bit late to the game, although that’s not our collective fault).
In this article I want to look at improving the result of the design of a picture-in-picture video within a video tutorial. There are two main facets, although we only have space here to describe one and so we’ll deal with the second in the next installment:
- In a previous post I described how to use a green screen effect to insert yourself into a video so viewers can see you explain something in person. Is a transparent background effect the best approach?
- What’s realistically the most natural way you can present yourself in the inset video, given your budget and time constraints? We’ll assume you don’t have a staff or a budget, which is often pretty much how it’s going to be anyway.
Let’s refer to them as the background problem and the presenter problem.
The Background Problem
Suppose as your first iteration you’ve decided to record yourself in front of a green screen. Once that video is ready, what are your options for inserting it? Let’s break them down.
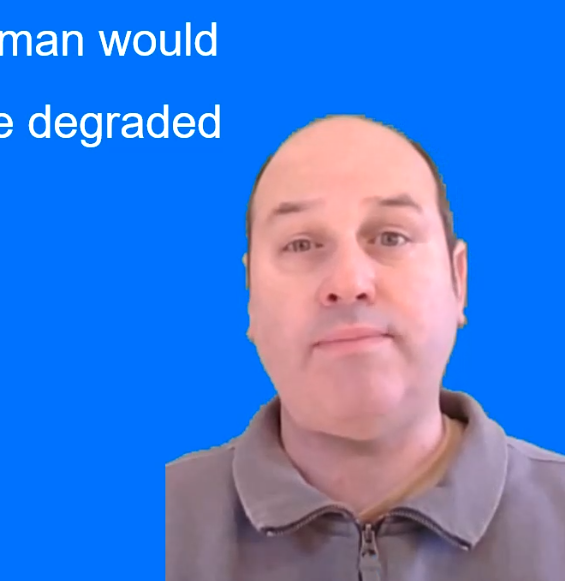
Transparent Background
After processing with a video editor to remove the background, you inset the video in a corner (so you don’t cover up the tutorial content). You’ve probably seen this in a number of videos on YouTube, with varying results.
Advantages:
- Immersivity! You’re in the video talking, so people can see your emotional reaction as you explain things. (I hope you know how to be emotive when you’re recording yourself.)
- Minimal footprint: Since you’re typically in the middle of the inset video, the edges are transparent. That means that space is the same color as the main video’s background, so you can use that space to add text or graphics, or make existing ones larger and thus more legible (like the word “degraded” in the example image above).
Disadvantages:
- Technically rather difficult: As I mentioned in a previous post, unless your recording space is large enough, you’re going to have green color spill around your outline, so your video editing software won’t render a perfect effect, which can be distracting to viewers.
- Reverse Immersivity: It turns out that when you’re in an environment that you can’t interact with, you lose some of your authenticity. On a low budget, you don’t have time to populate your world, it’s just you and nothing else.
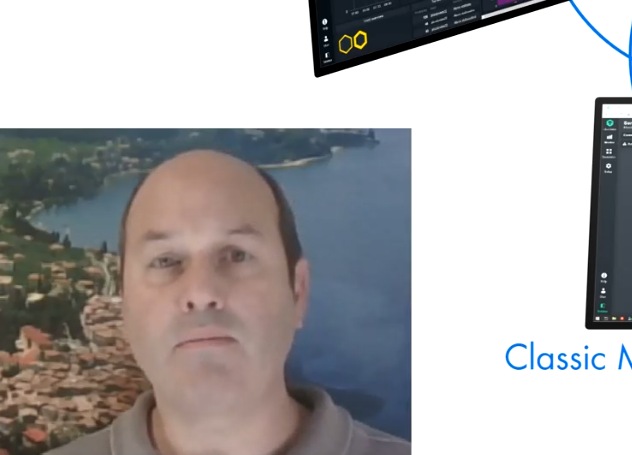
Artificial Backdrops
So if you don’t like those ugly edges you see around you, or you prefer you don’t look like a space alien dropped into a uni-color background, what can you do about it? Well, you could instead put something like a poster behind you (i.e., an old school 2D “analog” background), or you could even put one of those 72-inch LCD monsters to use and display whatever background you can find on the internet. Here’s an example of what I mean, with a nice poster of a mountain lake behind me:
Advantages:
- No more light spill and thus no more fuzzy edges
- You need fewer lights in general (you just have to avoid shadows, unlike in the above picture)
- You won’t need to do nearly as much video post-processing to remove the green
Disadvantages:
- Many posters are glossy, so you may get a lot of reflected/glaring light
- You’re still surrounded by a static environment (e.g. no objects, movement or shadows moving)
- You’re back to having a rectangular background in the inset video, meaning that that space can’t really be used any more
Real Backdrop
That’s all great, but now maybe you’re thinking you need something with a bit more authenticity. With a background you don’t look like an alien anymore, but it still feels a bit artificial, and it gets especially notable as the video gets longer.
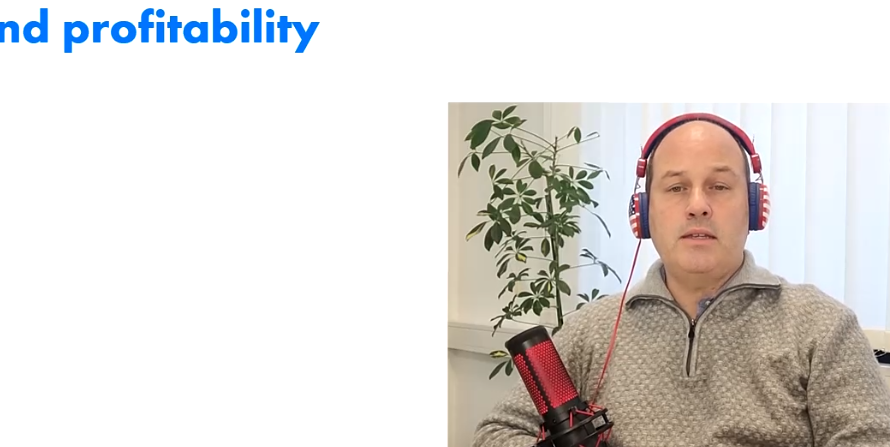
So let’s take a look at a real background. If you want some authenticity, you might want to locate it inside a room that’s typical either of your development environment (e.g. an office for software development) or of your deployment environment (e.g. a server room, or a warehouse if you do logistics software).
A real backdrop might be you in a big empty office, or even a partly full office. If you’re the kind of person who has to do a lot of takes, try starting off with as little movement as possible. But what’s most important is to get some depth to the space, and have everyday objects in it, not just white walls immediately behind you, or else you might as well be using a fake backdrop.
Here’s an example of what I mean:
Advantages:
- It looks real with shadows that move, objects ahve the right proportions and perspective no matter how you move around, the light is more natural, etc.
- Again the video post-processing will be minimal as long as you set up the lighting correctly ahead of time
Disadvantages:
- A real backdrop means you’ll have interference, such as people talking loudly, gaps if you have to do multiple takes, even the slow movement of the sun if you’re shooting near a window over the course of an hour
- Shooting with multiple takes (using cuts) means not only you, but also things in the back of the shot might be in different positions or places
- Again, it takes away that extra space that background transparency originally gave us
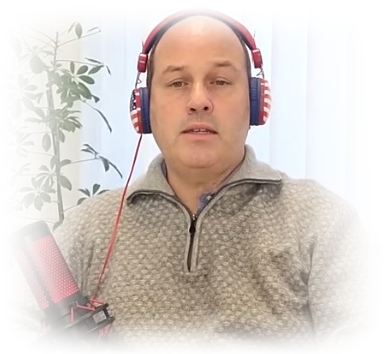
Are We Done?
No! That’s the joy of the iterative design process. You can always make improvements. For instance, if you want to reclaim part of the space, you might decide to try an edge or radial blur filter effect:
And of course, even if you think you’ve gotten everything almost perfect, you can always search on YouTube for keywords like “examples of best practice tutorial videos” in order to up your game.
I’ll see you next time when we’ll talk about the Presenter problem.
Charles Callaway
Author
Latest posts by Charles Callaway
30. 06. 2026
Documentation
Teleprompter Tips, Part 2
30. 04. 2026
Documentation
Teleprompter Tips, Part 1
25. 02. 2026
Documentation
Making Your Own Video Tutorials, Part 20: Recording a Good Task-based Screencast
30. 10. 2025
Documentation
Tutorial Video Editing Technical Tips, Part 2: No Country for Boring Men (or Women)