30. 04. 2026
Documentation

In my last blog post we looked at practical suggestions for improving the tutorial videos you upload to YouTube, focusing on tips for audio recording, video recording and editing, writing the script, and uploading them.
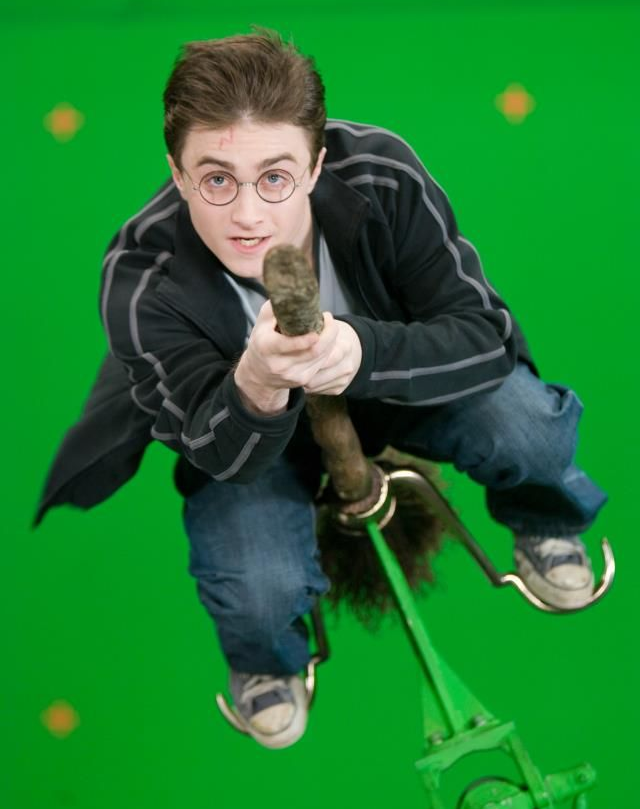
Now suppose you want to take the next step that will (hopefully!) add some impact to your tutorials: putting yourself in them! Unlike tutorials for physical products, software tutorials are usually screencasts and slides, so I don’t mean you standing next to your monitor. I mean using a “green screen” to help you “composite” yourself on top of the screencast.
Green screening is one example of using a Chroma Key, where the color being keyed on is green. It’s the kind of thing you see when they show how Hollywood movies are made, when actors seem to be walking in a sea of green. Of course you can use any color, but bright green just happens to be far away on the spectrum from skin tones and most clothing.
Getting your green screen right takes a bit of effort – like most everything technical, it’s more complicated than you would think initially, and there’s a bit of a learning curve, but once you’re over that, it easily becomes second nature. There are also a ton of teaching sites and videos out there with lots of advice. Below I’ll summarize what I learned “while doing”, while adding a bit of expert advice I’ve gathered from the web.
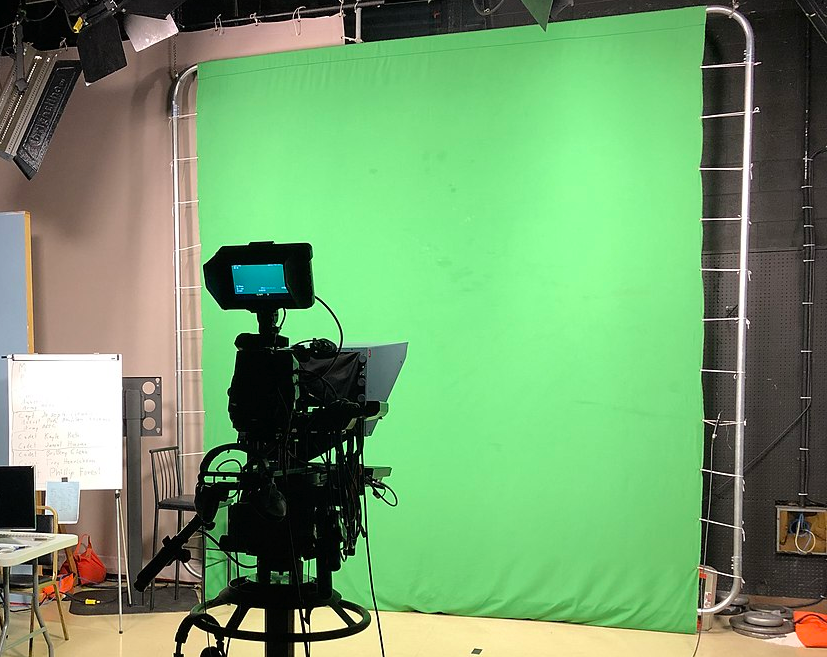
The Filming Space
To start, you’ll need to find a medium-sized space which can contain all of the necessary equipment along with the person being filmed. You’ll need full control over this space, and it should be quiet since you’ll be recording audio at the same time you’re filming.
If you only have a smaller space available (say 4 meters by 4 meters) you’ll end up having to take some shortcuts that will (1) require extra work, and (2) negatively impact quality.
There truly is a minimum available area necessary because you will need space for:
- The green screen itself, which will need to be supported in some way such as by hanging
- A place to put the person being filmed, with distance between them and the green screen
- A place to put the lighting equipment (lights, scaffolding and wiring), again with distance between it and the subject (whom you don’t want to blind with large lights right in their face)
- Somewhere to put the camera, which may be near the lighting equipment
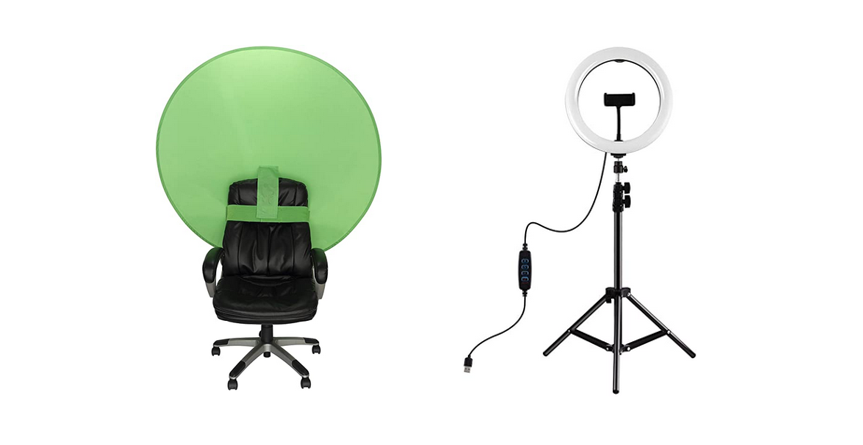
There are alternative green screen methods that need less space, such as the “chair halo” or circular “selfie light” used by some frequent videoconferencers and live streaming gamers (and dare we say it, YouTube “Influencers”), but these will result in lower quality effects on video, as I’ll describe in further detail below.
Many people will say that the effects of the lack of space, along with any mistakes you make during filming, can be fixed during a video post-editing phase. Beware though that when they say this, they’re assuming you have a video editor to help you. It’s almost always easier to do things right as soon as possible during the production pipeline, and this includes properly setting up the space you’ll be using.
Lighting
Believe it or not, lighting, and especially well-planned lighting, is the primary factor in creating a quality chroma-key effect. The main goals when you light a scene is to eliminate shadows everywhere, and make the screen have a single color as seen by the camera.
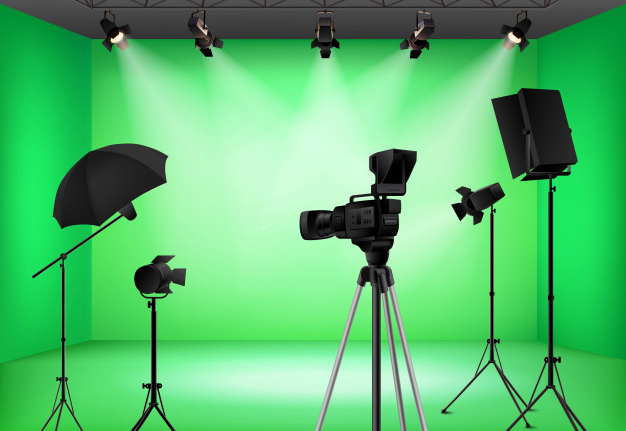
In general these require that you:
- Keep sunlight out, since it creates strong directional shadows and is highly variable due to factors outside of your control
- Use lights of the same “temperature”, don’t mix cold (bluish) and warm (yellow) lighting sources
- Use soft lighting with “lighting box” techniques like you would see at a photographer’s studio – they produce light from more directions without requiring more physical lamps, and greatly reduce the chances of hotspots/flares
The next most important factor is to separately light the background screen and the foreground subject. You should first set up one group of lights for the subject, checking with the actual camera (or webcam) you’ll be using to ensure that the level is bright enough and there are no shadows on the face, chin, shoulders, etc. Once that’s done, then you can add the lighting for the green screen and fix any shadowing/banding problems on it while checking that it doesn’t affect the foreground.
Lighting the Subject
Lighting the subject needs to be done from at least two sides, e.g. either above and below, or left and right, to prevent shadows, most often cast by the nose or chin. Lights need to be completely away from where the eyes are directed to keep the subject from squinting, or causing headaches from too much glare over time.
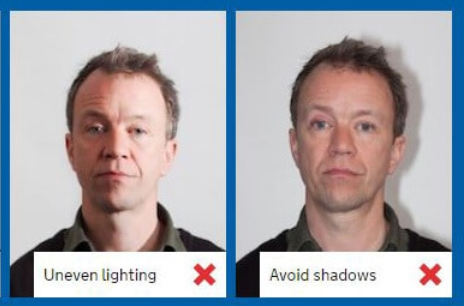
Putting the lights too close to the subject will also cause these problems. This can be fixed by having more physical space available so you can move the lights farther away, which keeps the same relative angle (and thus doesn’t introduce shadows) but doesn’t overpower the eyes.
Lighting the Background
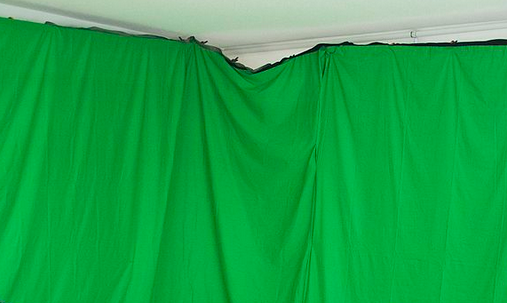
For the green screen in the background, it’s vitally important that it is completely flat, even if it requires some stretching. There are two problems here: shadows and banding. Both wrinkles and folds (caused by the material not being supported evenly) will cast shadows, which can be improved somewhat by adding more lights.
Banding occurs when the light intensity is uneven across the surface, perhaps because one light is stronger or closer than the others. This results in the video camera seeing multiple shades of green, which will cause problems in post-production when you try to make the green areas transparent. Increasing the color tolerance will help, but may also cause areas of the subject to be included in the transparent area. While you can use multiple chroma-keys in post-production, it’s better to light the scene properly so this problem never occurs in the first place.
Finally, use the minimal amount of lighting possible on your green screen. If it’s too bright, reflected light may bounce off it and then fall onto the edge of your subject (hair, shoulders, etc.) which will lead to a fuzzy border between subject and background. This is called “spill”, and it can also occur when you use a green screen that is much too large compared to your foreground subject. The more green the video camera can see, the more of it will be reflected onto the subject.
The Subject
Before beginning to film, make sure the subject is not wearing any clothes or jewelry, or carrying any objects, which are the same color as the screen. If this can’t be avoided, the second best option is usually to try a blue screen.
Keeping movement to a minimum will give better results, which fortunately isn’t usually a problem for tutorial videos. What is typically more problematic is talking, especially if the text is too long to be memorized. The camera easily picks up leftward and rightward movement with the eyes as one reads.
If memorizing is too difficult, try using a (second) computer monitor or tablet as a teleprompter. Try putting it just above the camera – putting it below eye level has a negative look to it. If only your head and shoulders are showing, you can make reading undetectable by limiting the line length to 40 characters and using a mouse wheel to scroll the text down while reading.
If you have a bit more time and patience, you can also make your own teleprompter using materials you probably have around the house. If you want to see the kind of difference it can make, watch the hilarious last third of the first video on that web page.
Most professional advice says to put at least 2 meters (6 feet) between the subject and background, to avoid green light from reflecting onto the subject. But you also need to worry about the distance between camera and subject. A larger distance gives a better perspective of the face, but leads to worse screen resolution and thus both potential pixelation of the face and the border between green screen and subject.
The Green Screen
The screen itself should be flat and a single color. If it’s fabric, it should be clean without spotting. Some people who use the green screen technique over years will actually paint a wall green.
If you’re using fabric, be sure that it is ironed and hangs uniformly, preferably with tension on all four sides to keep curtain-like folds from forming. You can test for shadows and banding by using chroma-key software even without a subject in the foreground. There are also apps that will check for and highlight banding.

Be sure to follow the recommendations above for minimal size, uniform lighting, and distance from the subject to improve the final quality of the video. If you don’t have a dedicated space for a permanent “studio”, be sure to carefully store your green screen to prevent it from acquiring wrinkles and dirt.
Video Camera
Obviously you can spend a lot of money for a professional camera, but since online tutorial videos typically have very little motion you can get quite good results with the webcam on your existing laptop as long as its resolution is at least 1280×720.
I would note that you can’t increase resolution after your scene is over, but you can always decrease it. I’m also not a practiced photographer, so while I’ve read online that you can improve the banding of your green screen with an appropriate f-setting (usually only on dedicated cameras) that blurs the background, you’ll have to try that out for yourself.
Your webcam may not have a great microphone built in, so if you’ve got a better external mic, use it to record while filming. Never try to sync separately recorded audio later! And if you are using a webcam, make sure to raise your laptop so it’s at the right height (the webcam should be level with your eyes).
Some final advice: Always do more than one take when you’re shooting a scene. It’s a really bad feeling when you take down your entire setup, and only then see a bunch of errors that would be hard to fix by editing the video, and realize that you’ll have to set up your green screen and lighting all over again.
Conclusion
So there you have it! A bunch of advice on how to film an overlay of yourself talking on top of your online video tutorials. You might even become a YouTube star! In my next blog post I’ll go over software for video post-processing, including of course how to overlay (composite) your chroma-keyed video on top of other video or slides by making the green transparent.
Final Note: If you’re already creating standard video tutorials, you can add green screening to your existing setup unbelievably cheaply. About $100/€100 will get you a 2-meter square fabric green screen and four LED ceiling panels with built-in diffusers for lighting. You can also pick up some lighting trees (the more complicated ones are known as “c stands”) for another $20 each if you don’t have another way to place them.
Charles Callaway
Author
Latest posts by Charles Callaway
30. 06. 2026
Documentation
Teleprompter Tips, Part 2
30. 04. 2026
Documentation
Teleprompter Tips, Part 1
25. 02. 2026
Documentation
Making Your Own Video Tutorials, Part 20: Recording a Good Task-based Screencast
30. 10. 2025
Documentation
Tutorial Video Editing Technical Tips, Part 2: No Country for Boring Men (or Women)