
Introduzione
I plugin servono ad estendere o modificare le funzioni di GLPI. In questo tutorial vedremo come realizzare da zero un semplice plugin per GLPI per clonare un Computer. Questo tutorial presuppone che tu abbia una conoscenza base di GLPI.
Requisiti
- GLPI >= 0.85
1. Creare un nuovo plugin
Localizza la cartella di installazione di GLPI. Nel nostro caso /var/lib/neteye/glpi. All’interno di essa troverete la cartella plugins/ nella quale sono installati tutti i plugin di GLPI.
Creiamo quindi una nuova cartella in plugins/ che chiameremo clonecomputer. All’interno di clonecomputer creiamo il file setup.php.
<? # /var/lib/neteye/glpi/plugins/clonecomputer/setup.php

/**
 * Get the name and the version of the plugin - Needed
 */
function plugin_version_clonecomputer() {
   return array('name'           => "Clone Computer",
                'version'        => '1.0.0',
                'author'         => 'Davide Bizzarri',
                'license'        => 'GPLv2+',
                'homepage'       => '',
                'minGlpiVersion' => '0.85');
}
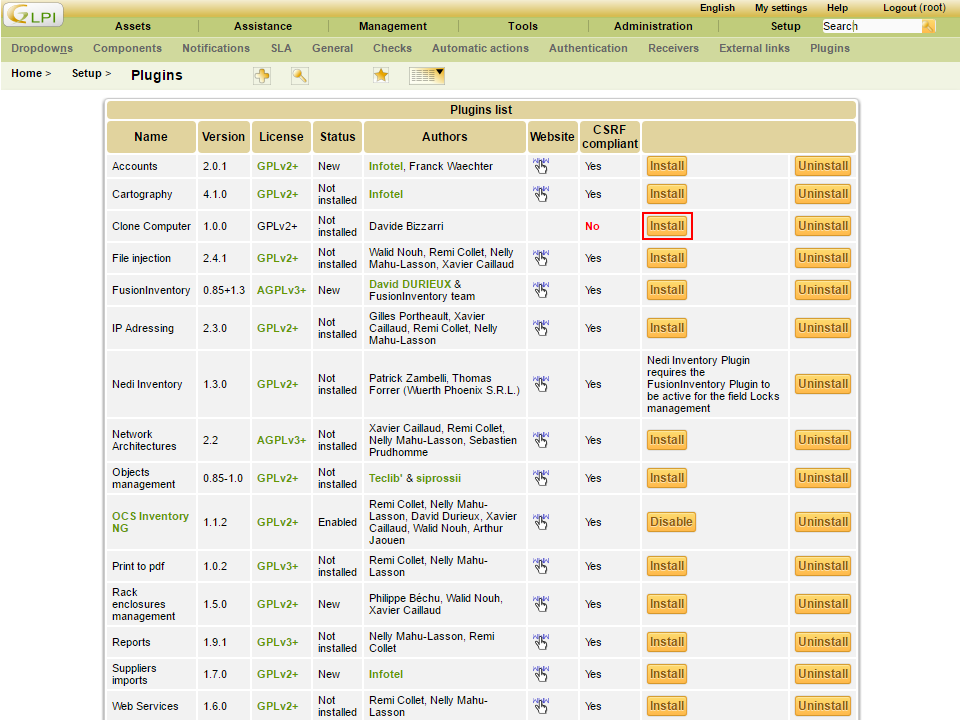
Accediamo ora all’interfaccia web e in Setup > Plugins potremmo vedere il plugin precedentemente creato.

Il plugin però non è installato e abilitato. Per poterlo installare e abilitare dobbiamo implementare le funzioni plugin_clonecomputer_install e plugin_clonecomputer_uninstall in hook.php. Creiamo quindi all’interno di clonecomputer il file hook.php.
<? # /var/lib/neteye/glpi/plugins/clonecomputer/hook.php

/**
 * Called when user click on Install - Needed
 */
function plugin_clonecomputer_install() { return true; }

/**
 * Called when user click on Uninstall - Needed
 */
function plugin_clonecomputer_uninstall() { return true; }
Nel nostro caso non ci servirà installare o disinstallare nulla pertanto lasceremo vuote le funzioni.
Infine dobbiamo implementare le funzioni plugin_clonecomputer_check_config e plugin_clonecomputer_check_prerequisites nel file setup.php.
<? # /var/lib/neteye/glpi/plugins/clonecomputer/setup.php

...

/**
 *  Check if the config is ok - Needed
 */
function plugin_clonecomputer_check_config() {
    return true;
}

/**
 * Check if the prerequisites of the plugin are satisfied - Needed
 */
function plugin_clonecomputer_check_prerequisites() {

    // Check that the GLPI version is compatible
    if (version_compare(GLPI_VERSION, '0.85', 'lt') || version_compare(GLPI_VERSION, '0.86', 'gt')) {
        echo "This plugin Requires GLPI >= 0.85 and GLPI < 0.86";
        return false;
    }

    return true;
}
La funzione plugin_clonecomputer_check_config restituisce sempre true poiché non abbiamo alcuna configurazione da controllare.
Nella funzione plugin_clonecomputer_check_prerequisites controlliamo che la versione di GLPI non sia minore della 0.85 e che non sia maggiore della 0.86. Se così non fosse il messaggio This plugin Requires GLPI >= 0.85 and GLPI < 0.86 verrà visualizzato al posto del pulsante Install
Ora possiamo quindi installare e abilitare il plugin Clone Computer.
2. Aggiungere il tab Clone Computer
Per inserire il tab dobbiamo implementare la funzion plugin_init_clonecomputer in setup.php nella quale registreremo la classe PluginClonecomputerClone che verrà richiamata da GLPI per inserire il tab e visualizzarne il contenuto.
<? # /var/lib/neteye/glpi/plugins/clonecomputer/setup.php

...

/**
 * Init the hooks of the plugins -Needed
**/
function plugin_init_clonecomputer()
{
    global $PLUGIN_HOOKS;

    $PLUGIN_HOOKS['csrf_compliant']['clonecomputer'] = true;

    Plugin::registerClass('PluginClonecomputerClone', array('addtabon' => array('Computer')));

}
Creiamo ora la classe PluginClonecomputerClone in inc/clone.class.php.
<? # /var/lib/neteye/glpi/plugins/clonecomputer/inc/clone.class.php
class PluginClonecomputerClone extends CommonGLPI
{
/**
* This function is called from GLPI to allow the plugin to insert one or more item
* inside the left menu of a Itemtype.
*/
function getTabNameForItem(CommonGLPI $item, $withtemplate=0)
{
return self::createTabEntry('Clone Computer');
}
/**
* This function is called from GLPI to render the form when the user click
* on the menu item generated from getTabNameForItem()
*/
static function displayTabContentForItem(CommonGLPI $item, $tabnum=1, $withtemplate=0)
{
?>
<form action="../plugins/clonecomputer/front/clone.form.php" method="post">
<? echo Html::hidden('id', array('value' => $item->getID())); ?>
<? echo Html::hidden('_glpi_csrf_token', array('value' => Session::getNewCSRFToken())); ?>
<div class="spaced" id="tabsbody">
<table class="tab_cadre_fixe">
<tr class="tab_bg_1">
<td>
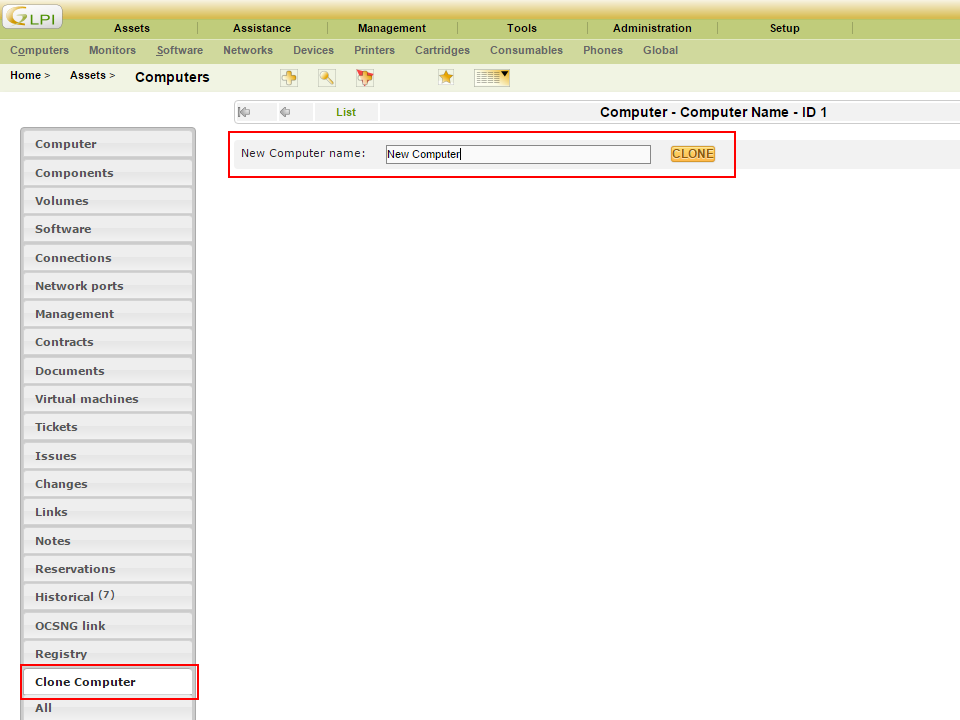
New Computer name:
<input type="text" name="name" size="40" class="ui-autocomplete-input" autocomplete="off">
<input type="submit" class="submit" value="CLONE" name="clone"/>
</td>
</tr>
</table>
</div>
</form>
<?
return true;
}
}
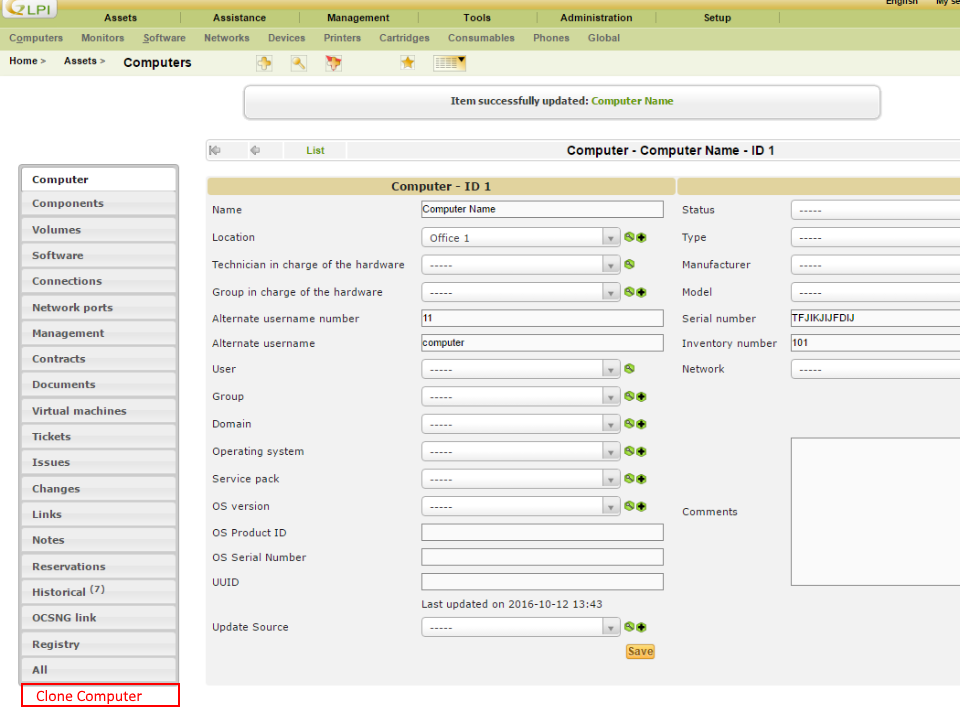
Accediamo quindi all’interfaccia web e in Assets > Computers selezioniamo o creiamo un nuovo computer per visualizzare il Clone Computer tab. Se non lo visualizzi assicurati di aver installato e abilitato il plugin (Setup > Plugins).
3. Implementare l’azione Clone
Il form creato da displayTabContentForItem() ha come action ../plugins/clonecomputer/front/clone.form.php, dobbiamo quindi creare il file clone.form.php in front/ che gestisca la richiesta inviata dal form.
<? # /var/lib/neteye/glpi/plugins/clonecomputer/front/clone.form.php

// Load GLPI
define('GLPI_ROOT', '../../..');
include(GLPI_ROOT . '/inc/includes.php');

if ($_POST && isset($_POST['clone']) && isset($_POST['id'])) {

    // Check that a name has been passed
    if (!isset($_POST['name']) or empty($_POST['name'])) {
        Html::displayErrorAndDie('Please specified date');
    }

    // Load the Computer to be cloned
    $Computer = new Computer();
    $Computer->getFromDB($_POST['id']);

    // Reset id and change the name
    $Computer->fields['id'] = 'NULL';
    $Computer->fields['name'] = $_POST['name'];

    // Save the new Computer to the DataBase
    $Computer->addToDB();

    // Redirect the user to the new Computer
    $url = explode("?", $_SERVER['HTTP_REFERER']);
    Html::redirect($url[0] . "?id=" . $Computer->getID());

}
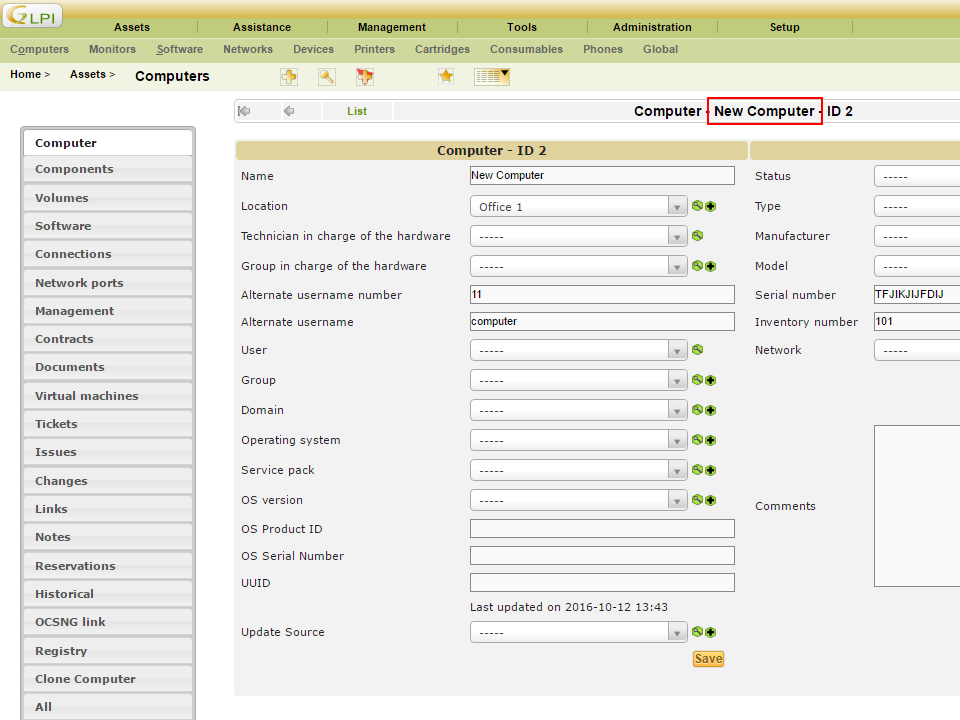
Torniamo quindi all’interfaccia web e inseriamo un nuovo nome per il Computer e clicchiamo su CLONE. Il Computer verrà duplicato e verremo quindi reindirizzati al nuovo Computer.
Conclusioni
Per saperne di più sui plugin per GLPI analizza i plugin sviluppati da GLPI stessa che poi trovare su GitHub


Davide Bizzarri
R&D Software Engineer at Würth Phoenix
Hi, I'm Davide! I’m a full stack developer at Würth Phoenix. I started to use a PC at the age of ten when my parents bought our first family PC: an old Windows 98. Then, in high school, my professor introduced me to the world of software development by teaching me my first programming language, C. Since then I began to study IT and programming languages alone. After one year, I started to develop my first website that reached over one thousand views per day. Once I finished high school, I changed my job twice, until Würth Phoenix has hired me. Here I have learned many interesting things, one of the most important once is the agile development methodology which we living every day.
Author
Latest posts by Davide Bizzarri
15. 05. 2018
APM, NetEye, Unified Monitoring
How to monitor docker containers using cAdvisor [ Part 2 ]
05. 03. 2018
Downloads / Release Notes
NetEye 3.12 Packages Updates