11. 09. 2025
NetEye, PHP, Unified Monitoring

Introduction
In this article I will show you how to use phpIPAM (https://phpipam.net/), an open source IP address management project, as an import source database for NetEye. The goal is to use hosts you have already configured separately in phpIPAM and import them into NetEye. This allows you to take advantage of the powerful and flexible automation features and APIs of phpIPAM, a project that is enjoying great success in its field thanks to the continuous development made possible by an excellent community of contributors.
Infrastructure Prerequisites
phpIPAM is a web application based on PHP and MySQL. To use the application you need a web server with active SSL and a working MySQL instance. In this article I assume an installation on a CentOS system (https://www.centos.org/) with Apache web server (https://httpd.apache.org/), although it will work with other similar software.
Operating System and Web Server Prerequisites
Several additional packages will need to be installed on your system:
$ sudo yum install httpd mariadb-server php php-cli php-li php-gd php-common php-ldap php-pdo php-pear php-snmp php-xml php-mysql php-mbstring git
Also essential is the installation of the php-mcrypt package (for which you need to enable access to the epel-release repository) that will be needed when you enable the phpIPAM API:
$ sudo yum install epel-release
$ sudo yum install php-mcrypt
phpIPAM Installation
Once the prerequisites have been taken care of, the next step concerns the installation of phpIPAM, for which we recommend following the project’s official documentation (https://phpipam.net/phpipam-installation-on-centos-7/).
In any case, I will summarize the fundamental steps here.
First, download the latest version of the phpIPAM project:
$ git clone https://github.com/phpipam/phpipam.git /var/www/html/phpipam/
$ git checkout 1.4
and configure database access:
$ cd /var/wwww/html/phpipam
$ cp config.dist.php config.php
Next, in the config.php file you have to edit the fields related to the MySQL database connection. I advise configuring a specific user to access phpIPAM databases (user and database can be created separately using the MySQL console or an equivalent tool, or automatically by phpIPAM itself as long as an administrative user of the SQL engine is provided during the installation phase in the browser form):
/**
 * database connection details
 ******************************/
$db['host'] = '$hostname';
$db['user'] = '$db_user';
$db['pass'] = '$password';
$db['name'] = '$db_name';
$db['port'] = 3306;
It should now be possible to connect to http://$ip_address/phpipam from your browser, through which you can proceed with the remaining installation steps.
If the steps have been followed correctly, you will be able to log in to phpIPAM using the credentials provided during the installation. For the configuration of additional scanning functionalities (phpIPAM can continuously check the IPs used within the infrastructure) and the backup, I again recommended you follow the official documentation.
Web Server Configuration
Integration between NetEye and phpIPAM is based on the IP Address Management software API. To use them, you will need to configure phpIPAM to use prettyfied links. For this step it is also instructive to refer to the official project documentation (https://phpipam.net/documents/prettified-links-with-mod_rewrite/), which among other things will ask you to check that the Apache mod_rewrite module is enabled.
It is also necessary to use the API to activate SSL on the web server used, either by creating self signed certificates or importing commercial certificates. The procedure is described in the official Apache documentation (https://httpd.apache.org/docs/2.4/ssl/ssl_howto.html).
It will then be possible to define a virtual host in the Apache configuration where you can specify the certificates to use (in the example below, I use certificates generated through the Let’s Encrypt certificate authority).
$ cat /etc/httpd/sites-available/ipam.$domain.conf
<VirtualHost *:80>
   ServerName ipam.$domain
   DocumentRoot /var/www/html/phpipam
   Redirect permanent / https://ipam.$domain/
   RewriteEngine on
   RewriteCond %{SERVER_NAME} =ipam.$domain
   RewriteRule ^ https://%{SERVER_NAME}%{REQUEST_URI} [END,NE,R=permanent]
</VirtualHost>
<VirtualHost _default_:443>
    Header always set Strict-Transport-Security "max-age=63072000; includeSubdomains;"
    ServerName ipam.$domain
    DocumentRoot /var/www/html/phpipam
    <Directory /var/www/html/phpipam/>
            Options FollowSymLinks
            AllowOverride All
            Order allow,deny
            Allow from all
    </Directory>
    ErrorLog /var/log/httpd/ipam.error_log
    CustomLog /var/log/httpd/ipam.access_log common
    SSLEngine on
    Include /etc/letsencrypt/options-ssl-apache.conf
    SSLCertificateFile /etc/letsencrypt/live/ipam.$domain/cert.pem
    SSLCertificateKeyFile /etc/letsencrypt/live/ipam.$domain/privkey.pem
    SSLCertificateChainFile /etc/letsencrypt/live/ipam.$domain/chain.pem
</VirtualHost>
phpIPAM Configuration
The following steps assume that access to the phpIPAM application is now possible, and that prettyfied links are configured correctly (links should have the form https://ipam.$domain/subnets/2/ rather than https://ipam.$domain/?page=subnets§ionId=2).
Custom Fields
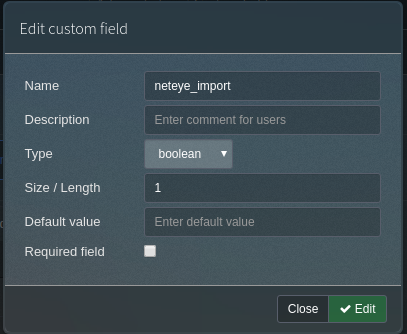
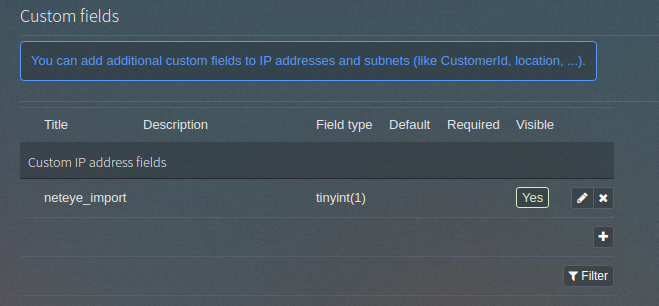
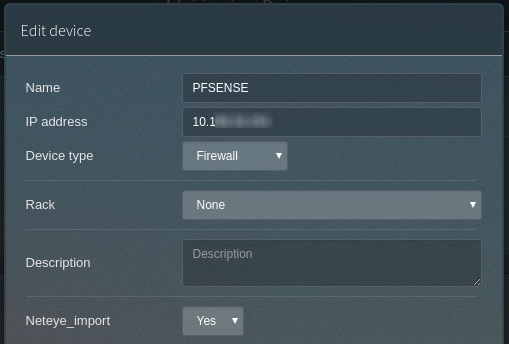
You need to configure a custom field called neteye_import, which will be used by NetEye to evaluate if that particular host in phpIPAM should be imported or not. The configuration of the custom field is done from the Administration > Custom fields path. This field must be added to the IP address object, and then “Yes” must be selected on each IP address that you want to import into NetEye.
API Configuration
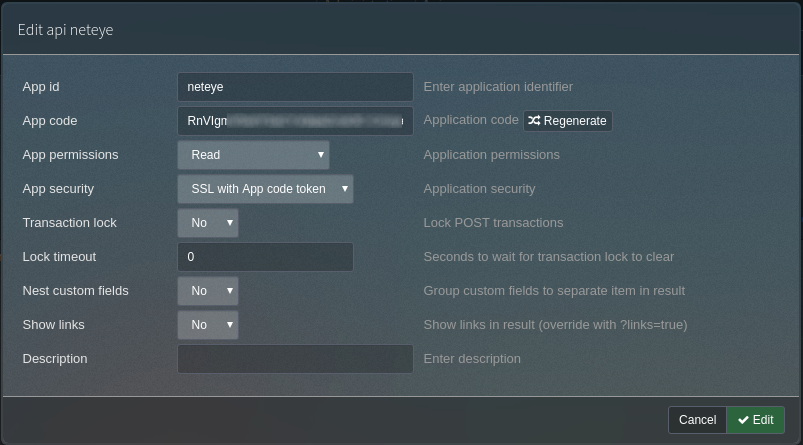
You also need to enable the phpIPAM API. This configuration step is performed from the Administration > API path.

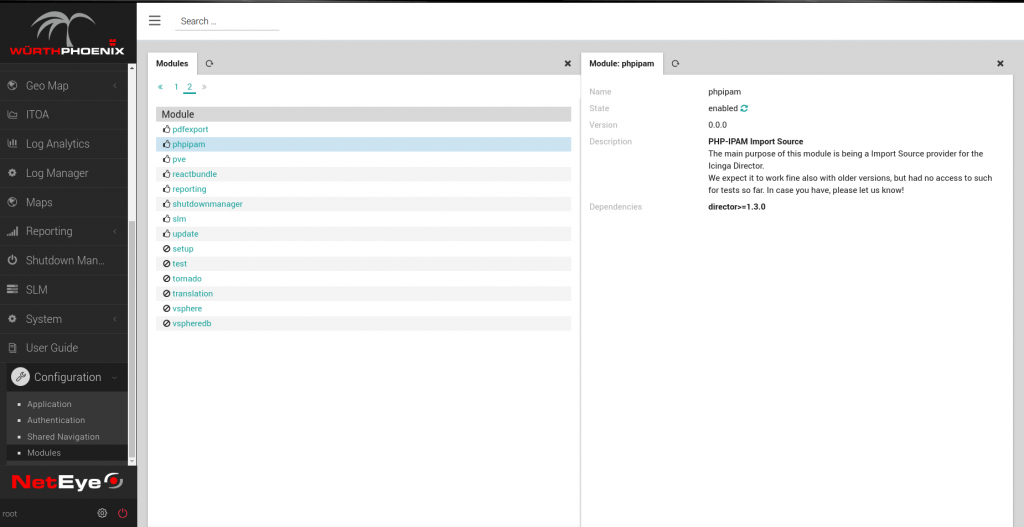
NetEye Module Installation
We now come to the heart of our project. We have developed a NetEye module whose task is to connect to the phpIPAM API and read its configuration.
The module is copied into the directory /usr/share/icingaweb2/modules and then must be enabled in NetEye at Configuration > Modules > phpipam.
NetEye Automation Configuration
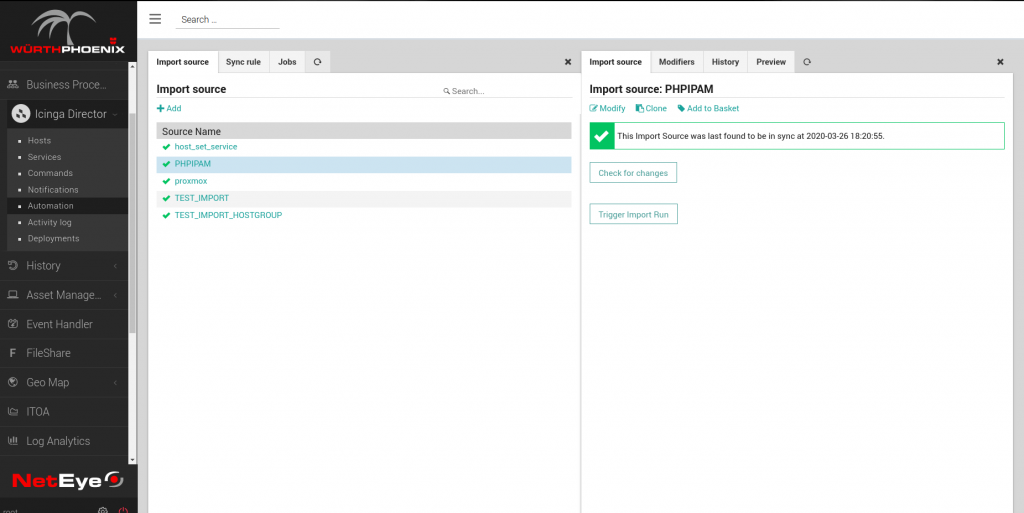
Import Source
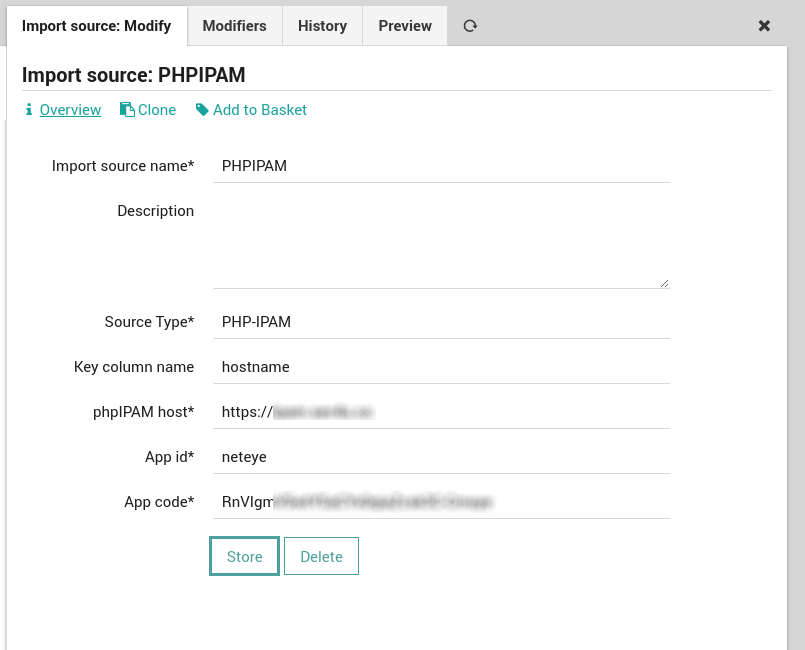
After enabling the module, the first thing to do is to configure the import source, adding it from the Automation section of Icinga Director. For the import source type, choose PHP-IPAM and then set the name of the host on which phpIPAM is installed, along with details about the API configuration (ID and app code).
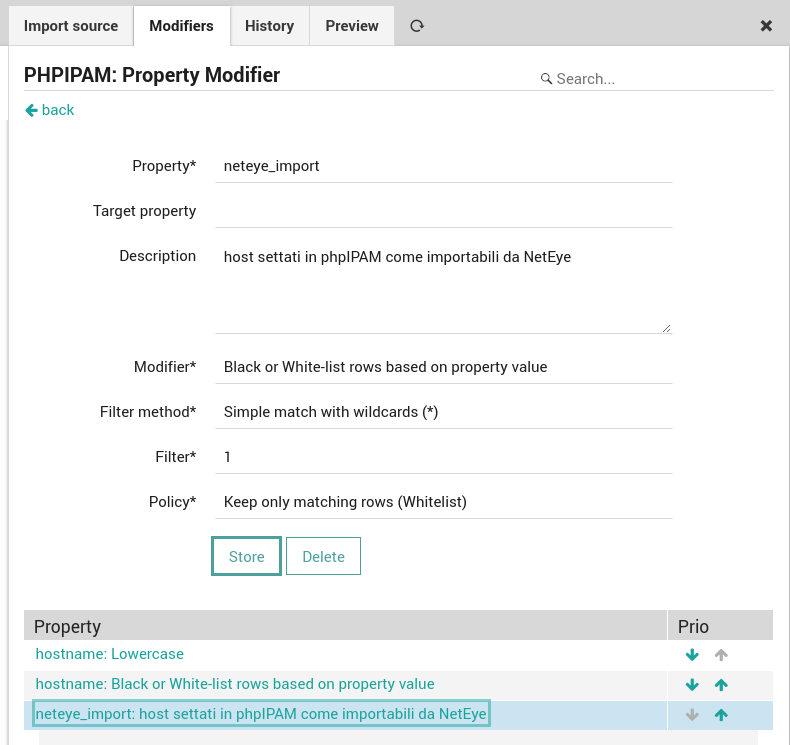
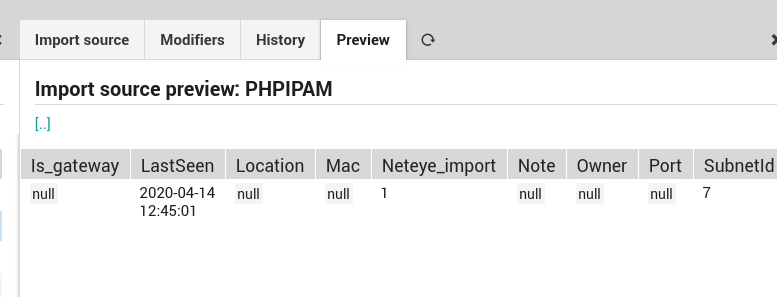
A neteye_import property must also be configured, which will check which hosts will actually be imported into NetEye (those to which the custom field neteye_import in phpIPAM has been set to Yes). In this step the import source preview feature is very useful, as it allows us to understand which hosts we are actually filtering with the property we have configured.
Sync Rule
The next step is to configure the sync rule, which allows us to go to match some fields of the objects that will be imported from phpIPAM to fields of the host object within NetEye.
Job
If necessary, we can then configure a sync rule schedule, so that we can start importing our database continuously at regular intervals.
Final Considerations
In this article we have seen how it is possible to take advantage of the possibility of integrating external databases into NetEye, which may already be present and managed in an organization, in order to optimize the import phase of new hosts into our monitoring system, and above all to keep its information and configurations continuously updated.

Massimo Giaimo
Team Leader Cyber Security at Würth IT Italy and Head of Cyber Threat Intelligence at Würth Group
Author
Latest posts by Massimo Giaimo
04. 02. 2026
Threat Intelligence
From RAMP to RehubCom?
05. 11. 2025
SATAYO, Threat Intelligence
Embedding Threat Intelligence into Your Security Operations
10. 10. 2025
SEC4U, Threat Intelligence
NetEye Conference 2025: The Correct Analysis for Some Use Cases
04. 08. 2025
SEC4U, Threat Intelligence
Favicon Intelligence – Detecting Clones Of Official Web Services