
When deploying new features, releasing your code into a production environment might not be as easy as it seems. To ensure the minimal amount of service disruption, we might want to easily roll back to a previous configuration or to gradually migrate traffic to a new one.
That’s where blue-green deployment comes to our aid.
A brief introduction to blue-green deployments
Blue-green deployments are based on having two parallel environments:
- The blue one: which corresponds to the active production infrastructure
- The green one: which is what we would like to release, but has only been previously tested on internal networks.
The technique consists of gradually transitioning the traffic from the blue environment to the green one. While doing so, usually multiple health checks are set up in order to spot any issues, and roll back to blue if needed.
There are several ways to do so, but here’s how we’re going to proceed:
Explanation about how the system will operate
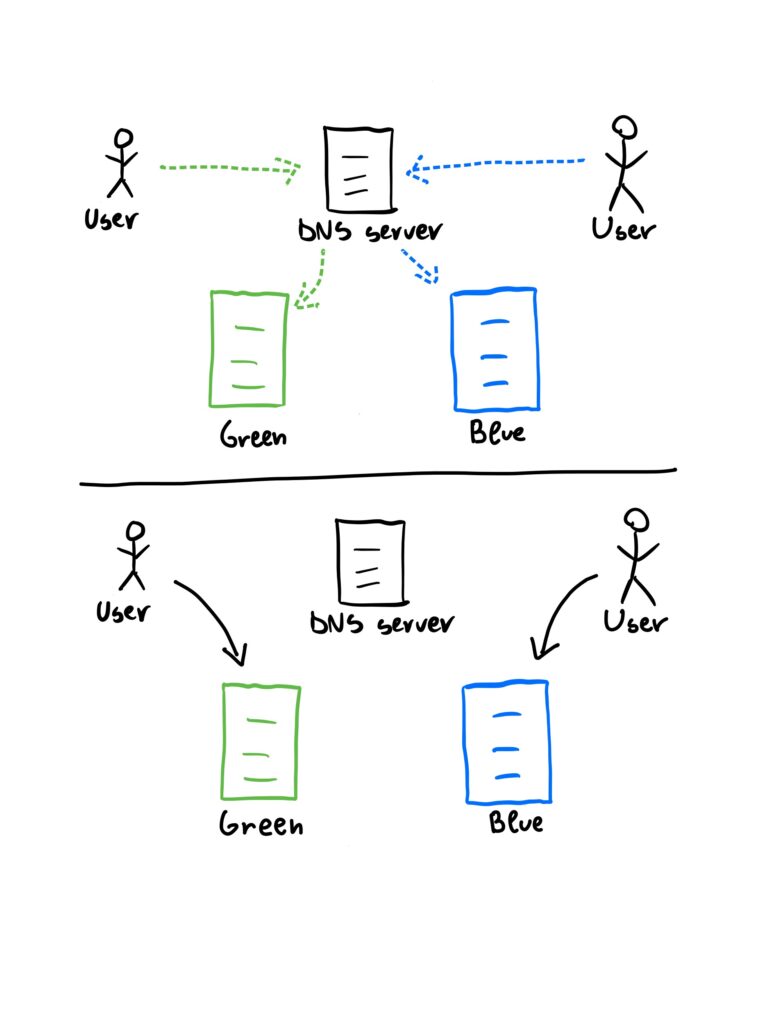
The first way that might come to mind is setting up a load balancer that redirects traffic between the two endpoints, which is a totally fair approach. However, there’s an easier and more resource-conserving way: working at the DNS level.
This way we can resolve the same domain name in multiple ways, distributing the traffic to the endpoints.
Of course there are some pros to this architecture:
- Very cheap (it only has to handle DNS queries). It’s basically free on Azure.
- All traffic flows point-to-point from the host to the chosen service, minimizing any load and delay on the load balancer.
And at least one con:
- The redirection of traffic is not instantaneous, but can vary depending on when the cached DNS records expire
The Azure tool to achieve this functionality is called the traffic manager.
Showcase of two sample deployments
Let’s imagine we have two virtual machines, one hosting the live production environment (blue) and one hosting the staging one (green). Once we make sure that the staging VM (which is only exposed on the internal network for testing purposes) is ready to be deployed, we can start the procedure.
To easily identify which service is currently available I created two simple web servers deploying two different pages:
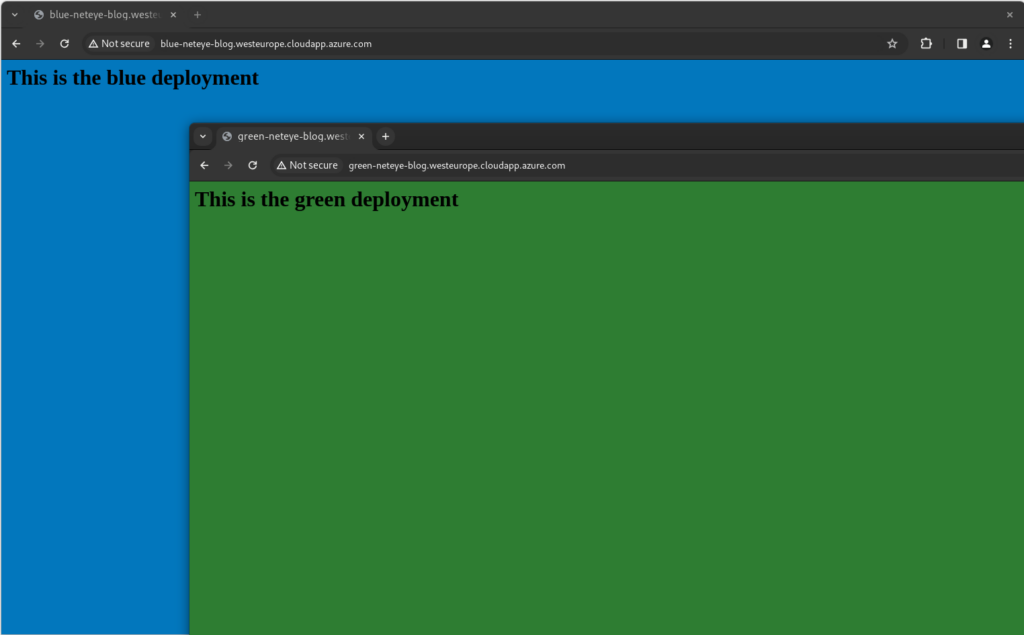
This will help us to quickly visualize which of the two deployments is being served.
Creating the traffic manager
As I mentioned above, the traffic manager operates on the DNS level, returning a destination IP/cname depending on the configuration that we set. First of all, let’s create one.
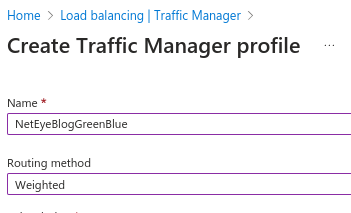
While doing so, we’ll have to choose the routing method; you can have a look at the existing ones here.
We’ll pick the weighted method, which works by distributing the traffic proportionally in relation to the weight that’s assigned to the endpoint. The range goes from 1 to 1000: the higher the weight, the more traffic it will receive.
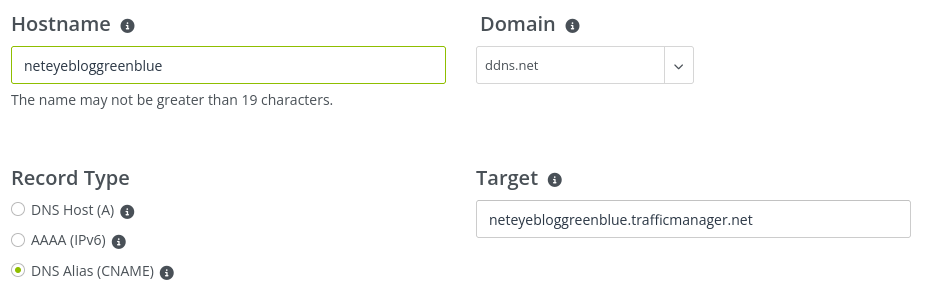
Once we do create a traffic manger, we’ll be able to see that a DNS name is associated with it:

It’s the domain that we’ll have to use if we want to pass through the traffic manager. Consequently, we’ll have to point our productive domain to it by setting the record type to CNAME.
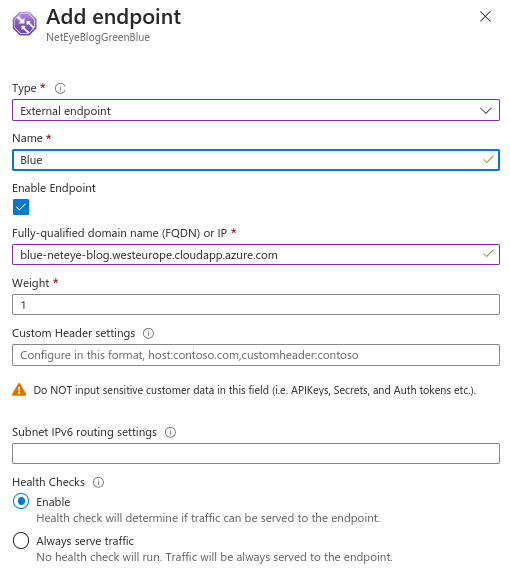
Configuring the traffic manager
Now we just have to add the endpoint where the traffic manager will redirect the traffic to. You’ll be able to do so from the Settings->Endpoints page. We’ll start by setting the weight for green to the minimum and the weight for blue to the maximum.
After that, we’re done! The traffic manager will already be working.
We can progressively increase/decrease the weight of the items to transition the traffic from the blue environment to the green one. I’ll set it to 1/3 (300) for the blue and 2/3 (600) for the green, and now we can easily verify that it’s working by making some requests.
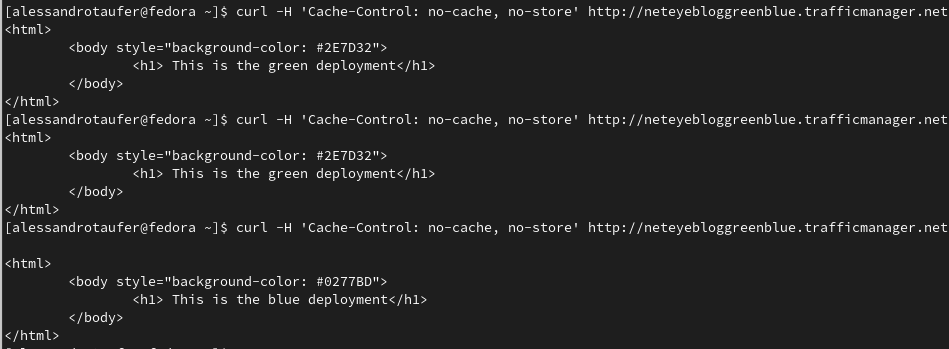
As you can see, requests to the same domain will be redirected differently.
If you’re running some tests, one trick that might be useful is decreasing the TTL in the configuration page of the traffic manager so that the redirection will look more instantaneous.
Have fun with it!
These Solutions are Engineered by Humans
Are you passionate about performance metrics or other modern IT challenges? Do you have the experience to drive solutions like the one above? Our customers often present us with problems that need customized solutions. In fact, we’re currently hiring for roles just like this as well as other roles here at Würth Phoenix.
Author
Latest posts by Alessandro Taufer
31. 03. 2026
DevOps, Kubernetes
Abusing Trust Boundaries between TLS and HTTP
31. 12. 2025
Development, DevOps
What Tests Can Tell You About Your Codebase
19. 09. 2025
Development, DevOps
How to Debug Your Kernel Calls