30. 06. 2026
APM, DevOps, Kubernetes

NetEye SIEM is a very powerful tool that allows you to ingest logs from many different sources. However, by default it does not ingest the ssh-login attempts on the NetEye Servers themselves, nor does it check the integrity of important configuration files. In this blog post I will describe a procedure to configure an Auditbeat service that will help you collect this important information.
NetEye Configuration
By default, Auditbeat is not installed in NetEye. You can install it by downloading the rpm-package of the right version of Auditbeat (the same as Elasticsearch) from the official download page of Elasticsearch and checking that the sha512 sum corresponds.
After the download, you can install the package as follows:
yum localinstall auditbeat-7.6.2-x86_64.rpm
The Auditbeat agent relies on an Elasticsearch template to adopt the Elastic Common Schema (ECS). Thus before starting to collect the data, we need to load these components into Elasticsearch:
/usr/share/auditbeat/bin/auditbeat -e -c /etc/auditbeat/auditbeat.yml -path.home /usr/share/auditbeat -path.config /etc/auditbeat -path.data /var/lib/auditbeat -path.logs /var/log/auditbeat -E setup.kibana.host="kibana.neteyelocal" -E setup.kibana.username="kibana_root" -E setup.kibana.password=$(cat /root/.pwd_kibana_root) setup
You can verify that this command was successful by executing this command:
$/usr/share/neteye/elasticsearch/scripts/es_curl.sh -X GET https://elasticsearch.neteyelocal:9200/_template/auditbeat* -s | jq -r 'keys[]'
# Expected Result
auditbeat-7.6.2
and by checking that the Kibana Dashboards loaded properly. Open Kibana > Dashboards and filter after “Auditbeat”, and you see something like this:
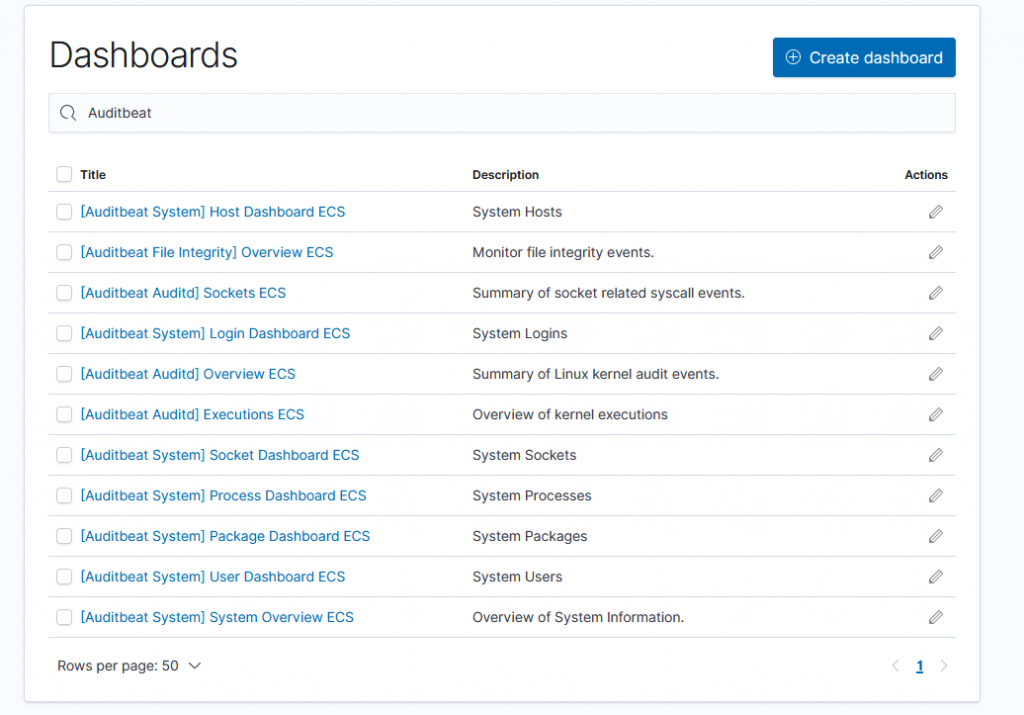
Congrats! You’ve successfully uploaded the Auditbeat Elasticsearch template and its Dashboards.
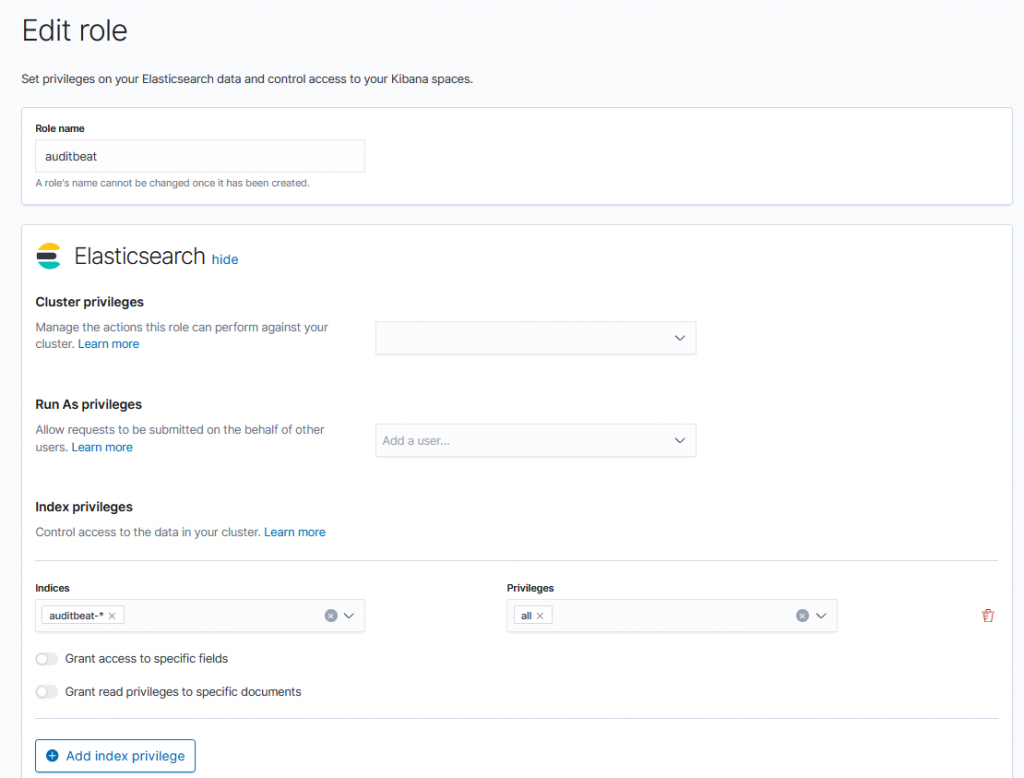
Finally, we need to adjust the Elasticsearch permissions to let the auditbeat user write data into Elasticsearch. First, we create a role named auditbeat that allows us to perform all operations on the audtibeat-* indices.
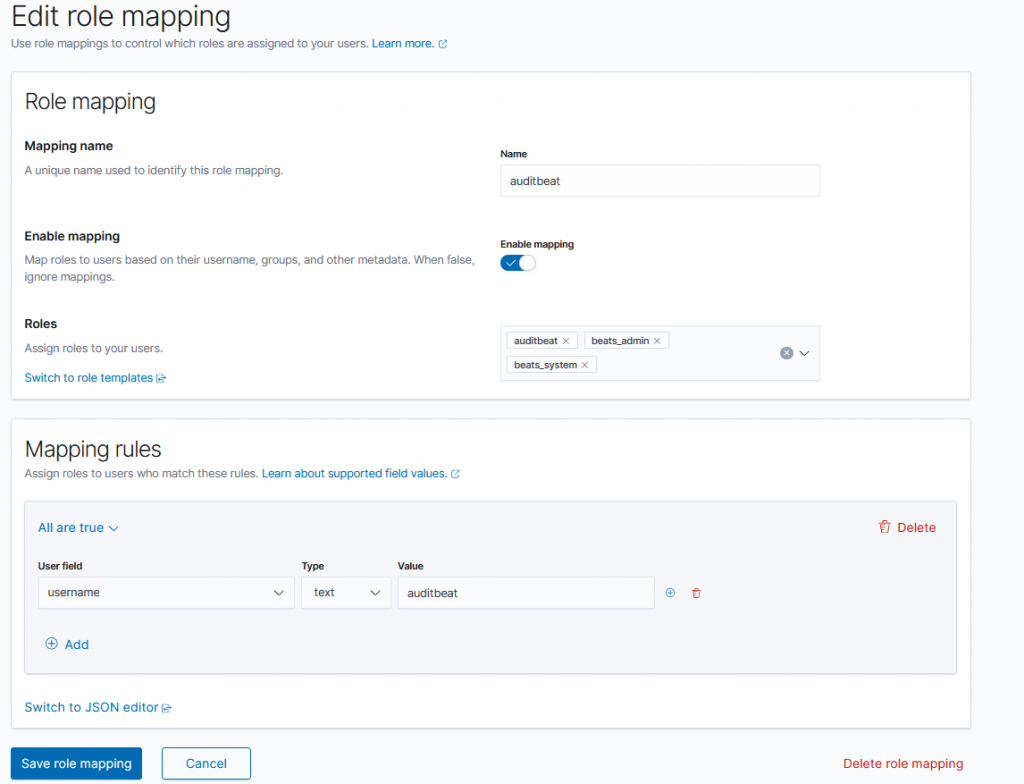
Second we add a Role mapping to map the auditbeat user to the necessary roles.
Finally, we generate a valid certificate for the auditbeat user and put it into the right folder:
/bin/bash /usr/share/neteye/scripts/security/generate_client_certs.sh auditbeat "/CN=auditbeat/OU=client/O=client/L=Bolzano/ST=Bolzano/C=IT" "/etc/auditbeat/" 1
We can keep the default /etc/auditbeat/auditbeat.yml file and adjust only the output.elasticsearch section to be similar to the one contained in /neteye/shared/filebeat/conf/filebeat.yml:
output.elasticsearch:
  hosts: ["https://elasticsearch.neteyelocal:9200"]
  indices:
    - index: "auditbeat-%{[agent][version]}-%{[event][module]}-%{+YYYY}.%{+MM}.%{+dd}"
      when.has_fields: ['event.module']
    - index: 'auditbeat-%{[agent][version]}-%{+YYYY}.%{+MM}.%{+dd}'
  ssl.certificate_authorities: ["${path.config}/certs/root-ca.crt"]
  ssl.certificate: "${path.config}/certs/auditbeat.crt.pem"
  ssl.key: "${path.config}/certs/private/auditbeat.key.pem"
That’s it. Now you can start the auditbeat service:
systemctl start auditbeat
Result
Once the logs starts coming in to the cluster, you will see in the SIEM Module of Kibana the successful and failed login attempts. You should see something like this:
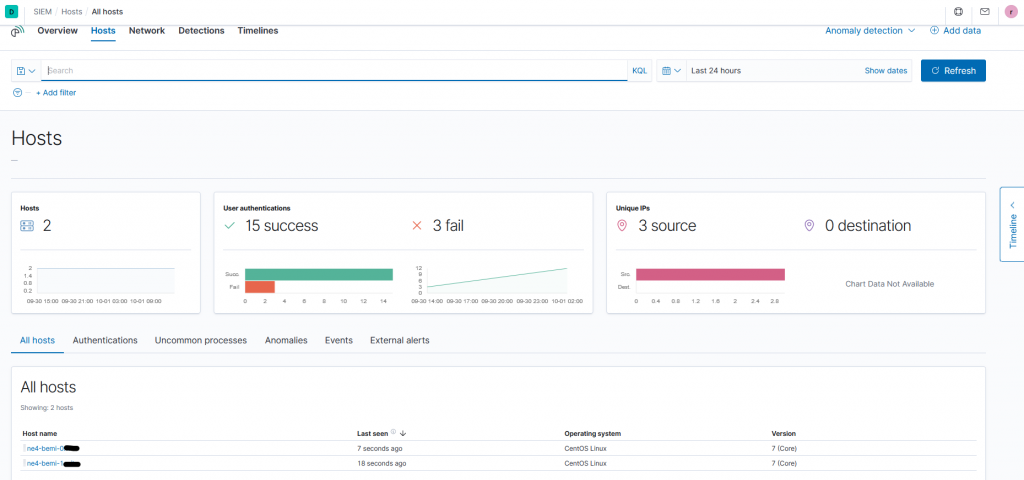
You can now click on one specific host to get a detailed overview of the login attempts. Moreover, you should be able to use the already-loaded Auditbeat Dashboards, e.g., the “[Auditbeat System] Login Dashboard ECS”, that shows the user logins and logout. In the rest of this section I explore some interesting use-cases.
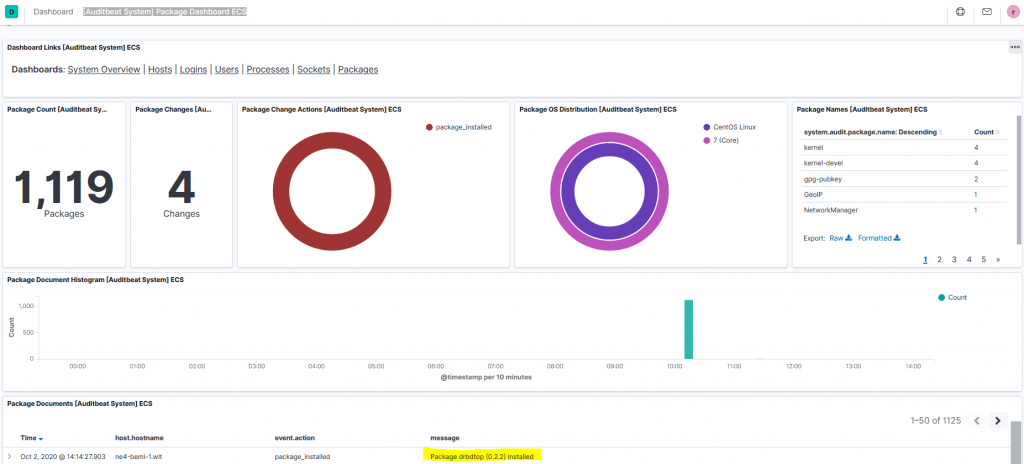
Use-Case 1: Revealing Newly Installed Packages
Now that we’ve installed the agent, we can test its detecting capabilities by installing a package:
yum install drbdtop --enablerepo=neteye*
After a few seconds, you should see a change in the [Auditbeat System] Package Dashboard ECS, that shows which host installed a new package.
Use-Case 2: Detect file changes
By default, auditbeat checks the integrity of some files:
module: file_integrity
paths:
  - /bin
  - /usr/bin
  - /sbin
  - /usr/sbin
  - /etc
So let’s try to create and remove a file in the /etc/ directory:
touch /etc/foobar && rm /etc/foobar -rf
Almost immediately you should see a change in the [Auditbeat File Integrity] Overview ECS Dashboard:
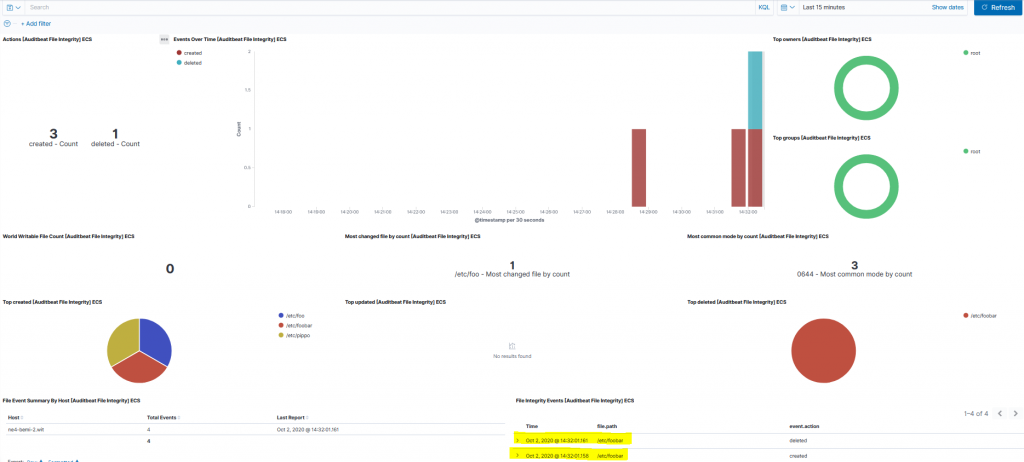
In this proof-of-concept I used a sample file, however we can use this feature to check if the configurations of some NetEye services are changed by customizing the file_integrity paths in the auditbeat.yml file.
Conclusion
In this blog post I showed how can we exploit the Auditbeat modules to check login attempts to the SIEM cluster itself, show newly installed packages, and check the integrity of sensitive folders. Furthermore, Auditbeat shows the start and end of processes, open sockets and much more information.
This is a small step forward in guaranteeing that the SIEM infrastructure itself is secure. Now, that the data is correctly ingested we can define watchers, detection rules and machine learning jobs that can be used to generate alarms and notifications, but that’s a topic for another blog. Stay tuned!

Mirko Bez
Consultant at Würth Phoenix
Author
Latest posts by Mirko Bez
21. 04. 2021
Log Management, NetEye, Unified Monitoring
Automatically Detecting Tornado Anomalies through its Logs
23. 12. 2020
Log-SIEM
How I Became an Elastic Certified Professional