


25. 02. 2026
Documentation

30. 06. 2021
Charles Callaway
Documentation
Making Your Own Video Tutorials, Part 5: Publishing on YouTube
Congratulations on finishing your first tutorial video! So now you can put it on your corporate web site, and maybe email or tweet out a link to it. But what about visibility? If your business is large enough to have a marketing department, you (or they) will likely want your tutorial videos to be part of an overall marketing strategy. This will include a full press on social media, and the default place for tutorial videos on the web is mainly YouTube.
There are, of course, a number of other websites that host freely available videos that anyone can post to, but few have the reach that YouTube has. Here’s a brief look at some of them:
- IGTV (Instagram TV): Mobile-centric (vertical, full screen) videos dominated by casual users
- Metacafe: Most similar to YouTube of all sites in this list, especially in terms of its interface and content, but with a much smaller audience
- TikTok: Mobile-centric very short form videos, dominated by young casual users
- Twitch: Originally built for gamers and eSports, it has diversified and is optimized for building communities around channels and live events
- Vimeo: Similar to YouTube, but lacking a good search interface and oriented towards culture and marketing showcase videos, but also live software demos
In short, for hosting standard tutorial videos, it’s hard to beat YouTube for its wide range of content, ease of use, popularity, accessibility, and search capabilities.
Advantages of Using YouTube
Unlike Google’s standard web search, once you’re inside YouTube the search function only returns YouTube results, which the marketing department can appreciate. It’s the first destination for most users, and it’s also free to upload as much content as you want.
These are the advantages most people are familiar with, as they’re the same types of features that drive traffic across the web. But with YouTube, Google also adds additional features based on separating the concept of a channel from that of a video.
In summary, rather than each video standing alone from all other videos, it can be associated with a YouTube account belonging to the video’s publisher, who can control the branding and promotion of that channel. It can also be “monetized” by tying it to a Google AdSense account, but here we’re assuming you want to publish free, unhindered tutorial videos for your company’s (IT) products. Any Google account can be associated with a YouTube channel account.
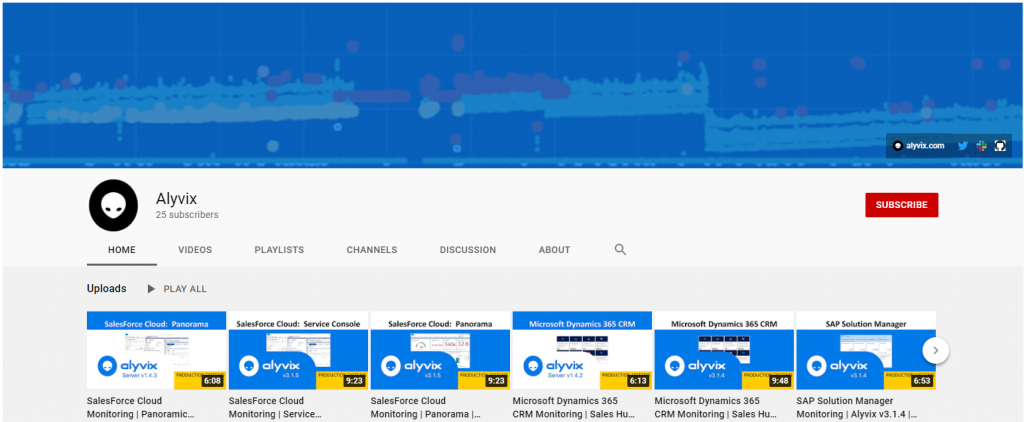
YouTube’s branding allows you to upload custom graphics to your channel, write custom descriptions, and create banners and video trailers. For instance, here’s the Alyvix channel main page:
As a content publisher you can also create playlists for your audience as part of your channel. For instance you could separate your videos into groups like tutorials for Microsoft vs. Linux, or groups based on content, application type, user type, etc.
Because each published video is associated with a specific account, viewers can link their account by means of a subscription … Subscriptions bring additional features such as alerts whenever a new video is uploaded to a subscribed channel.
“Verified accounts” are those tied to phone numbers, which allow additional features such as tutorial videos lasting longer than 15 minutes, custom thumbnails, and custom URLs.
Because the number of subscribers is now linked to having more influence and these special features, there is a lot of competition on YouTube for gaining subscribers. Limits for unlocking new features are usually set at 100, 1,000, and 10,000 subscribers.
So, supposing your convinced about starting your own YouTube channel for your tutorial videos, let’s look at what you need to do to set everything up.
Account basics
The first step to creating your channel is, of course, to have a Google account. If your business’ (or department’s) video group consists of just you, you can even use your personal account. Otherwise, feel free to set up a dedicated account just for the product you’re making videos about.
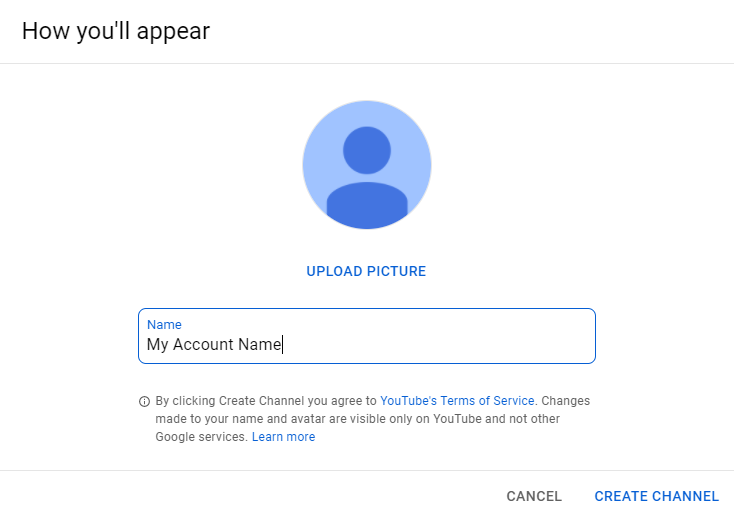
Once you’ve done that, go to YouTube Studio and log in with that account. If you’re starting from scratch, you’ll be asked for some basic information like a channel name and an icon (you can edit these later). And of course, the ubiquitous terms of service checkbox.
At this point you’ll have 0 subscribers, which means you can’t do anything fancy yet except uploading videos less than 15 minutes, creating some branding, adding a default text description for videos, and creating playlists.
The YouTube Studio interface allows you to change these things when you like, plus there are tabs to see statistics, and manage videos, comments, subtitles, personalization and more. The “Contents” channel will show you a list of all your videos, with basic information plus a bit of feedback on how each video is doing, like the number of visualizations, comments, and likes.
For more detailed information, the “Analytics” tab will show graphs on views, give you historical comparisons, and then graphs graphs graphs on everything from the source of your traffic, to what time viewers stop watching, to which videos and playlists are performing best, worst, etc.
The Uploading Process
Once you’ve gotten your channel ready, you can upload your first video and create your first playlist. Uploading starts by pressing the red “Create” button at the top left of the window, then selecting either to upload a prepared video, or start broadcasting live. I’m assuming you’ll upload carefully prepared tutorial videos like ones we’ve described in our previous blog posts.
The next step is to then choose the file you want to upload and press “Okay”. While it uploads, YouTube presents you with a long list of fields to fill in and questions to answer:
- Title: The video title that will be publically visible (if you intend to publish many videos, it’s useful to format titles consistently)
- Description: In addition to providing space for a paragraph or two of descriptive text, you can use this to add chapter marks, URLs and hashtags — note that most search results will be based on this text, so be sure to use your important keywords to help users find the right videos
- Cover image: While YouTube will automatically choose a frame from your video to use as a thumbnail, sometimes it picks a bad one, so you can also upload your own in PNG format
- Playlist: If you’ve created playlists, there’s a dropdown to select which list it belongs to
- Audience: Indicate if the intended audience is children (our tutorial videos won’t be)
- Monetization: Specify if you want ads to be automatically included, in which case you will need to link to your Google AdSense account
- Hashtags: A dedicated field for comma-separated hashtgs
- Language and Subtitles: Indicate the main spoken language within your video and any subtitle files, including their copyright (YouTube can also automatically add closed captioning if you don’t specify your own subtitles)
- Date and Location of where you recorded and edited your video
- License and Distribution: The default is the YouTube Standard License, with Creative Commons also available
- Embeddability: Can your video be embedded within an external web page, or can it only be viewed on YouTube itself
- Category: Applies a high-level, generic label like “Science” or “Humor”
- Comments: Whether to allow logged-in users to add comments, and if so how they should be ordered
- Visibility: You can make your video public or private, give it a password, and even allow it to have a “premiere” at a set date and time
- End screen and Cards: End screens are overlays of the last 20 seconds of your video that can contain links to what viewers should see next; Cards are small hoverable links that can appear at specific moments in the video, allowing you to time them to when you mention something related
Features like Cards that point to external websites require that your channel has a certain number of subscribers, because YouTube will vet each website before allowing it to be included.
Once you’ve filled in all the details, the press of a button is enough to publish the video for the world to see. You can now go to your Dashboard in YouTube Studio to see the details, and refresh to watch your visualizations number go up.
Final Words
Over recent years YouTube has fully embraced the Subscription model, so especially those video producers that depend on YouTube for revenue have been driving to get as many subscribers as possible. Subscriptions are becoming the foundation for additional features such as Notifications, which tell your subcribers when a new video is published in your channel.
YouTube has also invested in documentation (mostly in video form, naturally) by creating the YouTube Creator’s Academy. They already have a large catalog of instructional and informational videos that includes progress quizzes.
So in short, if you want to publish a channel with tutorial videos for your product, it’s a great time to start, with lots of features and support. See you on YouTube!
Charles Callaway
Author
Latest posts by Charles Callaway
30. 04. 2026
Documentation
Teleprompter Tips, Part 1
25. 02. 2026
Documentation
Making Your Own Video Tutorials, Part 20: Recording a Good Task-based Screencast
30. 10. 2025
Documentation
Tutorial Video Editing Technical Tips, Part 2: No Country for Boring Men (or Women)