


09. 04. 2026
NetEye

Thanks to automation, migration between NetEye 3 and NetEye 4 can be easily performed for a lot of entities such as hosts and services. But additional elements like parent-child relationships can be missed. So we implemented a procedure for mass-migration of this information from the old platform to the new one.
Solution
In the NetEye 3 appliance, create a folder ParentChild/, and inside it create the file parentchild.sql with the following query:
select
  child.name AS c_name,
  child.address AS c_ip,
  GROUP_CONCAT(parent.name) AS p_name,
  GROUP_CONCAT(parent.address) AS p_ip
from host_parent h_p
  join hosts AS child  using(host_id)
  join hosts AS parent on parent.host_id=h_p.parent_id
GROUP BY c_name,c_ip;
This query exports the data from Monarch DB, the old NeteEye 3 database, into a CSV file that can easily be managed by users:
mysql monarch < parentchild.sql | sed 's/\t/|/g' > parentchild.csv
The generated file looks like the table below, where the columns are:
- c_name: NetEye 3 child IP address
- c_ip: NetEye 3 child host_name
- p_name: NetEye3 parent IP address
- p_ip: NetEye 3 parent host_name
If no changes were made to the hostnames we can proceed with the automation.
If the hostnames are different, you’ll have to properly modify the CSV file, perhaps editing it directly in Excel. You can then add/remove/update dependencies as desired in order to obtain the target hierarchy.
Here we have a classic situation where the export provides this situation:
- One host with a single parent
- Two hosts with two parents
| c_name | c_ip | p_name | p_ip |
| child1.neteyelocal | 192.168.0.1 | parent1.neteyelocal | 192.168.0.1 |
| child2.neteyelocal | 192.168.0.2 | parent1.neteyelocal parent2.neteyelocal | 192.168.0.101, 192.168.0.102 |
| child3.neteyelocal | 192.168.0.3 | parent1.neteyelocal, parent3.neteyelocal | 192.168.0.101, 192.168.0.103 |
Next, copy the CSV file to the Fileshipper directory, then configure the automation.
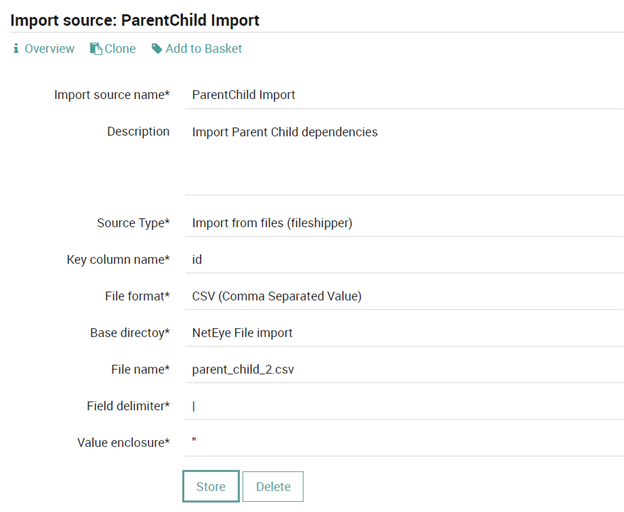
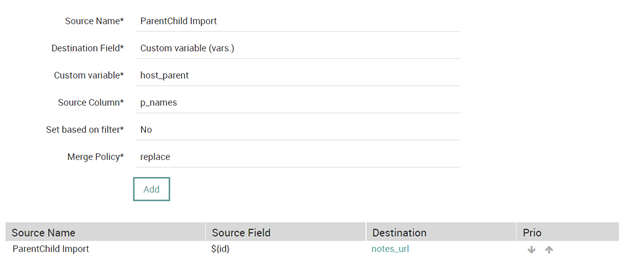
The first step is to create the first Import Source called, for example, ParentChild Import:
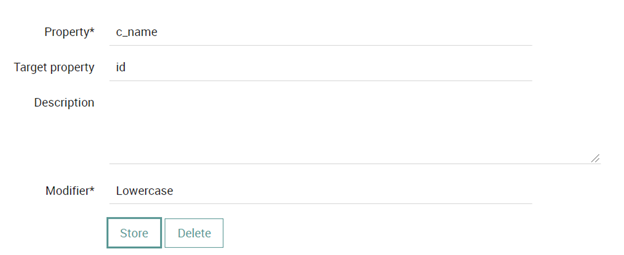
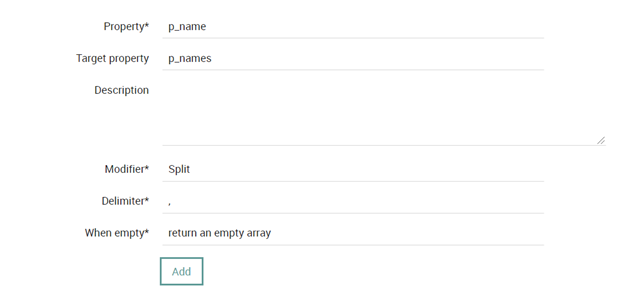
Then define two modifiers, one for the ID and one for the list of parents:
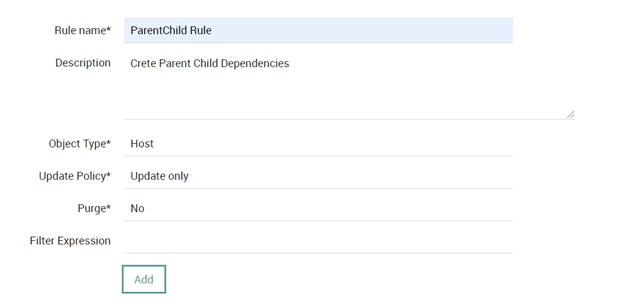
Once the Import source is defined, create a Sync Rule called “ParentChild Rule”, which updates only those existing hosts that match the object name. In order to avoid re-creation of hosts, create the rule with the “Update Policy” set to “Update only”:
Add two basic properties to the Sync Rule to complete the host update:
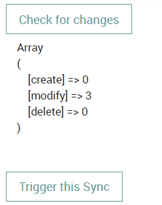
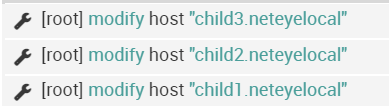
The result of “Check for Changes” and “Trigger this Sync” is the following, where the parent dependency is added to the child.
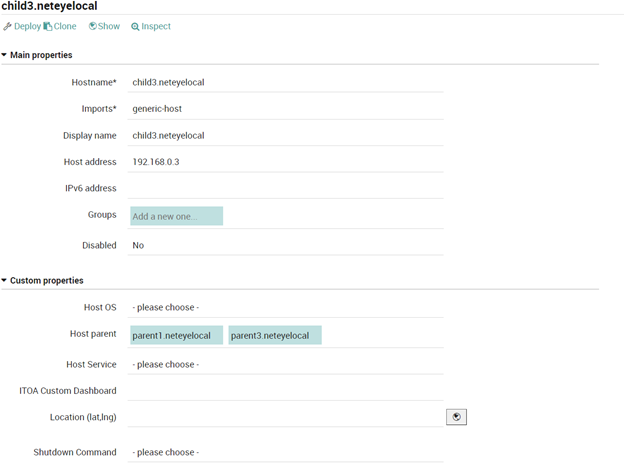
For example the host child3.neteyelocal is updated with its two parents:
Conclusion
This simple automation method for the mass import of dependencies from NetEye 3 into NetEye 4 is very easy to implement and can speed up the process of migration between the two environments. This solution does require a bit of attention about the host names used between the two installations. If host names were modified in NetEye 4, then you must edit the CSV/XLXS file in order to prevent the possible loss of information. For this reason, we choose a more conservative migration strategy via CSV and not directly via the DB.
Attilio Broglio
Author
Latest posts by Attilio Broglio
28. 10. 2025
ITOA, NetEye, Unified Monitoring
Grafana – Node Graph and Icinga
10. 10. 2025
Icinga Web 2, NetEye, Unified Monitoring
Massive Clean-up of the Icinga custom_var (Services)