28. 03. 2026
Asset Management, GLPI

I’ve been working with Grafana since 2017, when I started as a Frontend Developer here at Wuerth Phoenix.
I typically take care of the customization of the Grafana User Interface, with the goal of reflecting the NetEye look and feel inside Grafana, aka the ITOA module.
I’ve already written about a simple way to customize the Grafana theme (for changing the colors) in a blog article you can find here. In this article I’d like to describe how you can improve its customization, for example directly working on a particular component.
Customizing a component in Grafana could mean customizing its style or, if you need to deeply change its structure, also customize the React definition of the components themselves. I would suggest playing with the style as much as possible and leaving the customization of the React definition of the component as a last resort, in order to be sure you’re not compromising its functionality for any reason.
Let’s focus on customizing a component style, for now.
Set up a Grafana Development Environment
First of all, I suggest you set up a working development environment for Grafana. You can follow this useful Grafana Developer Guide for correctly setting up your Grafana project.
Once your Grafana installation builds, you’ll notice that as soon as you make a change in one of the frontend files, yarn will automatically rebuild the frontend and update your interface.
Keep in mind that this process will automatically re-compile all stylesheets and re-generate (read: “overwrite”) both _variables.dark.generated.scss and _variables.light.generated.scss. So if you had previously changed those files, you’ll need to port the same changes respectively to _variables.dark.scss.tmpl.ts and _variables.light.scss.tmpl.ts, and then the build process will automatically re-create the *.generated.scss files with your customization.
Customize a Component Style
In the same directory as the color variables files, you will find a subdirectory called components: grafana/public/sass/components/
Here you will find the stylesheets that define a style for many of the components used in the Grafana interface.
I’ll use an example to explain more clearly how you can proceed with this customization.
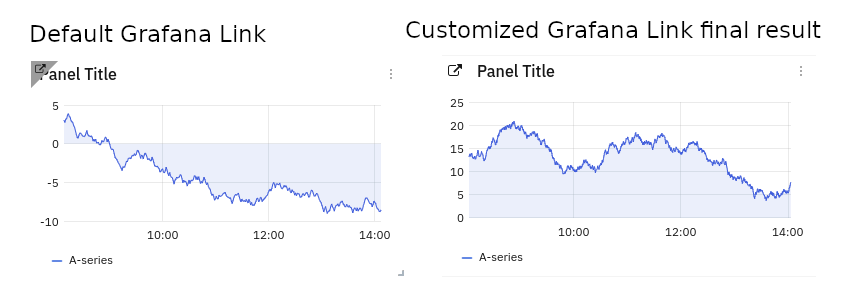
During one of my latest tasks, I had to change the graphical structure of the panel-info-corner element in the panel header. My goal was to transform this small triangle into a more visible and easier-to-click square, and move the panel title accordingly.
My first step was to try to understand where the style of this element was defined, and I found out that it was in the following file: grafana/public/sass/components/_panel_header.scss
One of the changes I applied was to hide the triangle shape in the background of the element. I simply added a display: none to the following block of code:
.panel-info-corner-inner {
  width: 0;
  height: 0;
  position: absolute;
  left: 0;
  bottom: 0;
  display: none; // my customization
}
At that point, I had to center the icon in the square button and move the title to the right whenever this element is present in the panel. To achieve this result I decided to add padding to the panel-info-corner element and remove the margins from the icon element:
.panel-info-corner {
  color: $text-muted;
  cursor: pointer;
  position: absolute;
  display: none;
  left: 0;
  width: $panel-header-height;
  height: $panel-header-height;
  z-index: $panel-header-no-title-zindex + 1;
  top: 0;
  padding: 4px 7px; // padding I defined

  .fa {
    position: relative;
    //top: -2px; margin that I removed
    //left: 6px; margin that I removed
    font-size: 100%; // increase icon size
    width: 12px; // set fix width
    height: 12px; // set fix height
    text-align: center; // center the icon in the element
    z-index: $panel-header-no-title-zindex + 2;
  }

  // Move title to the right when button is present
  ~ .panel-title-container {
    margin-left: $panel-header-height;
  }

  // Improving hover effect
  &:hover {
    background-color: $panel-menu-item-hover-bg;

    &--info, &--links {
      color: lightOrDark($gray-100, $white);
    }
  }
}
Once I was satisfied with my customizations, all I had to do was just save the file. Yarn automatically detected the changes and applied them directly to my Grafana installation.
Rebuild the Grafana Frontend
The last step, as soon as you’ve applied all the required changes both for colors and for the component, is as usual to re-build the Grafana frontend, which you can do by launching the yarn build command.

Valentina Da Rold
Hi, I'm Valentina and I'm a Frontend Developer at Wuerth IT Italy. I started out my career applying my Cryptography skills to coding, but really quickly fell in love with the web. I have been making websites and applications since 2012 and I still can't get enough of it. Along the way I found a passion for front-end development, and I use this passion to create interfaces that solve problems. When I'm not creating beautiful solutions, I enjoy cooking or doing sport, while listening to beautiful music.
Author
Latest posts by Valentina Da Rold
30. 03. 2026
Atlassian, Automation
Automating Confluence Page Status at Scale: A Practical Workaround
11. 12. 2025
Atlassian, Development
Boosting Atlassian Integrations with the atlassian-python-api Library
29. 09. 2025
Atlassian, Development
Syncing Entra ID Groups and Members to Jira CMDB via Atlassian SCIM API: Key Lessons Learned
04. 06. 2025
Atlassian, Automation, Development
Automating Asset Delivery Tracking in the Jira Customer Portal: A Developer’s Guide
26. 03. 2025
Atlassian, Automation, Development
Unlocking Atlassian Automation: Lookup Objects vs. Branch on AQL